Duda Integration
As a Duda Website Builder user, you're used to setting up new website features without writing code. The Site Search 360 Duda app lets you add search to your site the same no-code way.
Installing the Duda app takes three steps:
- Add the Site Search 360 app and widget to your site.
- Customize the widget's design and functionality per your unique requirements.
- Publish or republish your site to make the search go live.
Adding the widget to your site
Like any app that extends Duda's default functionality, start in the site editor:
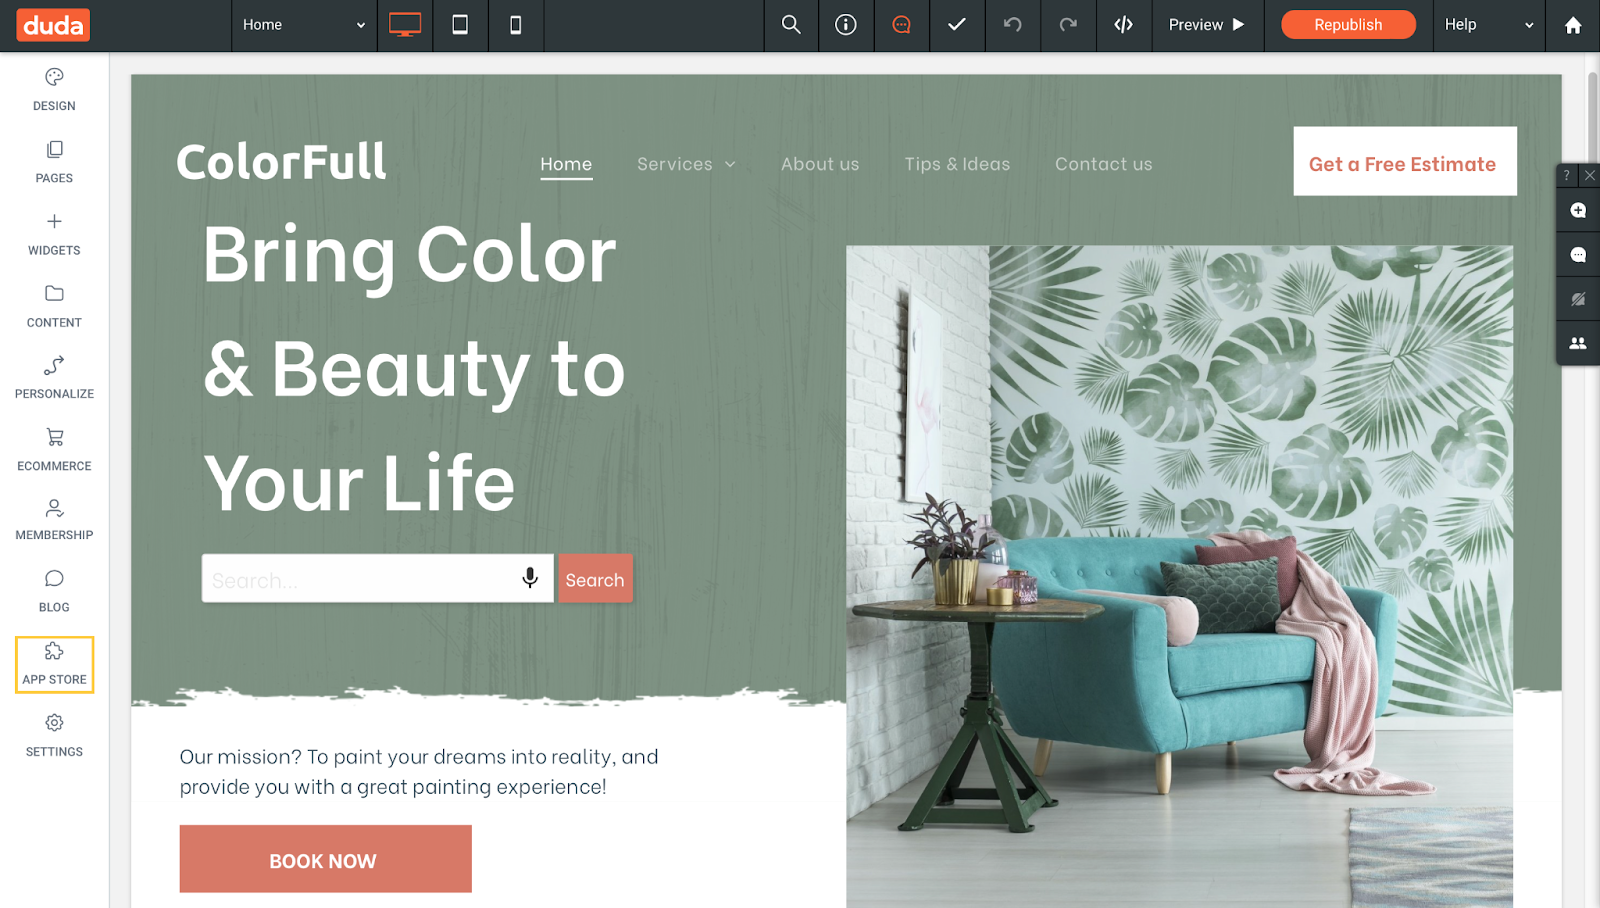
Search for "Site Search 360" and install the app in the App Store.
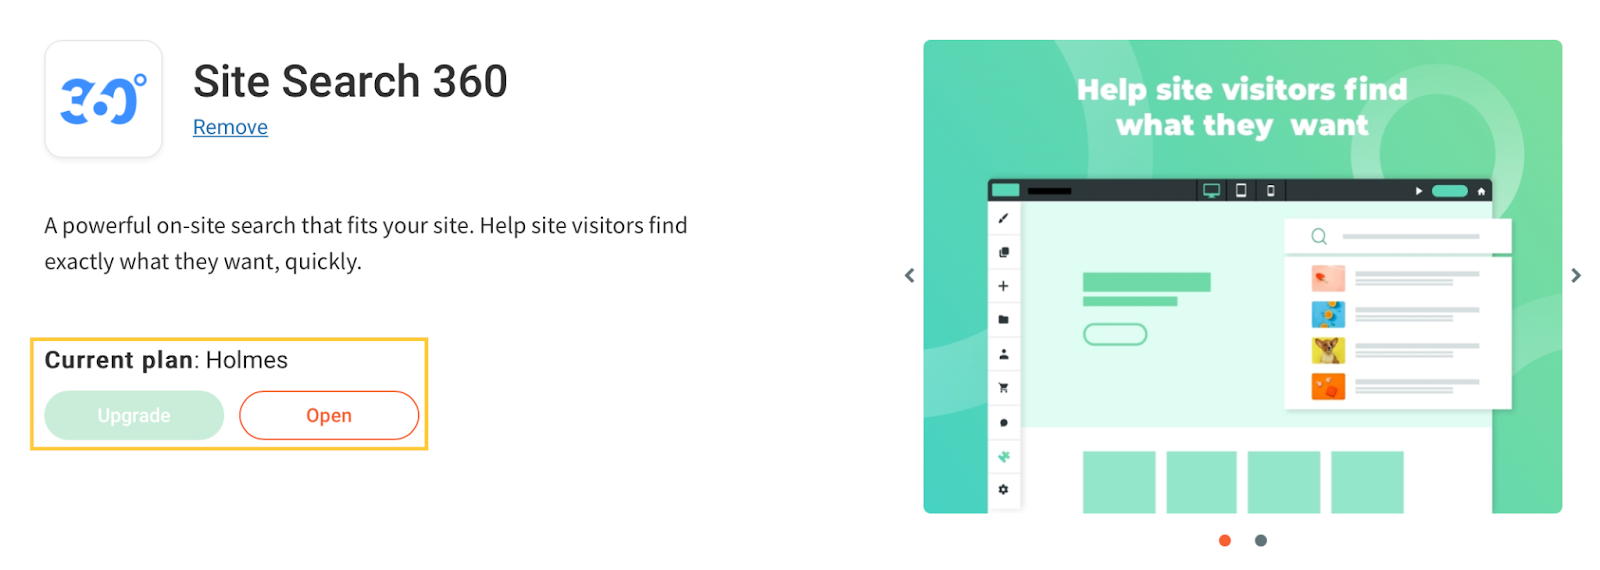
Use the widget's entry in the App Store to see the plan your search is on, upgrade, or open your Site Search 360 Control Panel for advanced configuration settings.
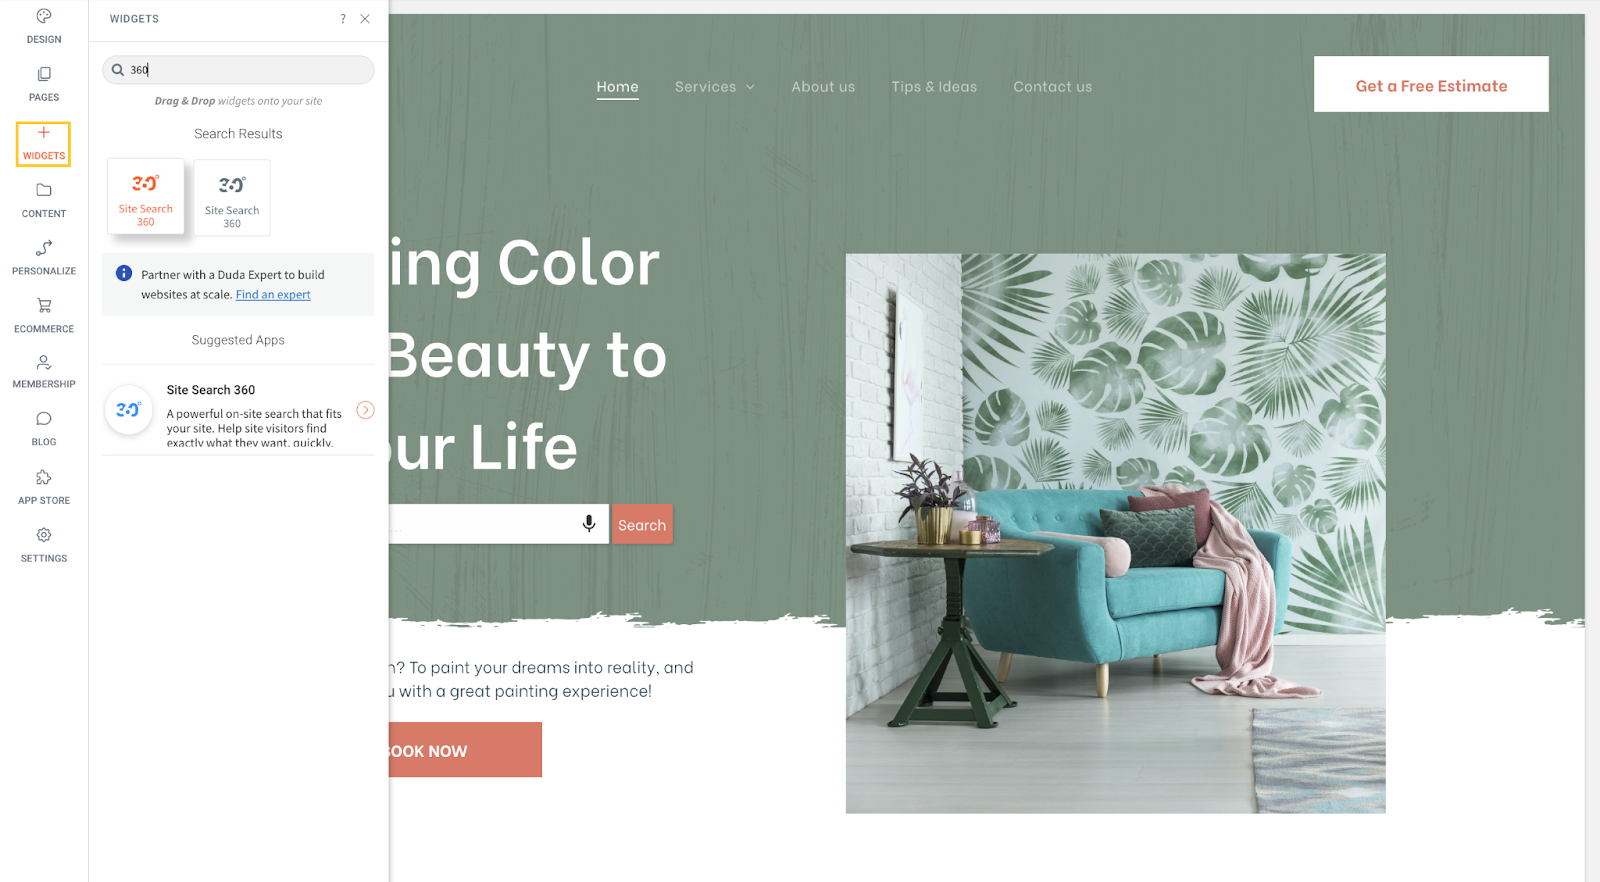
Once the app is installed, add it to your site. Go to the "Widgets" tab in the left side panel menu, look up "360", and drag and drop the search bar wherever you want it — in the navigation menu, header, footer, or any other element.
Make sure to publish or republish your site when you first install the widget. This starts a full crawl of your site and adds all available pages to your search results.

Next, adjust the widget's look and feel.
Customizing the widget
Duda's site editor:
To change the search box's default design or functionality, click it to open a pop-up menu of customization options.
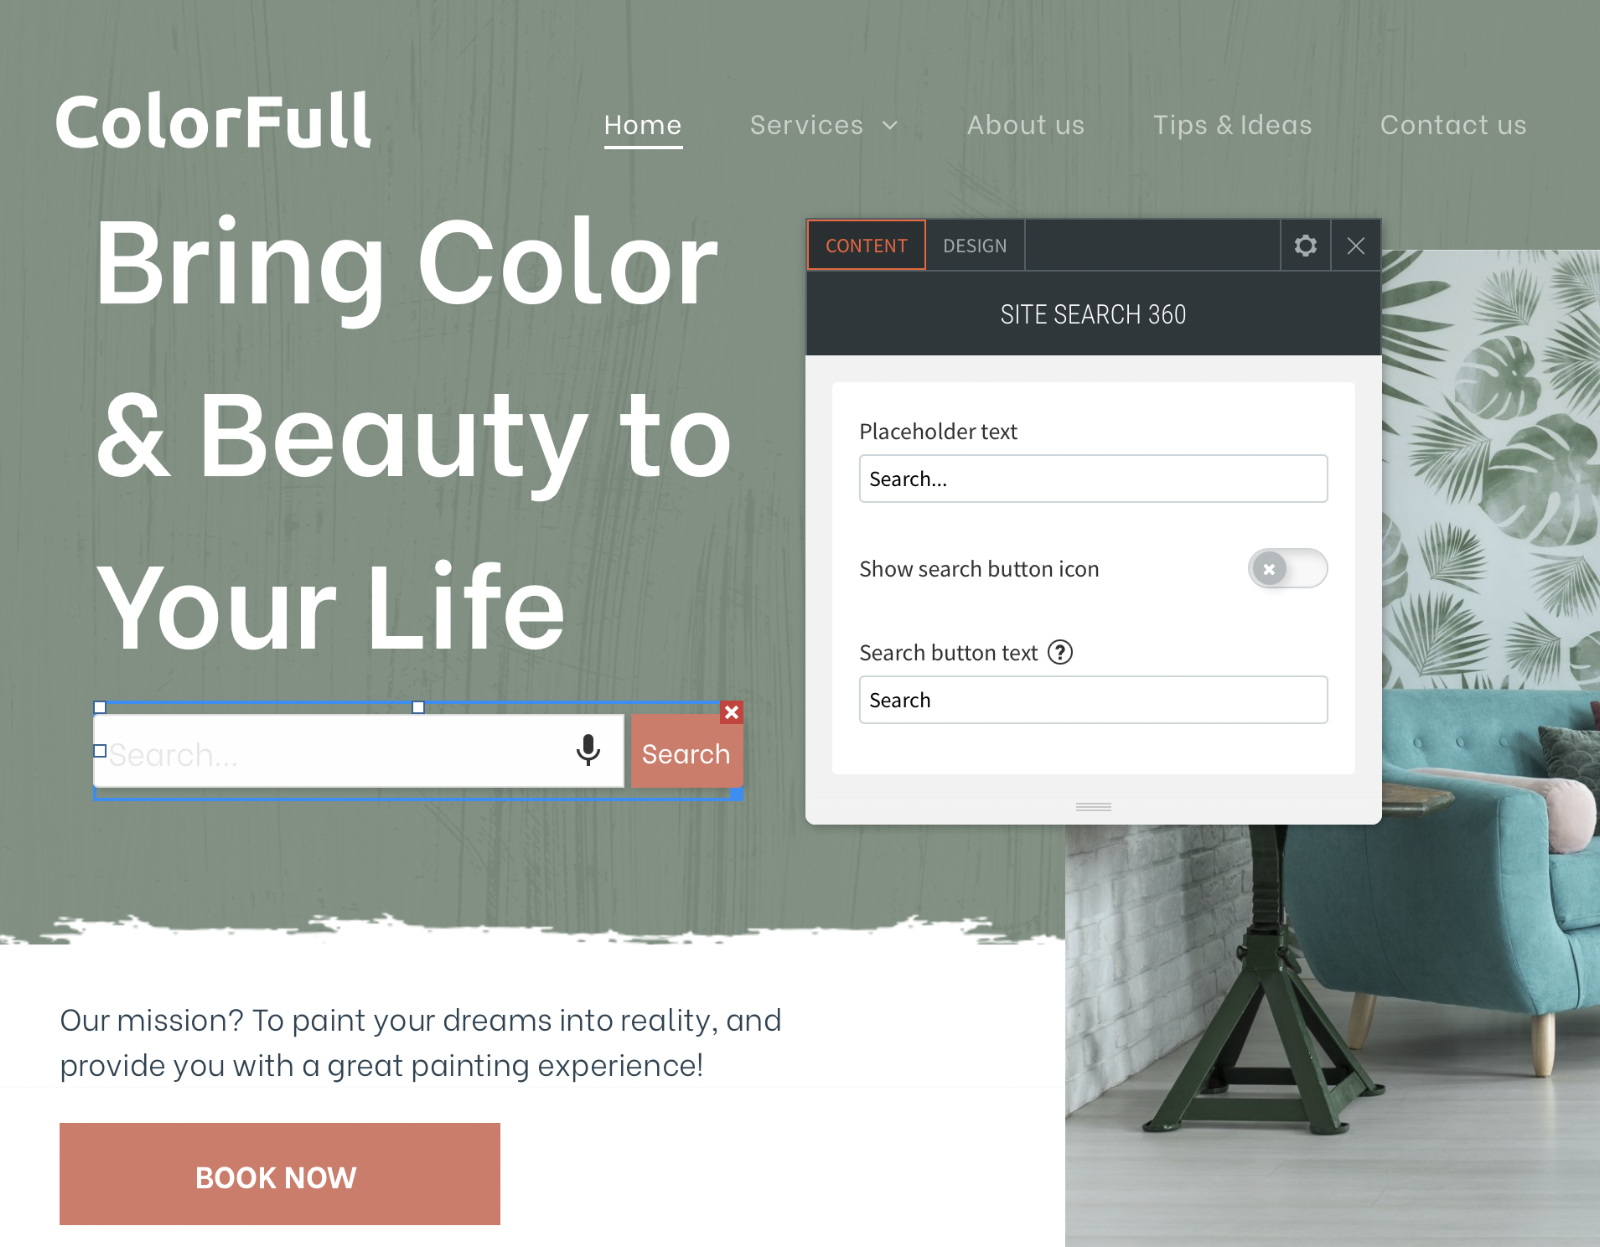
This menu has the same two tabs used elsewhere in Duda: "Content" and "Design".
Content Settings
"Content" settings control how your search box and search results are presented:
- What text (if any) is shown inside the search box and the search button:
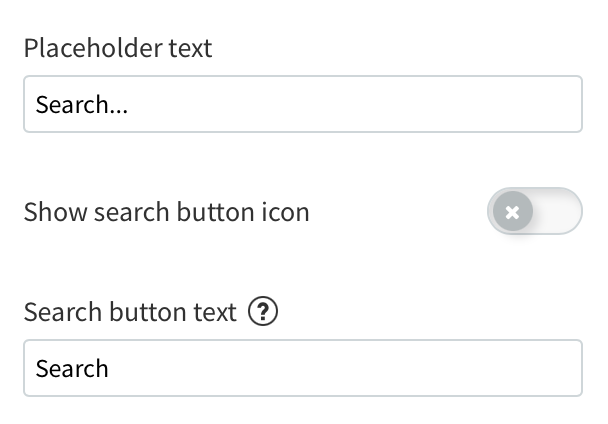
If you don't specify text for the search button, a magnifying glass icon appears instead.
- How your search suggestions are displayed:
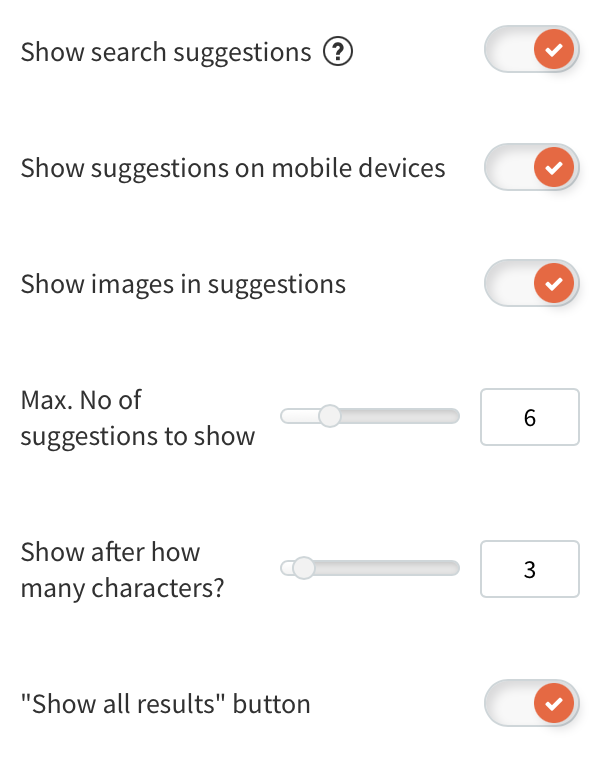
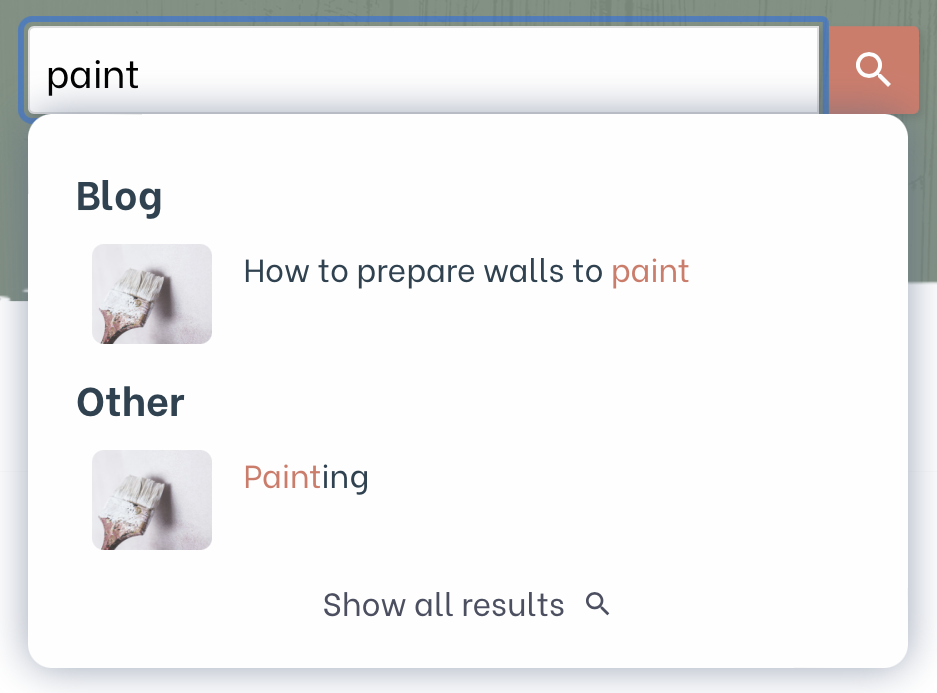
Search suggestions, also known as autocomplete or search-as-you-type results, appear under the search box before the search is initiated. On a live site, they look like this:
- What your search result layout looks like:
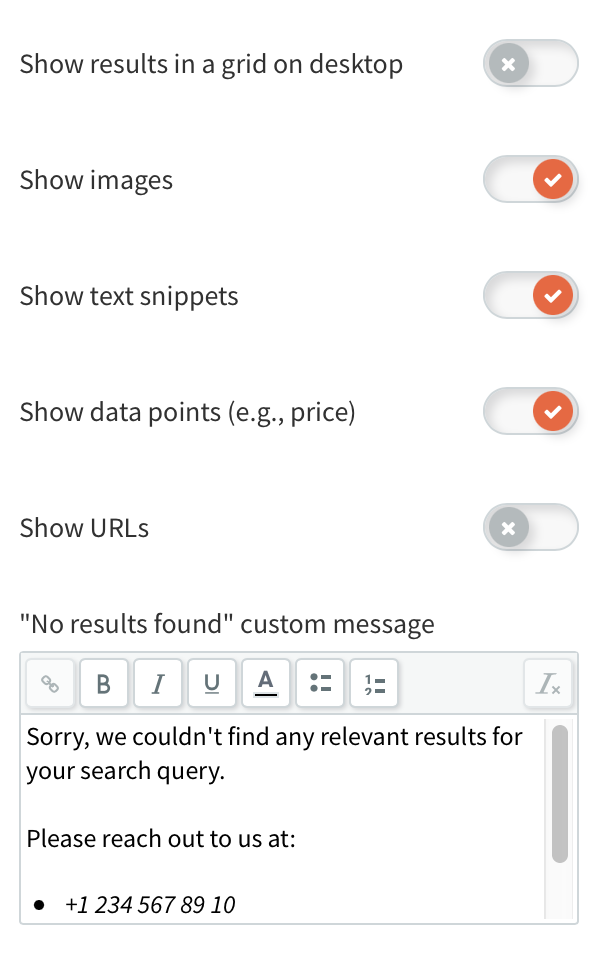
By default, search results (and search suggestions) show images pulled directly from the pages in the results. The crawler identifies images using the Open Graph image tag. To change the extracted image for a page, go to Pages -> Page Settings -> SEO -> Open Graph (or Post Metadata for blog entries). Click the image the crawler extracted and select a new one in Duda's Image Picker — you can choose from Duda's image collection or upload a new image.
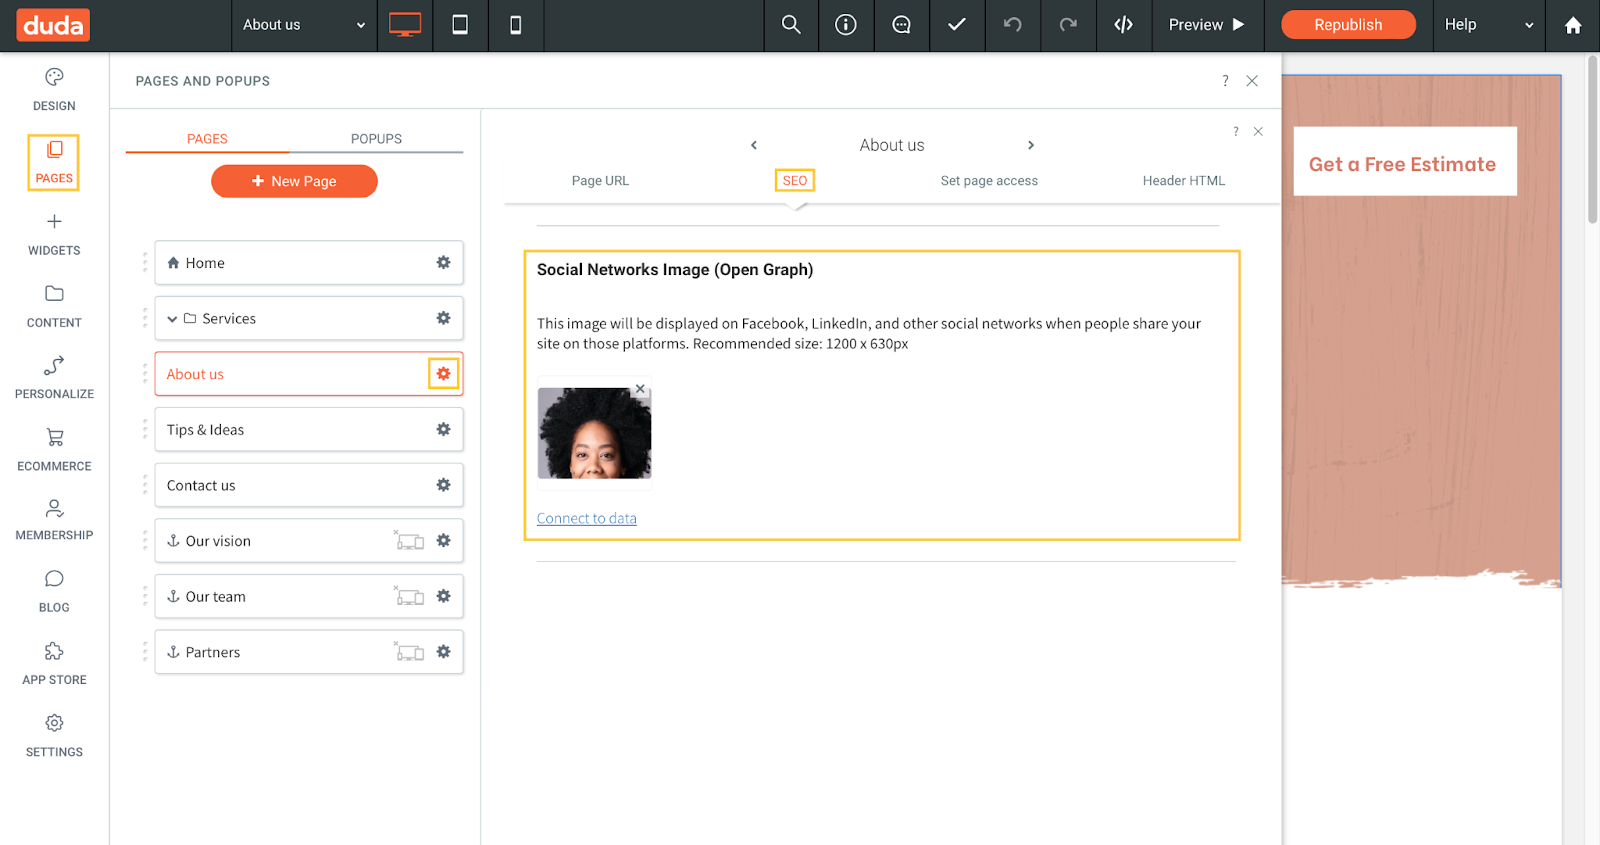
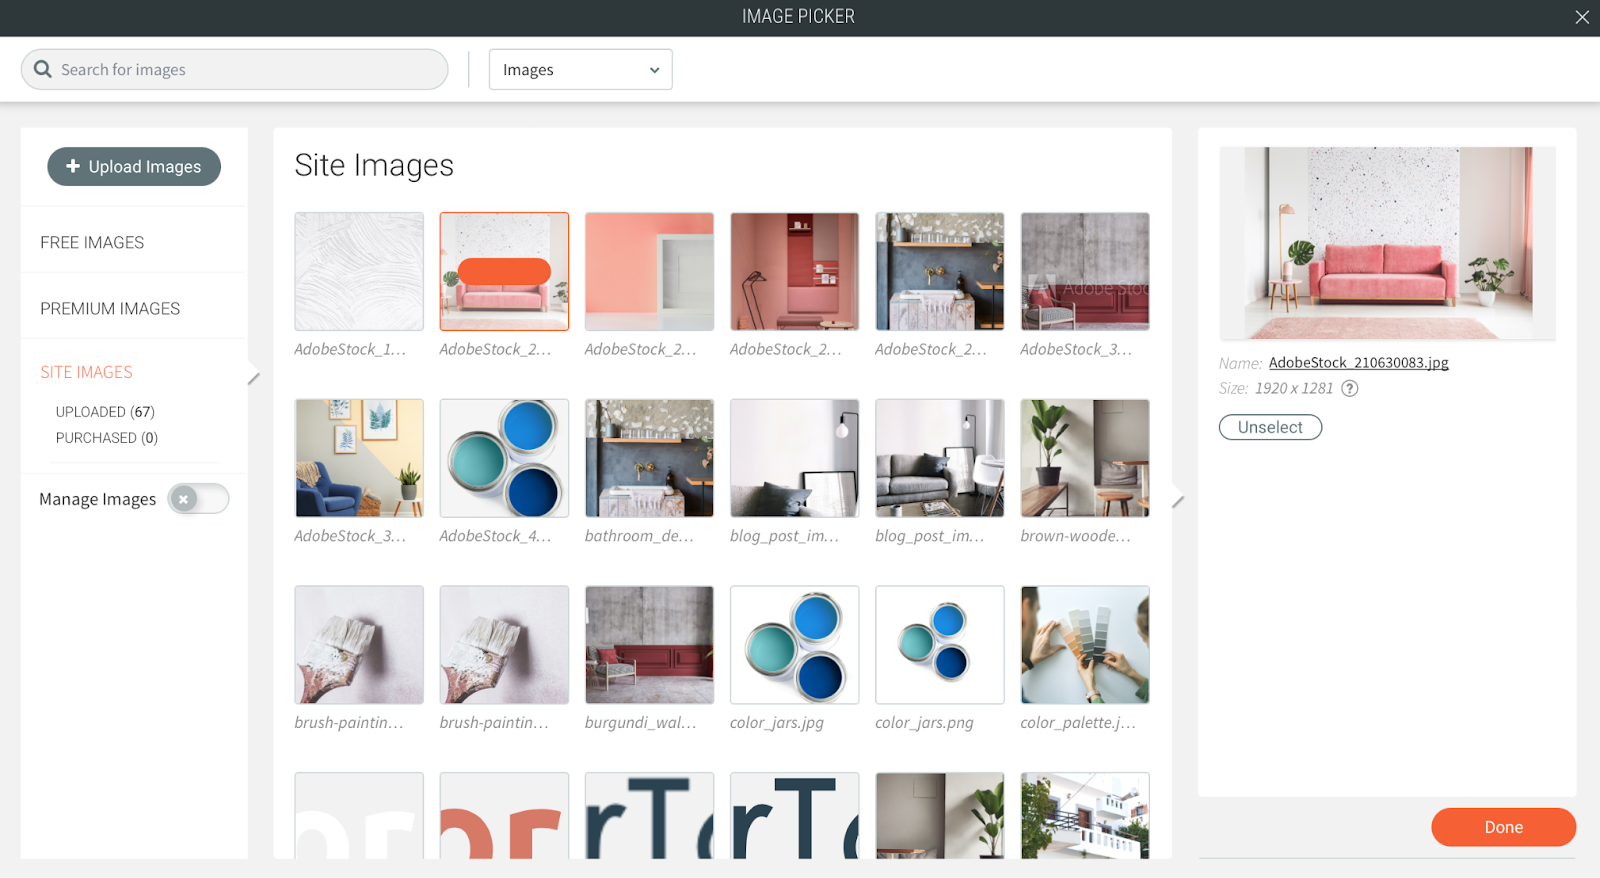
If your site's images don't have Open Graph tags, the site logo appears instead. You can keep the logo or hide images from the search entirely.
A text snippet is a page description that's picked up automatically during indexing. Change it in your site editor under Page Settings -> SEO -> Page Description, or in the "Content Extraction" section of the Site Search 360 Control Panel using custom Include/Exclude XPath rules (see our article on XPaths).
A Data Point is additional information that enriches the description — for example, a product's price or color, or a blog entry's author. Configure Data Points in the Site Search 360 Control Panel, covered later in this guide.
- Which language the search is in:
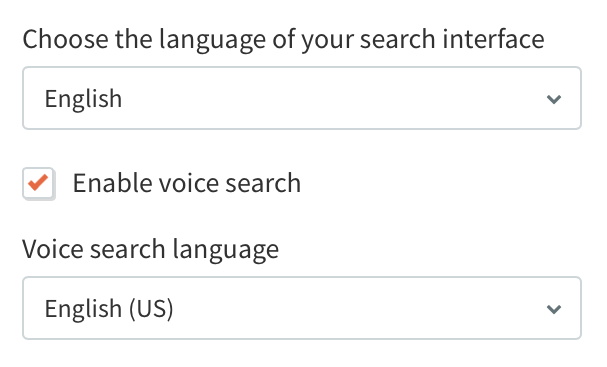
This setting affects your search results and interface elements such as CTA buttons. The search supports nineteen languages by default: English, German, Spanish, Turkish, Italian, Portuguese, Polish, Dutch, French, Danish, Finnish, Swedish, Norwegian, Russian, Czech, Romanian, Latvian, Lithuanian, Hungarian, and Greek.
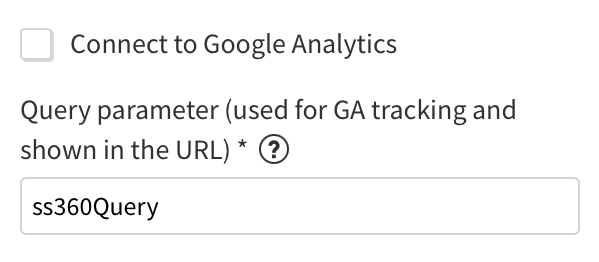
- Whether the search is connected to Google Analytics:
Design Settings
"Design" settings will be familiar if you've used Duda's other editing tools:
- What your search box looks like:
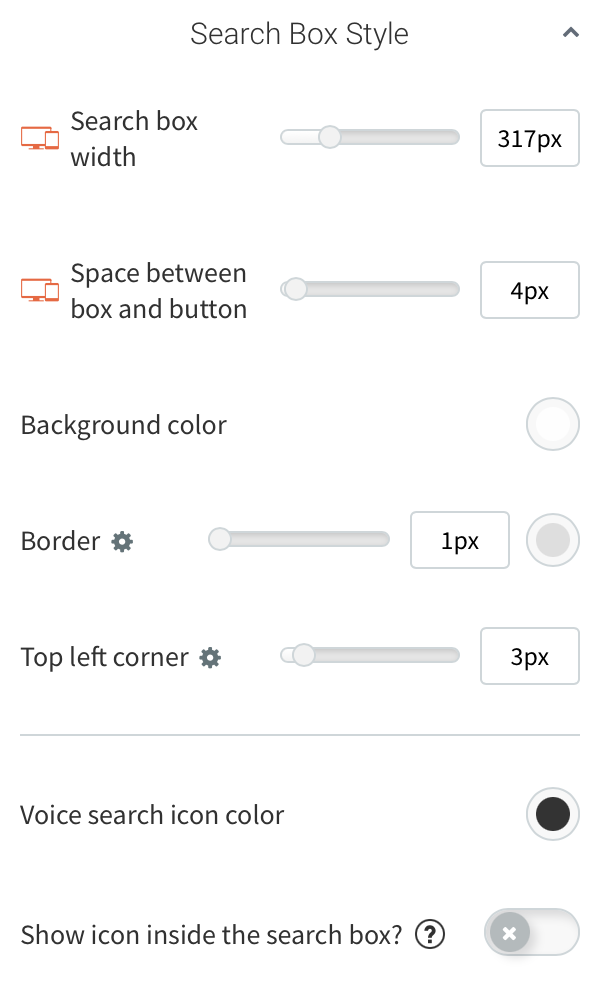
- How text appears in the search interface, results, suggestions, and the search box while a query is being typed:
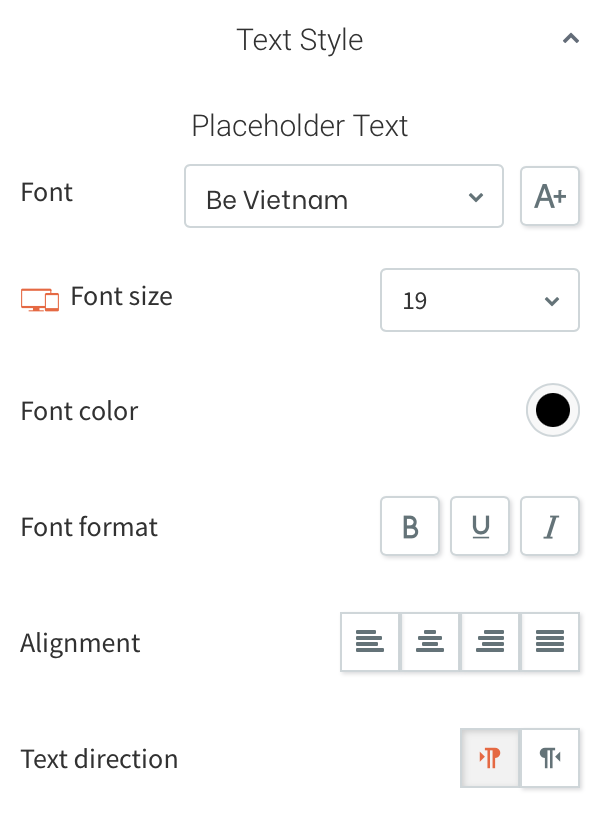
- The look of the search button and its text, if you're not using the magnifying glass icon:
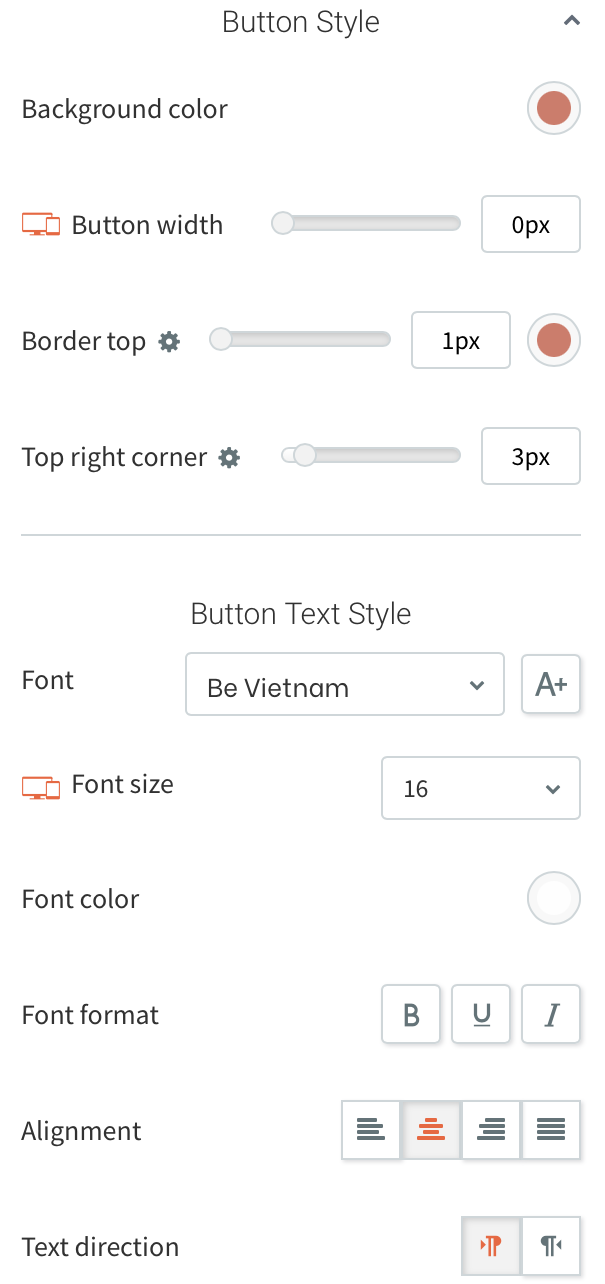
- Whether the search box is animated:
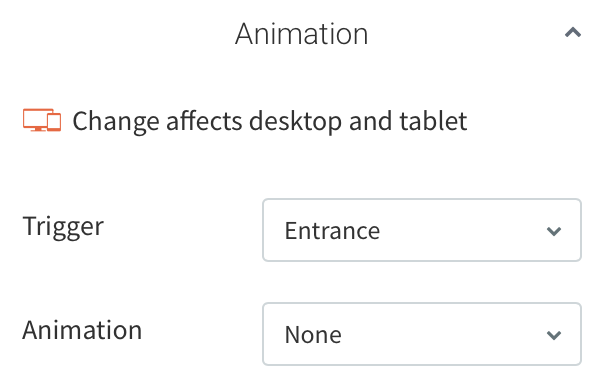
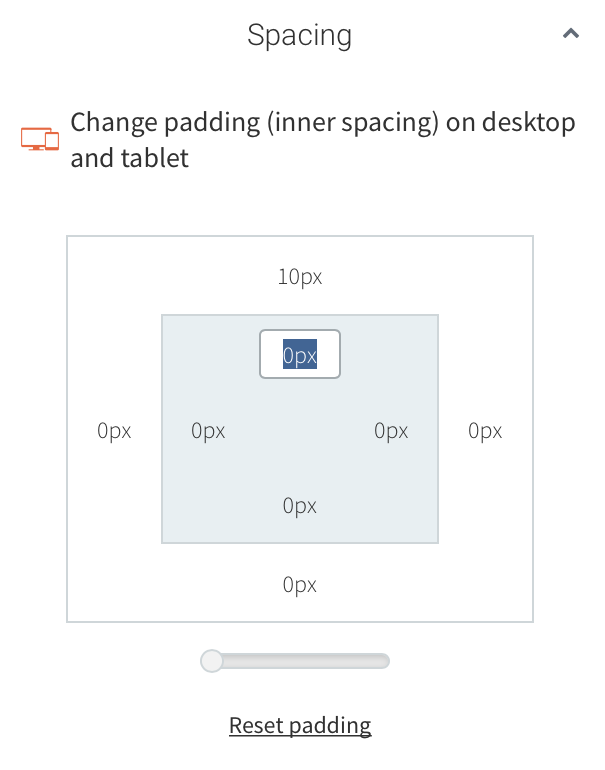
- The spacing between the search box and other layout elements:
Adding Custom CSS
For design options outside Duda's default functionality, add custom CSS to the project:
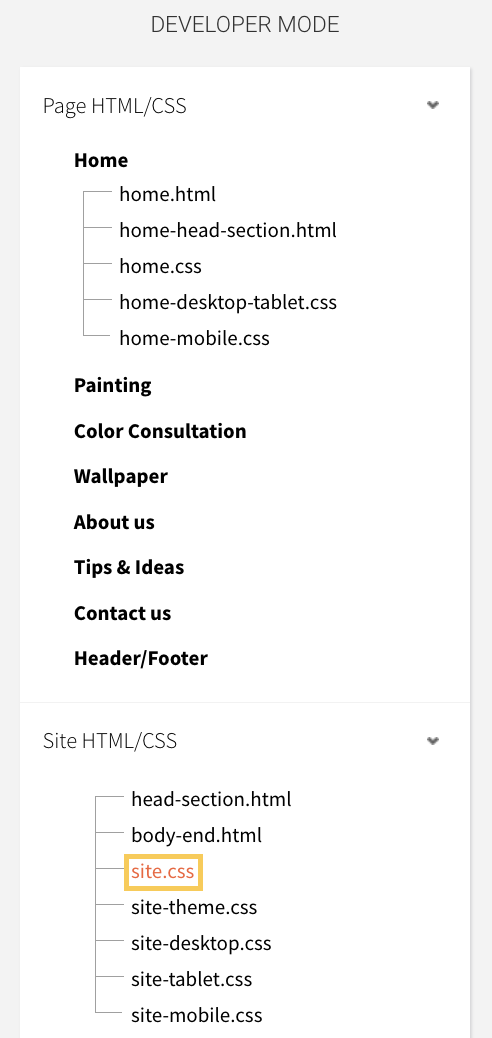
- Open "Developer Mode" in your site editor:

- Go to site.css under "Site HTML/CSS":
- Enter your CSS in the space on the right side of the screen. In this example, the CSS removes highlighting from the search box:
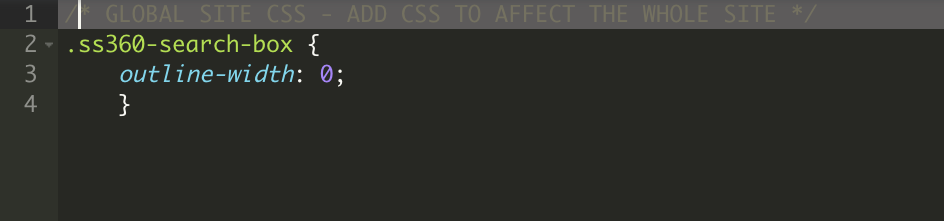
This gives you full control over the search's look, though it requires some coding.
These aren't the only customization options available — the rest are in your Site Search 360 Control Panel.
Site Search 360 Control Panel
This part of your search isn't powered by Duda, but you don't have to leave the site editor to access it. Open your Site Search 360 app settings by clicking "Open" in the widget's entry in Duda's App Store:
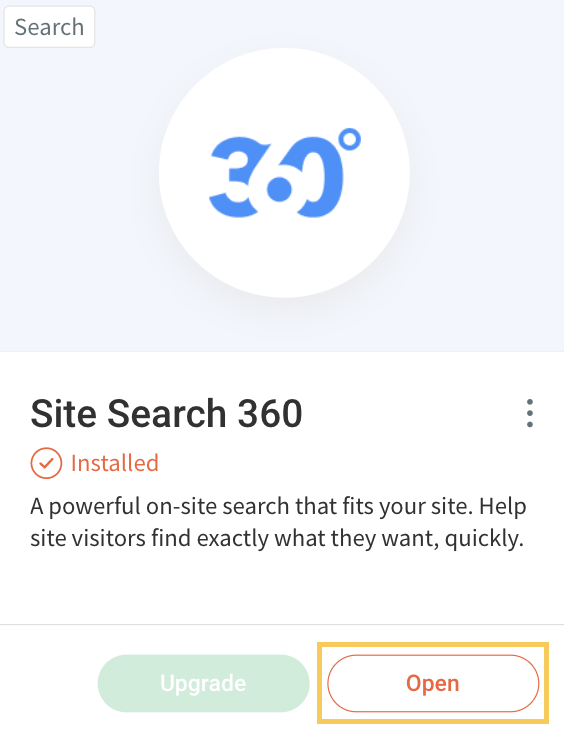
This takes you to your Dashboard and logs you in automatically.
Dashboard
The "Dashboard" section has three tabs, each showing data about your search's performance.
The "Analytics" tab shows how the search is being used.
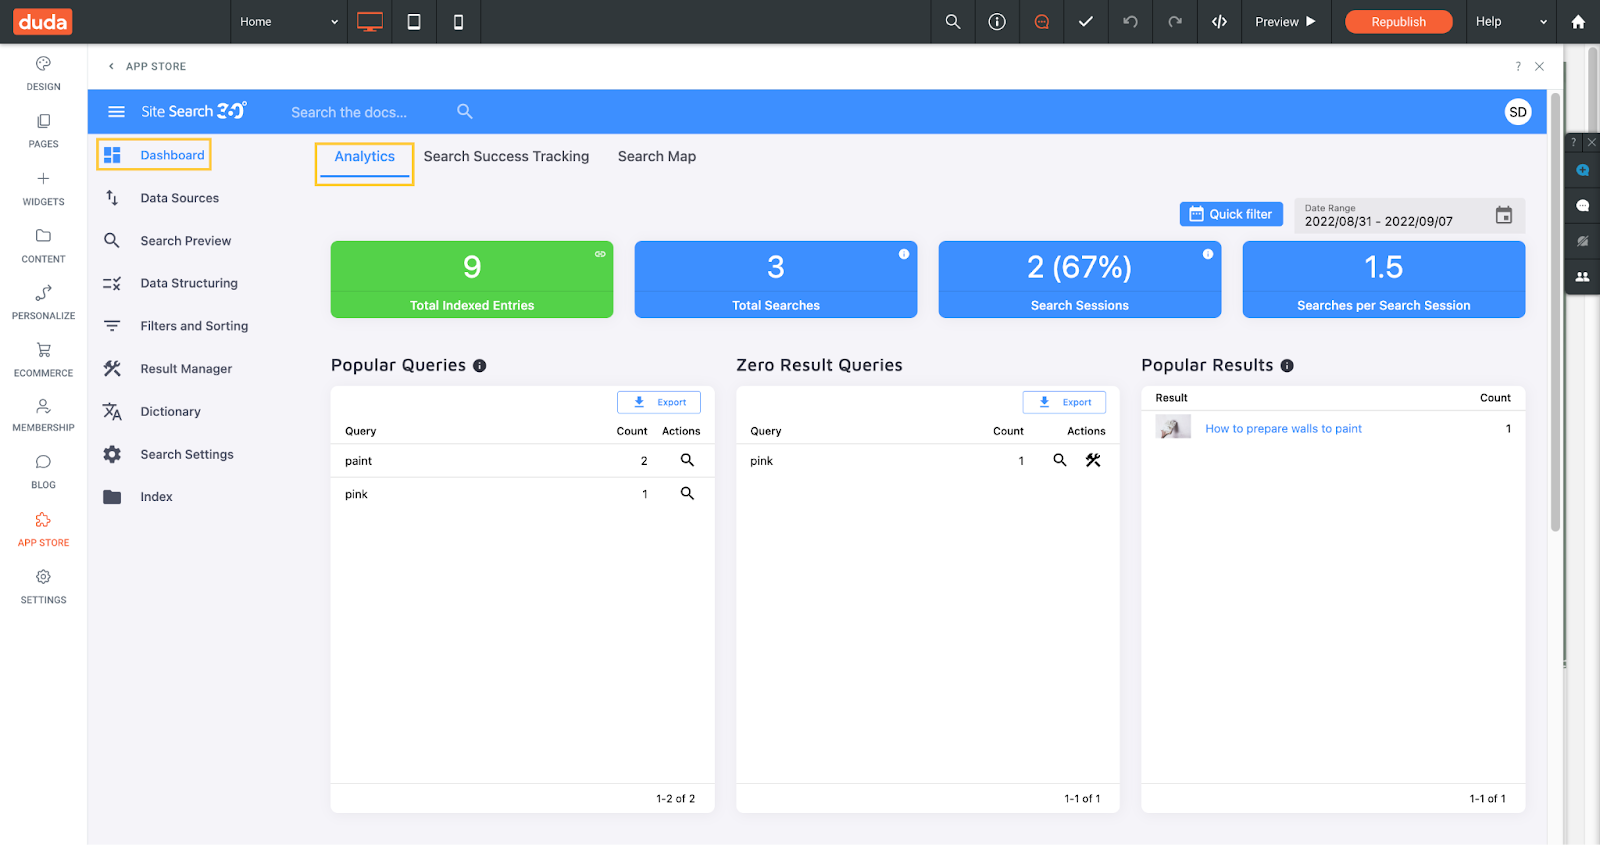
When you first implement the search, you'll see basic information about your project, like the number of pages the crawler has found and added to the search results. Available data expands as search usage grows — you'll see which search terms are most common and which return zero results, among other metrics.
Two buttons in the top right corner filter your search data. "Quick Filter" shows performance for today, yesterday, or the last 7, 30, or 90 days. "Date Range" lets you choose any custom period.

You can learn more about data pulled from your users' experience with the search in our article on Dashboard Analytics.
The "Search Success Tracking" tab tracks conversion-related metrics. With regular engagement, it goes from this:
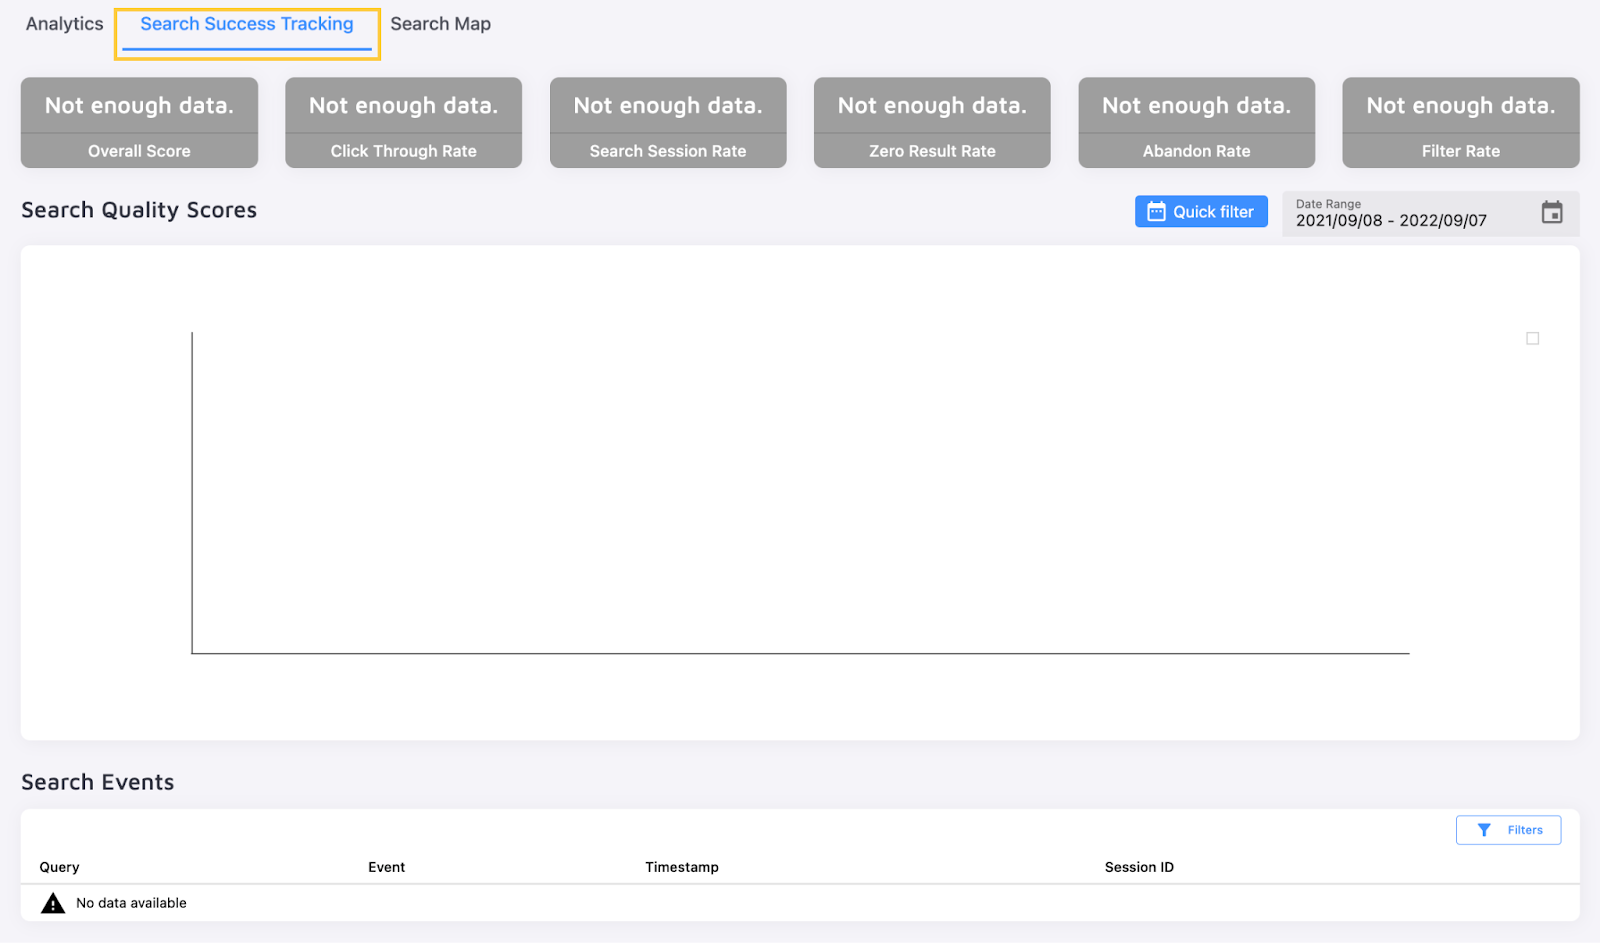
to this:
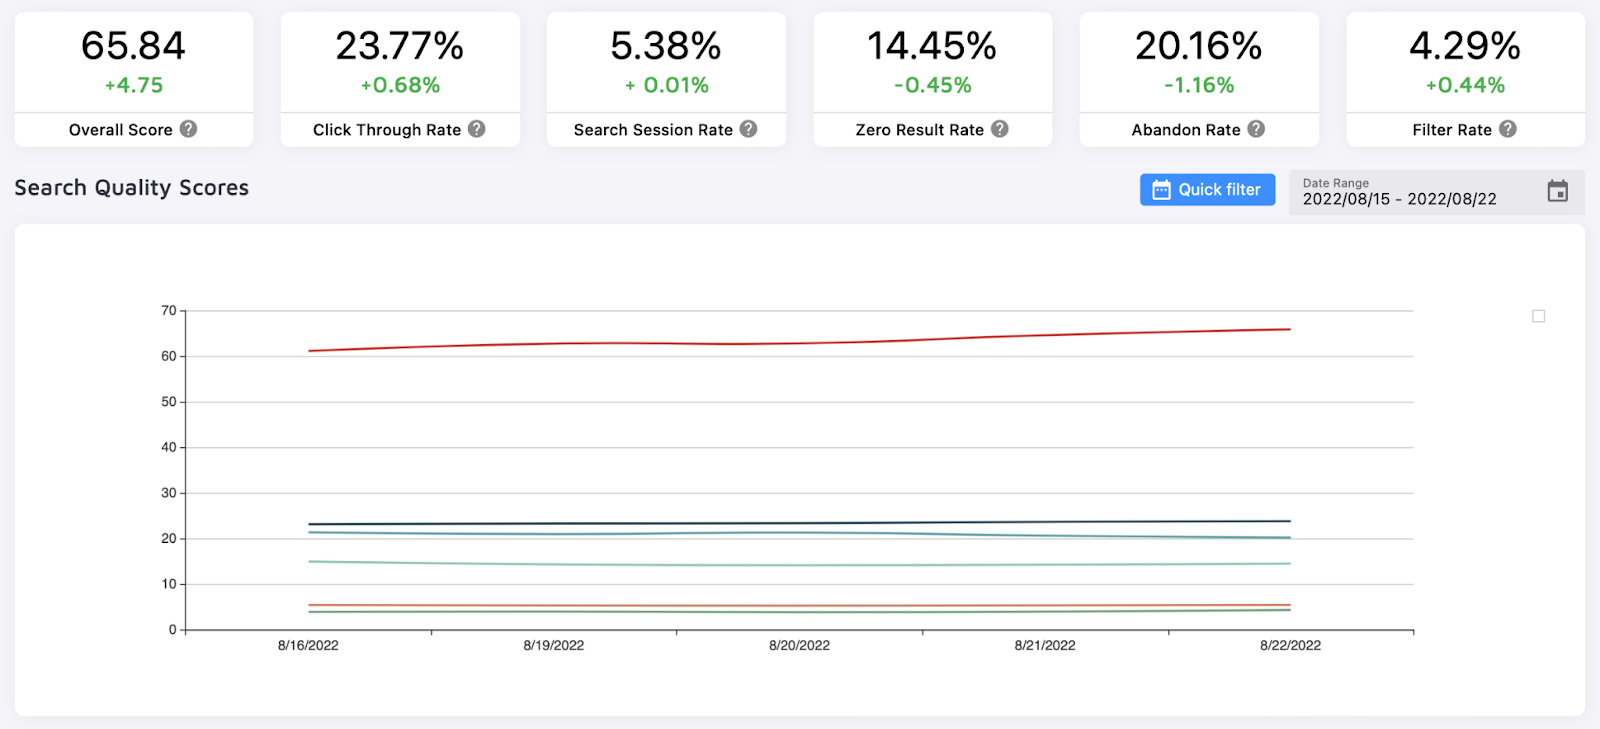
Your Search Success rate combines how many users engage with the search, how often they click results or use filters to narrow them down, and how often they see no results for their queries. Each query is recorded and detailed in this tab.
The "Search Map" tab shows where your users are based and which queries are popular in a particular region:
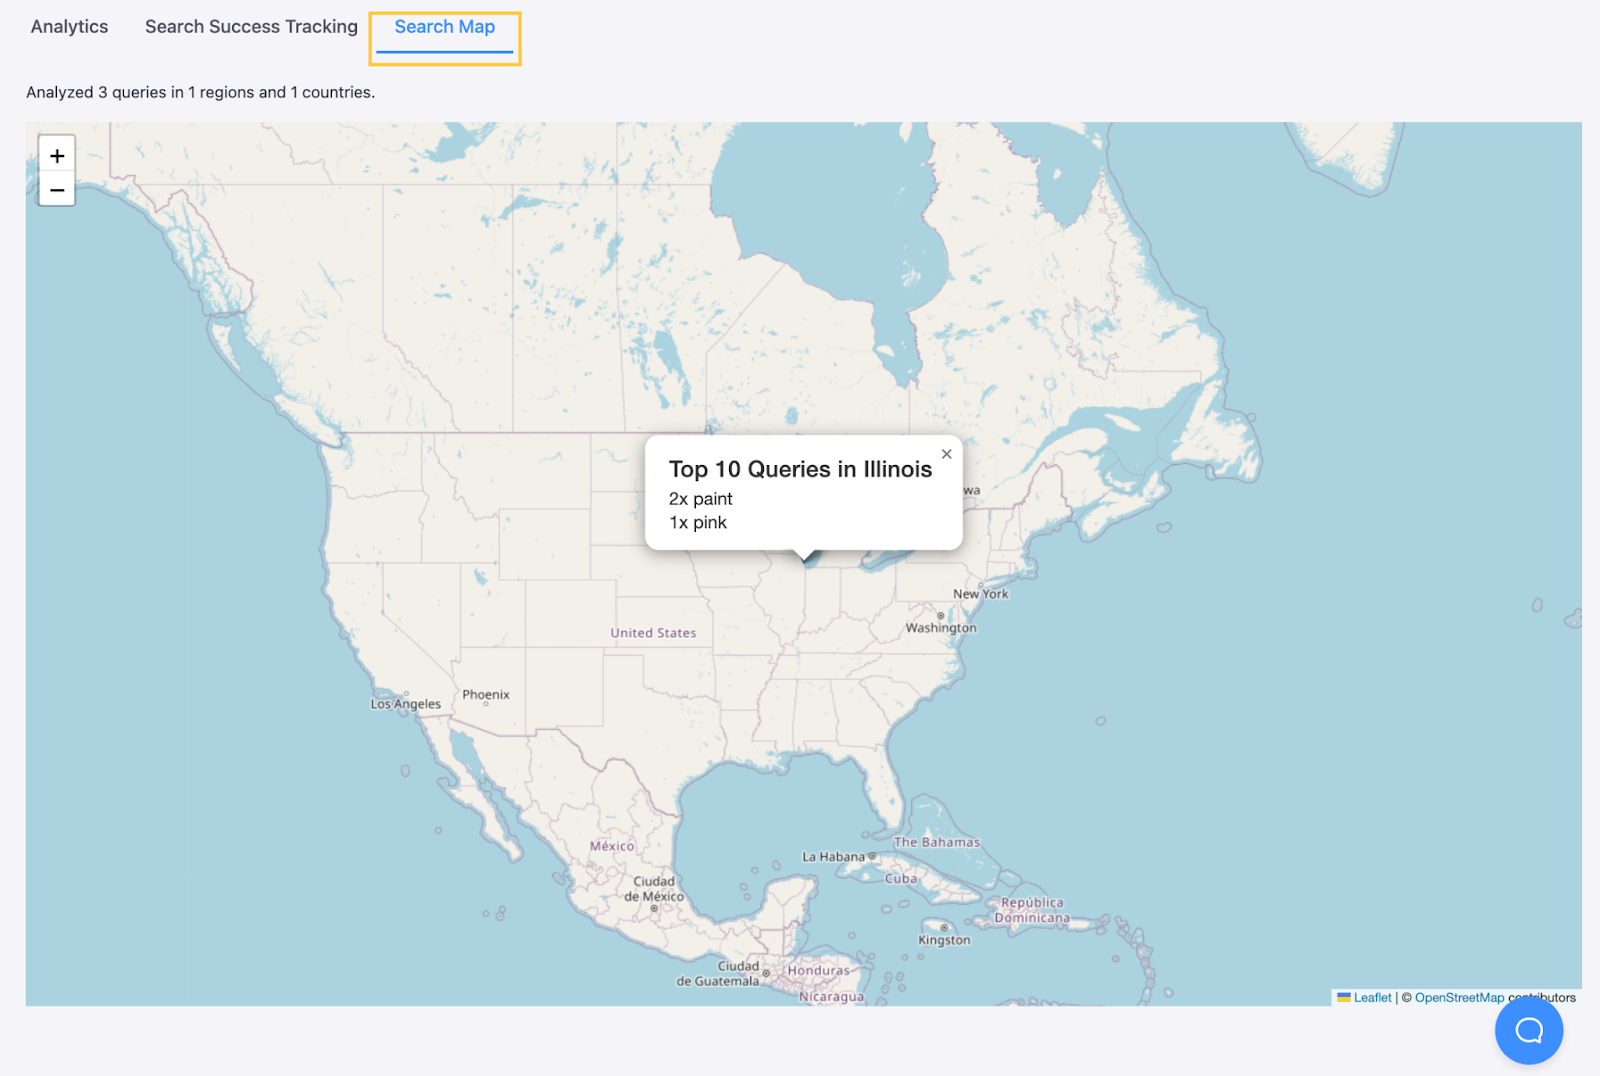
The "Search Success Tracking" and "Search Map" tabs only appear if these features are enabled for your plan (currently available for "Holmes" only). See our pricing page for plan differences.
A "Chat" icon appears at the bottom right of every tab. All users can email the Site Search 360 support team; "Holmes" users can also use the chat to contact support without leaving the project page and get a near-instant reply.

Data Sources
The "Data Sources" section covers everything that gets crawled to populate your search results.
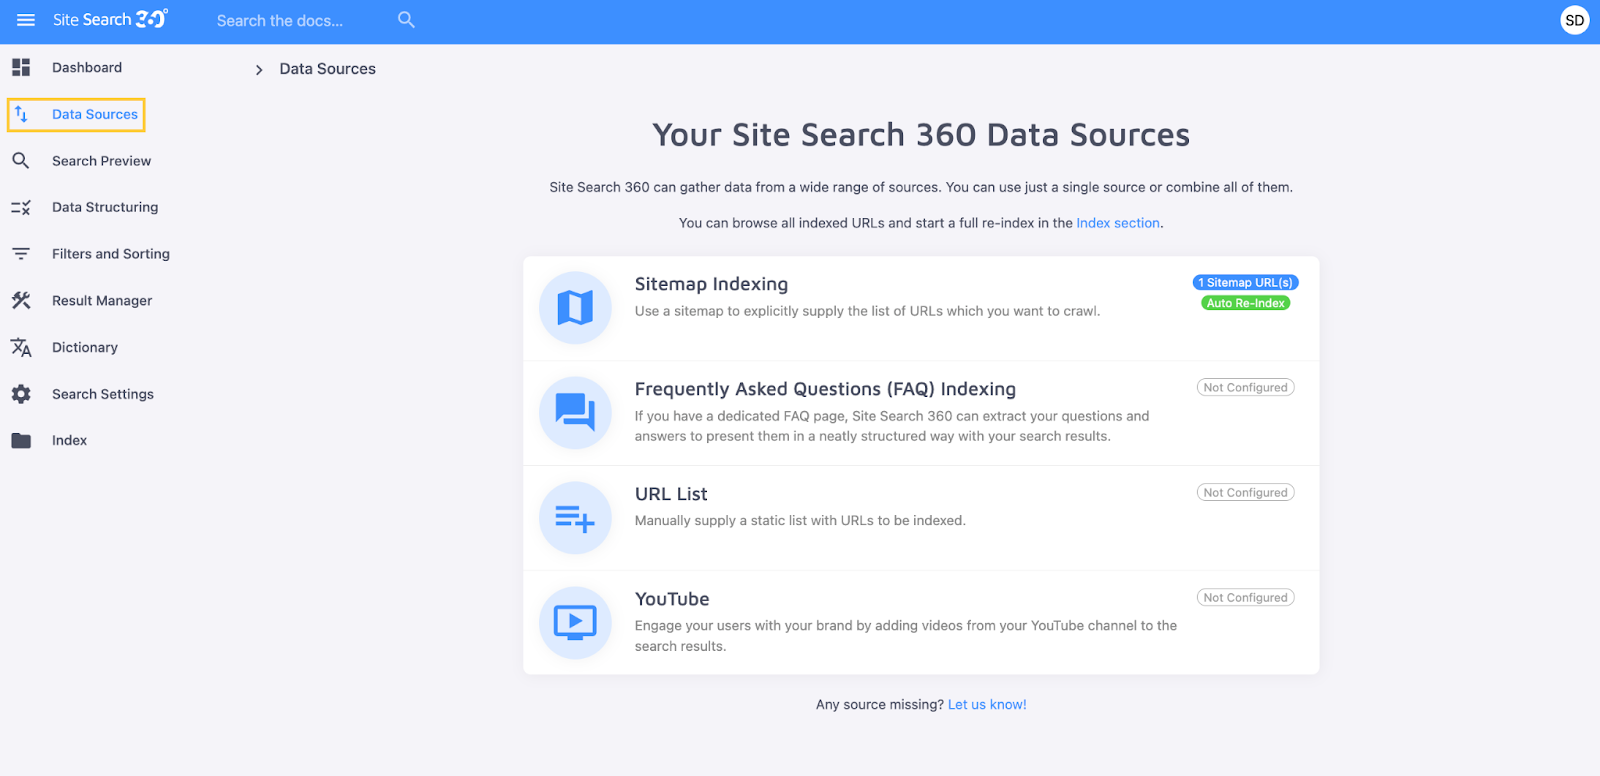
"Sitemap Indexing" is used by default for every Duda project. The sitemap is pulled from the site editor when your project is created and updates automatically as you add, edit, or remove pages.

You're not limited to the sitemap's default settings for how content is indexed.
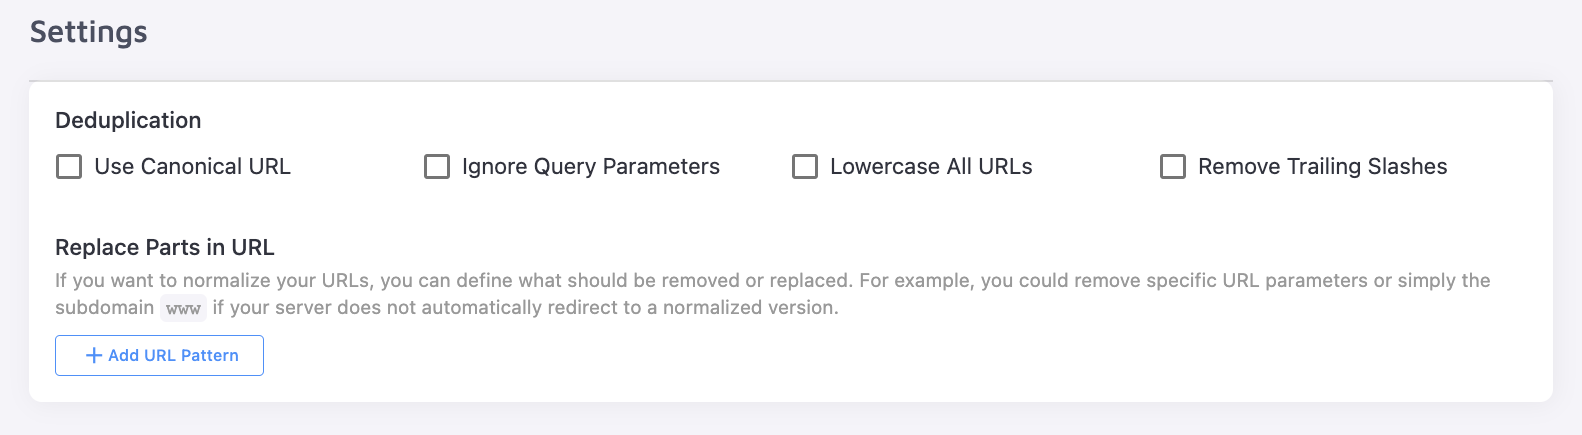
If the same content appears twice in your search, use deduplication to clean up the results without changing your Duda project:
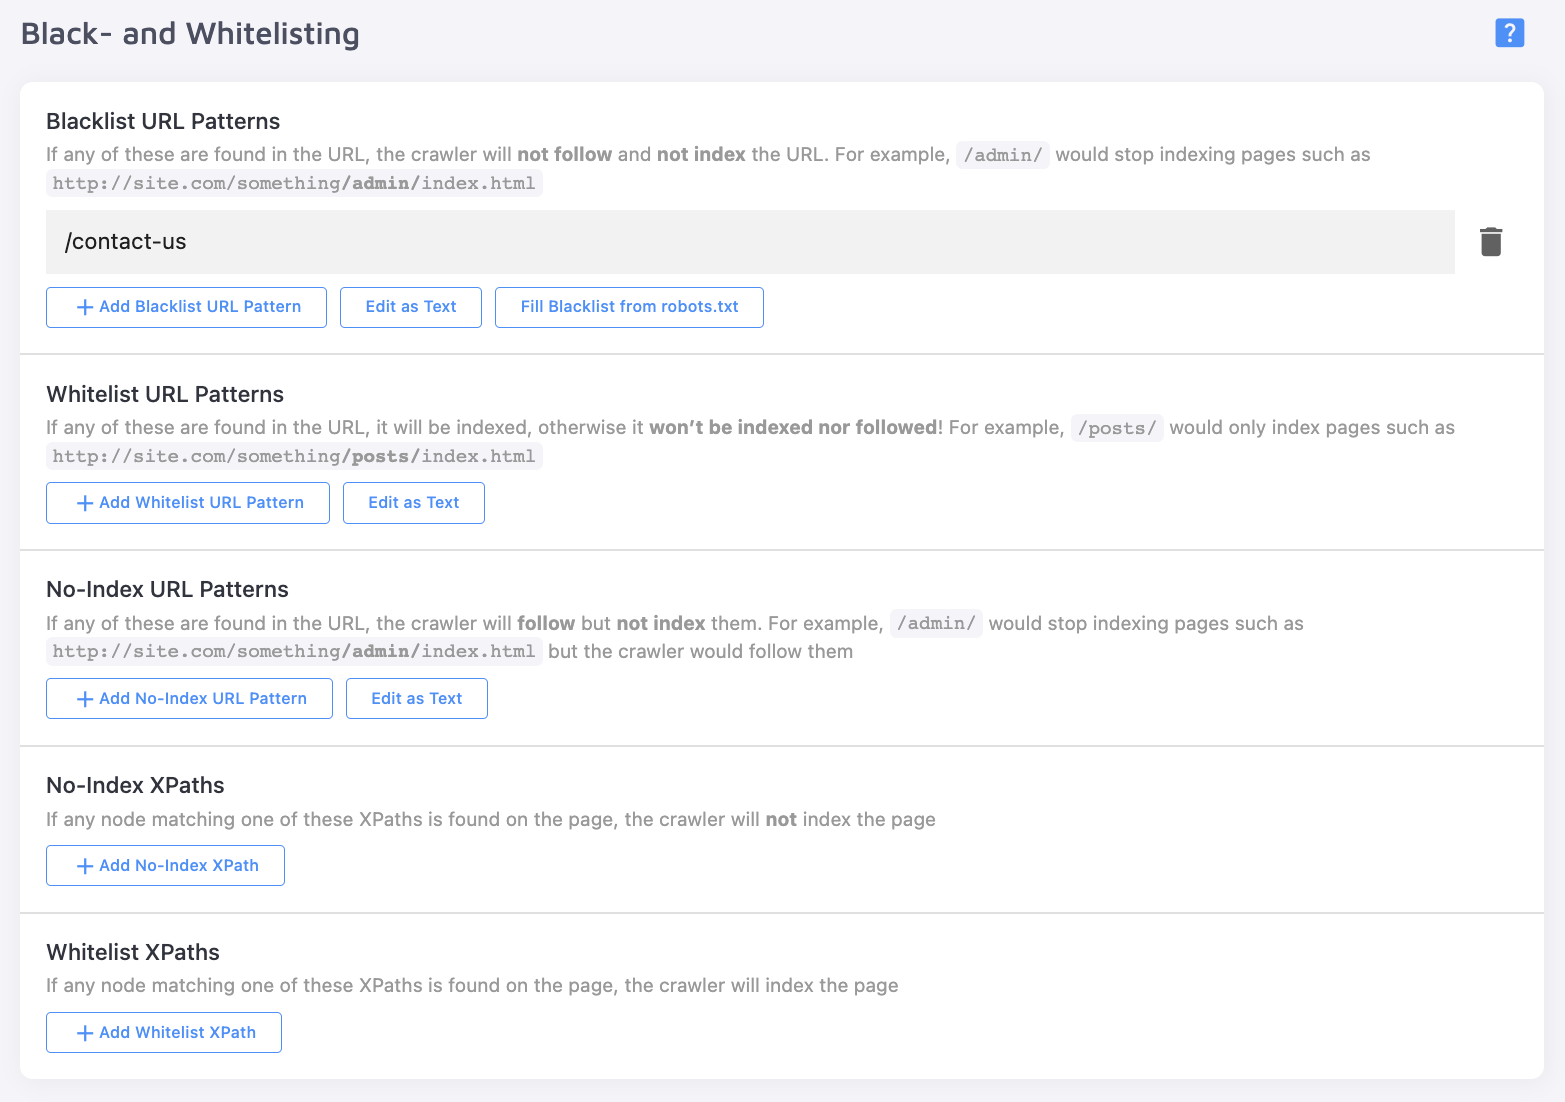
You can also remove pages from your search results without deleting them from the site by either blacklisting or no-indexing them. Alternatively, restrict the crawler to a specific area of your site by whitelisting certain pages.
If the crawler can't index certain pages, check the "Advanced Settings" for possible fixes.
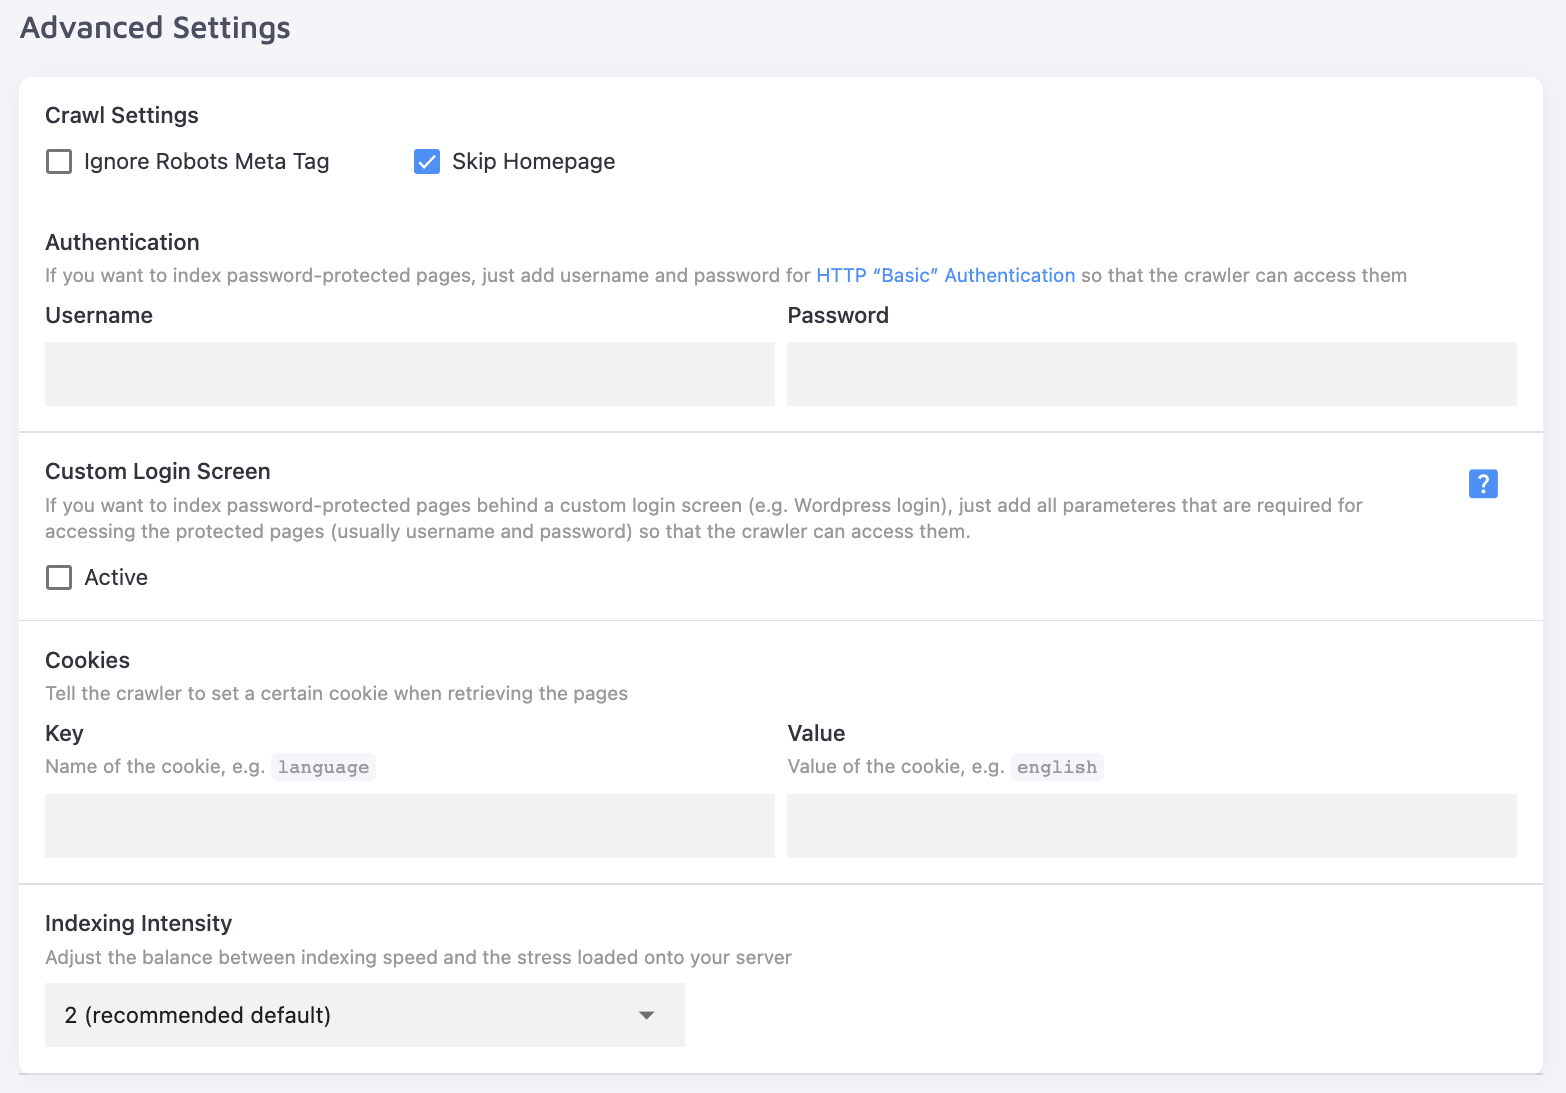
Sometimes pages are hidden from search engines by a no-index robot meta tag. You can let the app access these pages without exposing them to search engines by ignoring this meta tag.
In other cases, the crawler can't access pages that are password-protected or behind a login screen. Enter your login credentials to make this content accessible to the crawler.
Crawler Settings are explored more thoroughly in our article on this topic.
These options apply only to your sitemap, but the sitemap isn't the only data source the crawler can use. You can also add your site's FAQ, a list of URLs from other domains, or a YouTube channel (the latter only on "Holmes").
Throughout this section and others, you'll see a "Show Help" icon next to some settings:

Click it to open a How-To article explaining how that setting works:
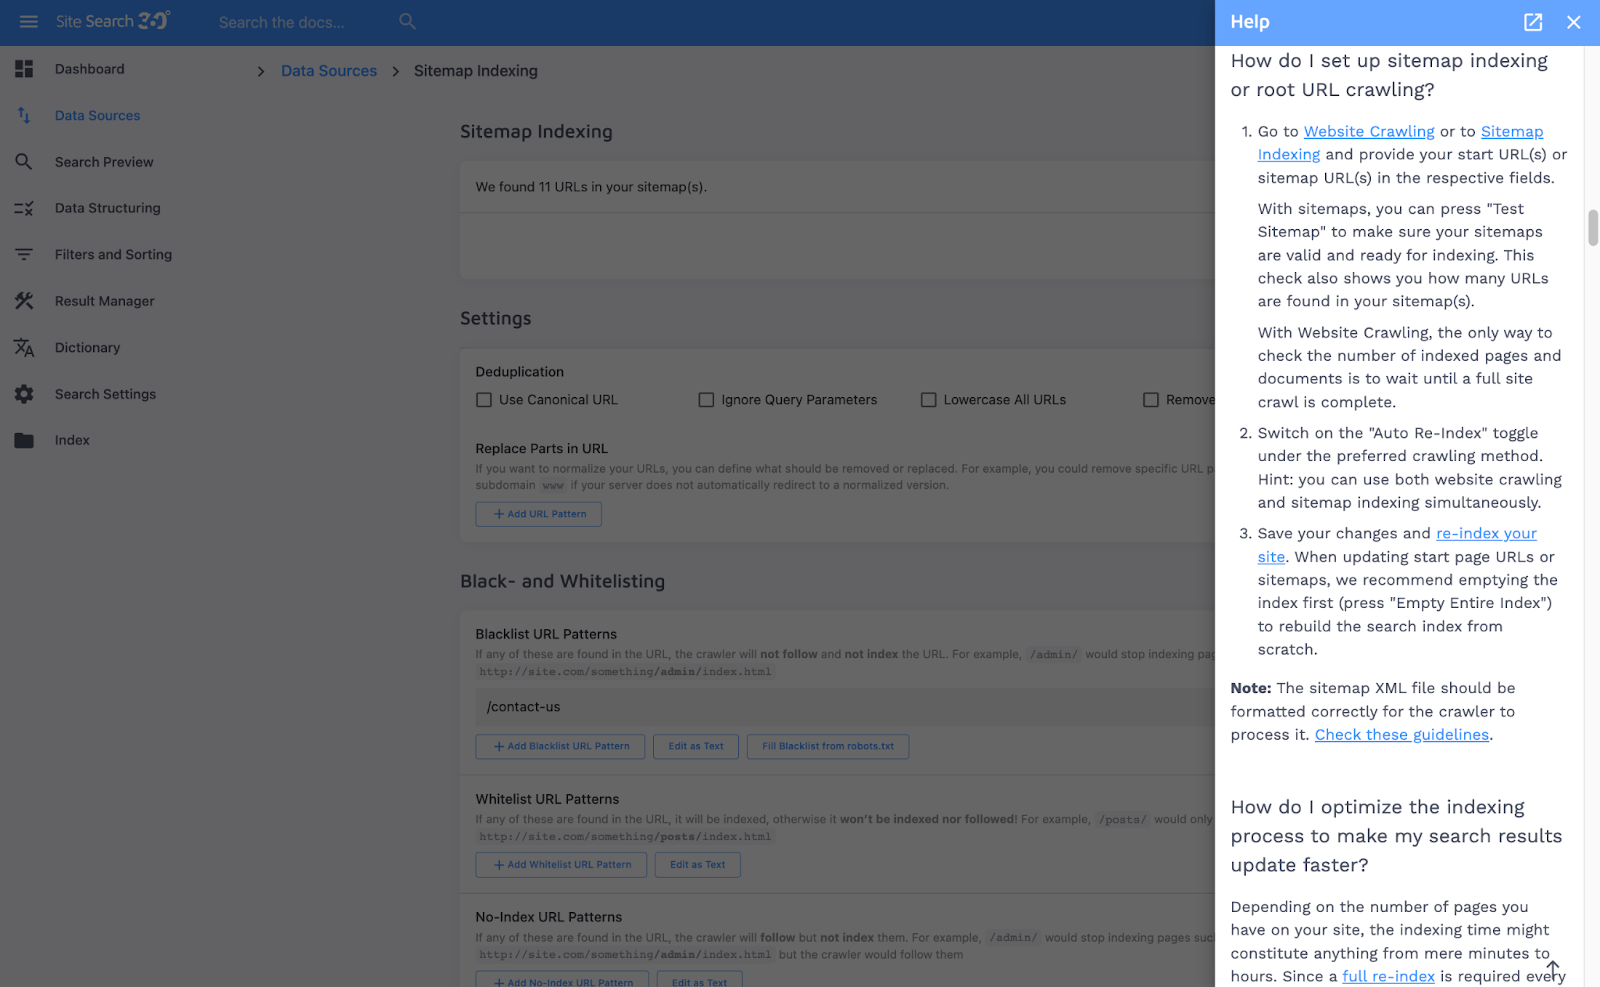
You can also search these docs directly by entering a feature name in the search field at the top left of the screen:

Search Preview
The "Search Preview" section shows how your search functions without switching to your site editor or the live site.
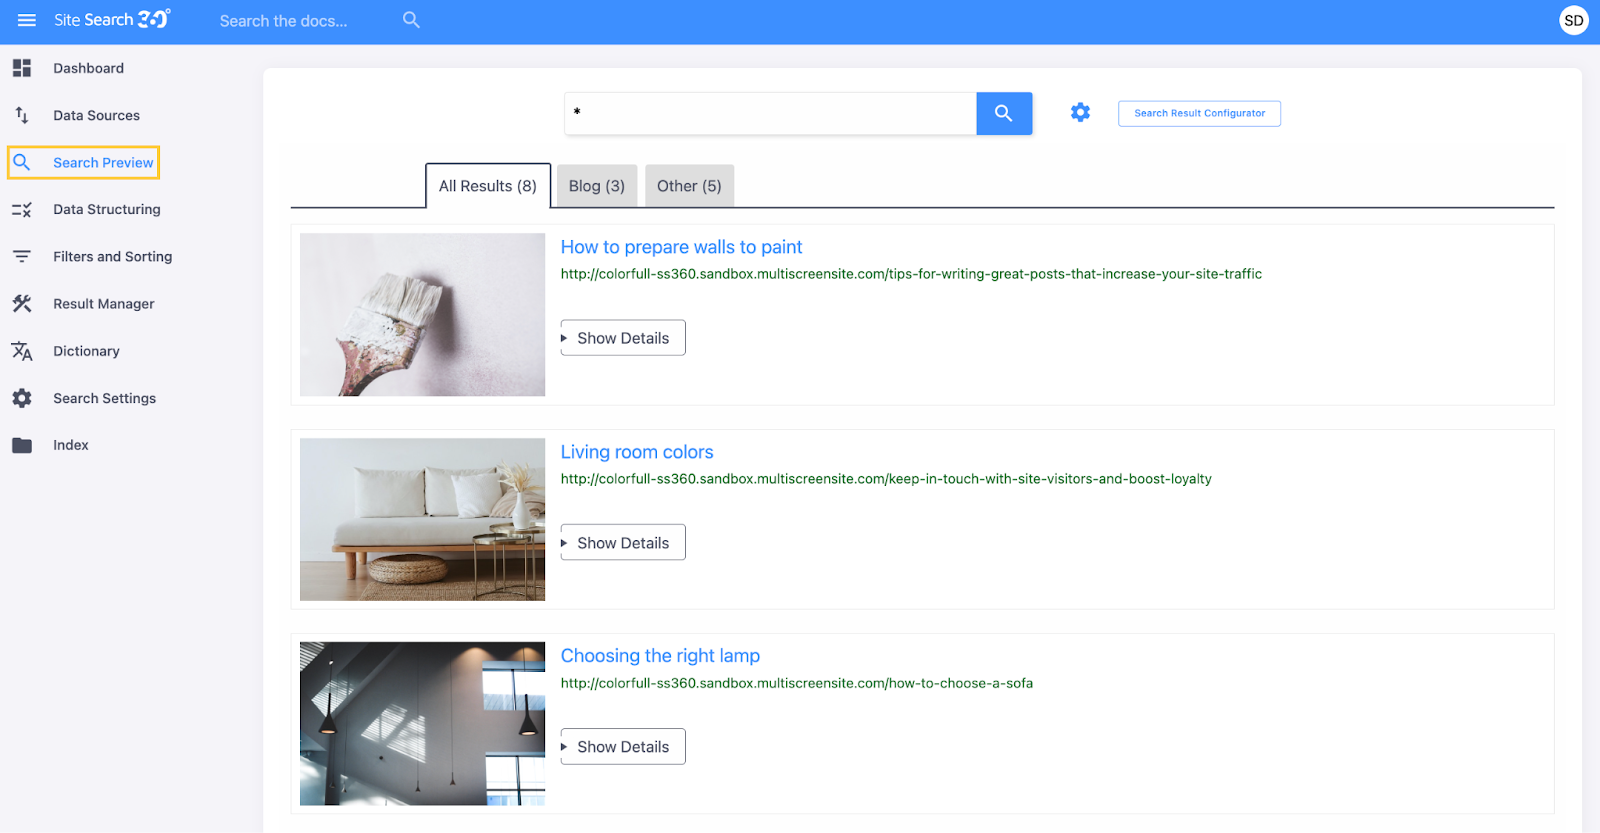
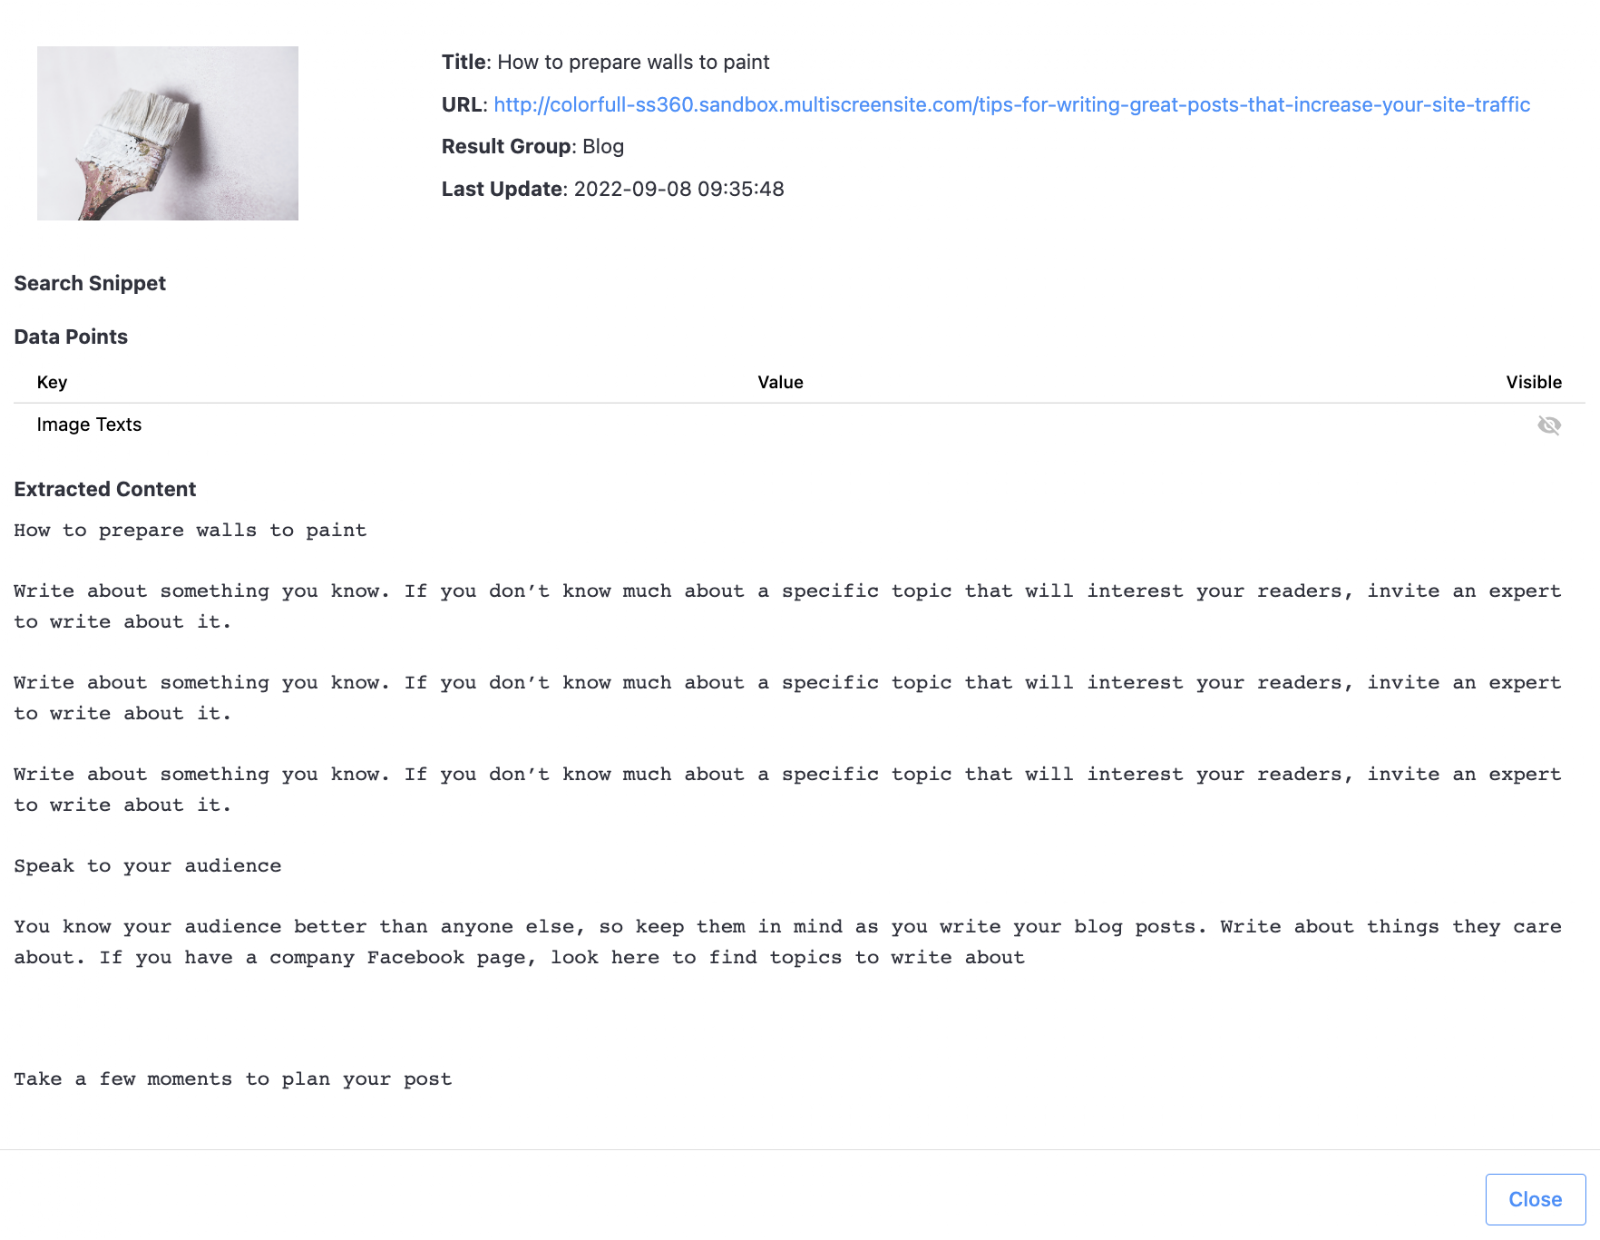
"Search Preview" shows which results appear for a given query and which Result Groups they belong to. Click "Show Details" to see the content extracted for each page:

"Search Preview" also lets you configure the search's general behavior, in a section called "Preview Settings":

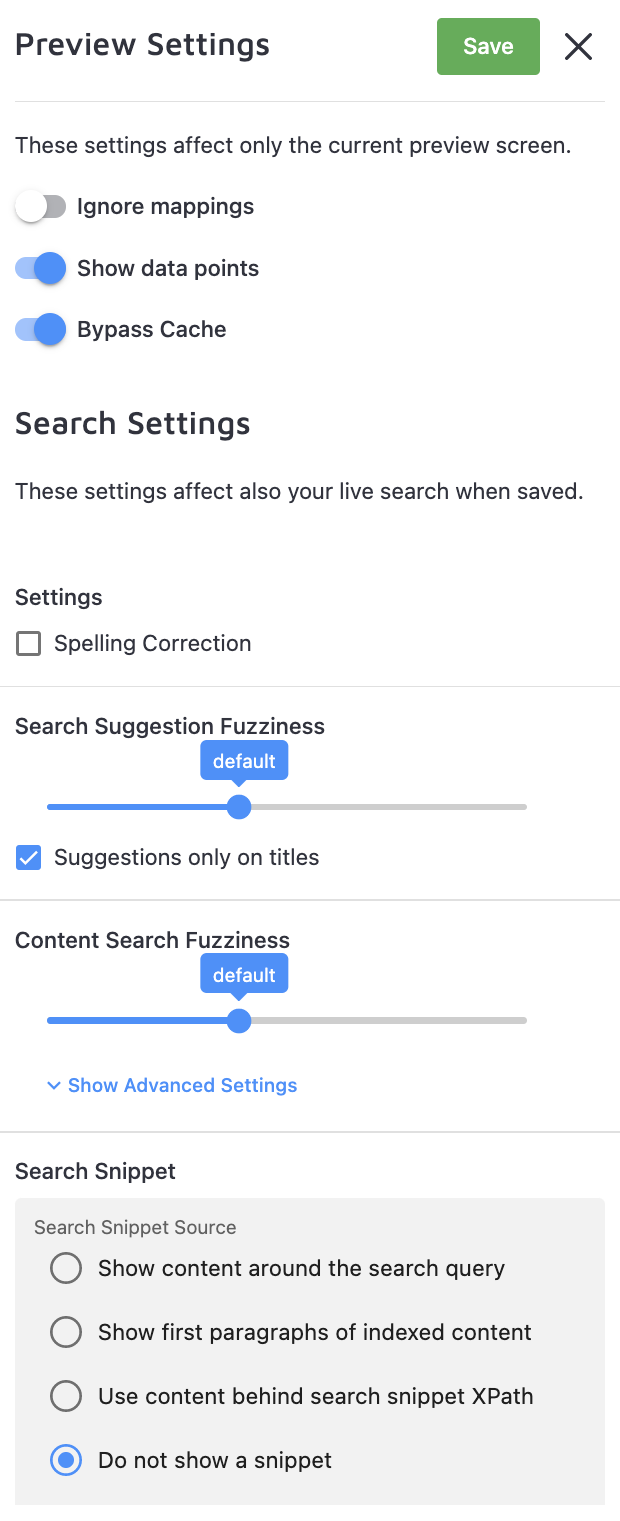
Most of these settings are self-explanatory, but a few are worth noting:
- Search Fuzziness controls how closely the extracted page info (title, text, tags, etc.) needs to match a query. It ranges from "extremely strict" (an exact match) to "get more results" (maximum leniency, matching just a few entered characters).
- Text (or search) snippet is the description shown under each search result. It can be plain text or a collection of Data Points, set up in the "Data Structuring" section of the project page.
There are also some advanced settings here related to page boosting:
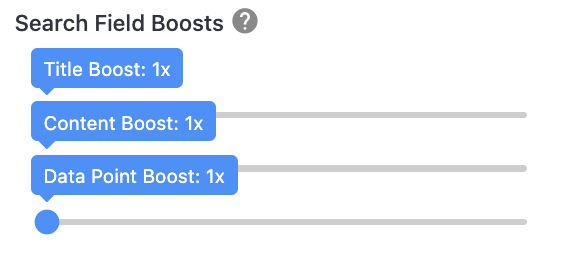
Boosted pages rank higher than others automatically. For example, if a query match appears on several pages — one in the title, another in the description — you can set which one ranks higher by default. You can create multiple boosting patterns with different values.
All these settings are explored in detail in our Search Settings article.
Next to "Preview Settings" is the "Search Result Configurator":

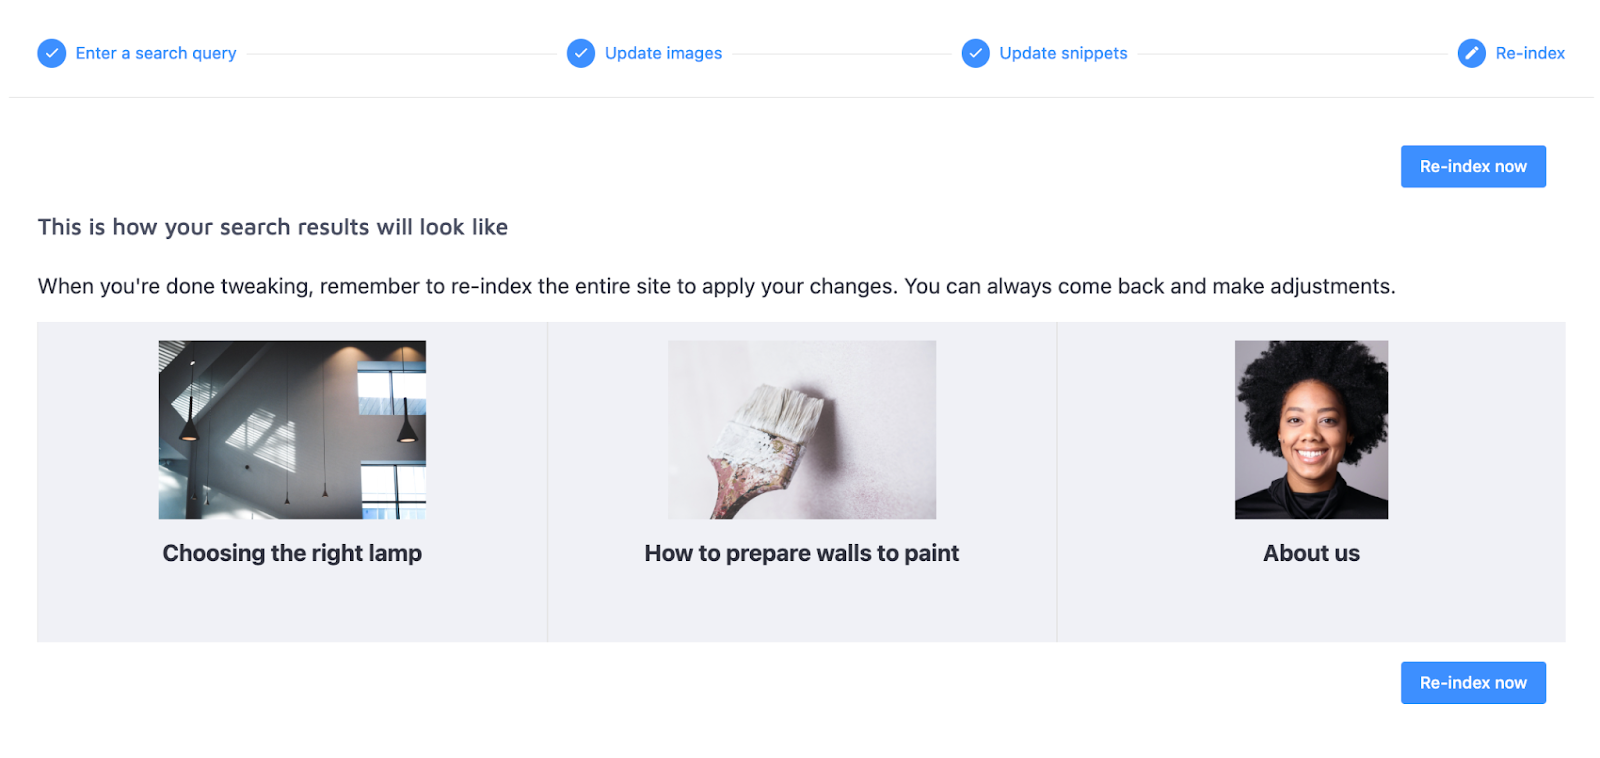
It lets you set the general look of your search results:
- Whether titles are extracted from the page's <h1>, <h2>, or <h3> element
- Whether images are detected automatically, selected from the page's content, or not displayed at all
- Whether the search snippet uses the Open Graph description tags, the first two paragraphs of the page's text, or nothing at all
Data Structuring
The next section is "Data Structuring". It has three tabs.
"Data Points" are bits of information extracted from page content and presented consistently across similar entries — for example, sizes for products or dates for articles.
In this tab, configure Data Points to appear in search snippets or serve as extraction criteria for filters:
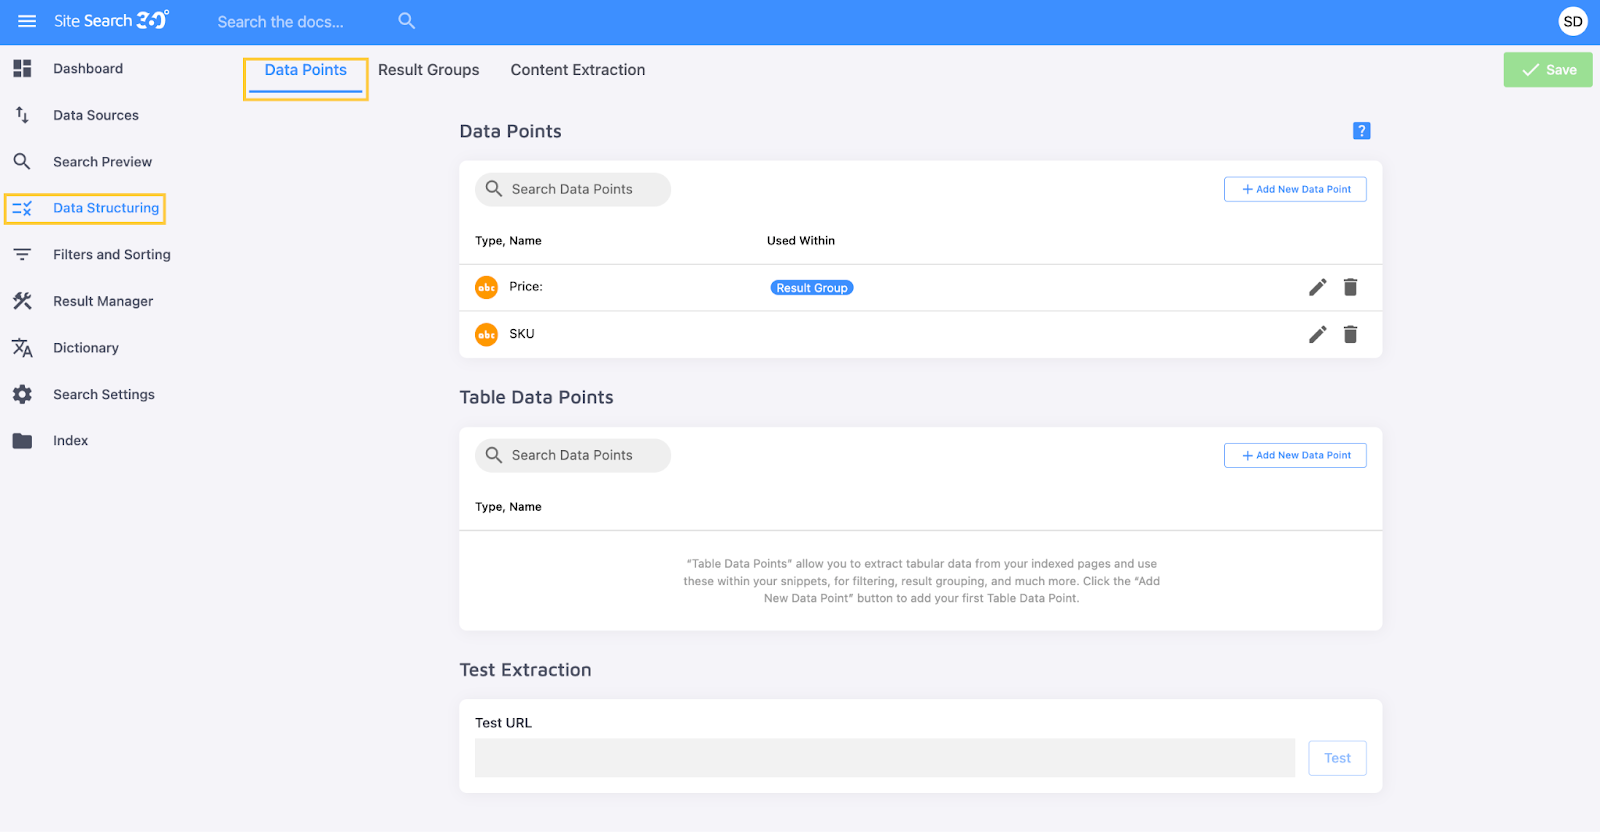
Here's what your settings can look like for a "Price" Data Point:
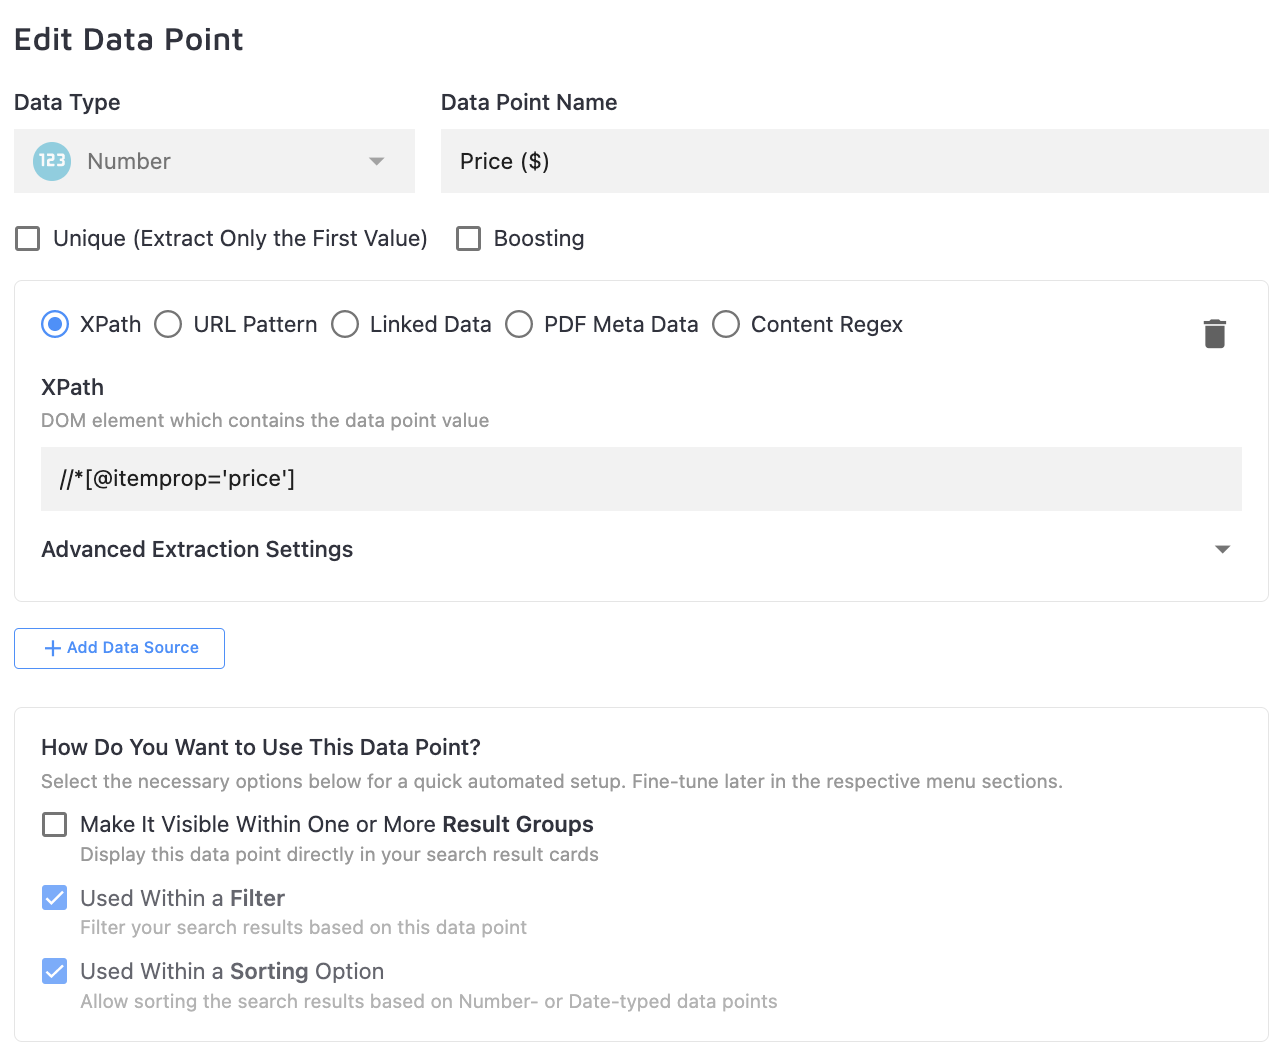
You can learn more about setting up Data Points in our step-by-step guide on the topic.
"Result Groups" let you categorize the search into separate tabs for different result types — videos, articles, FAQ entries, and more — as long as the pages in a category share a URL pattern or XPath element.
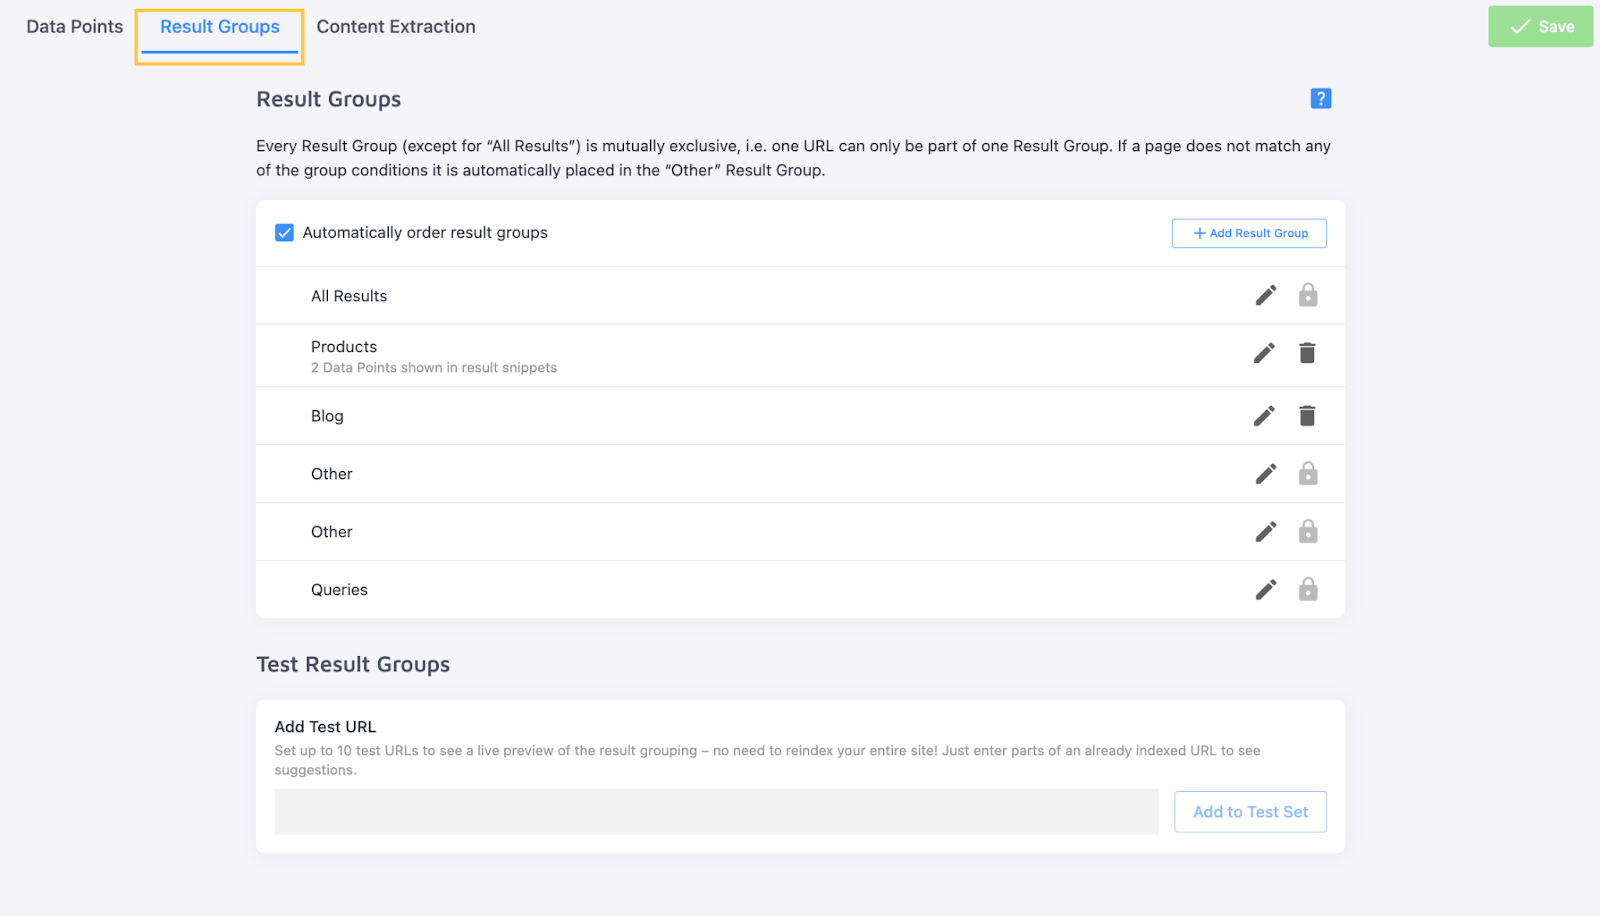
Here's what configuration for an automatically created "Products" Result Group looks like:
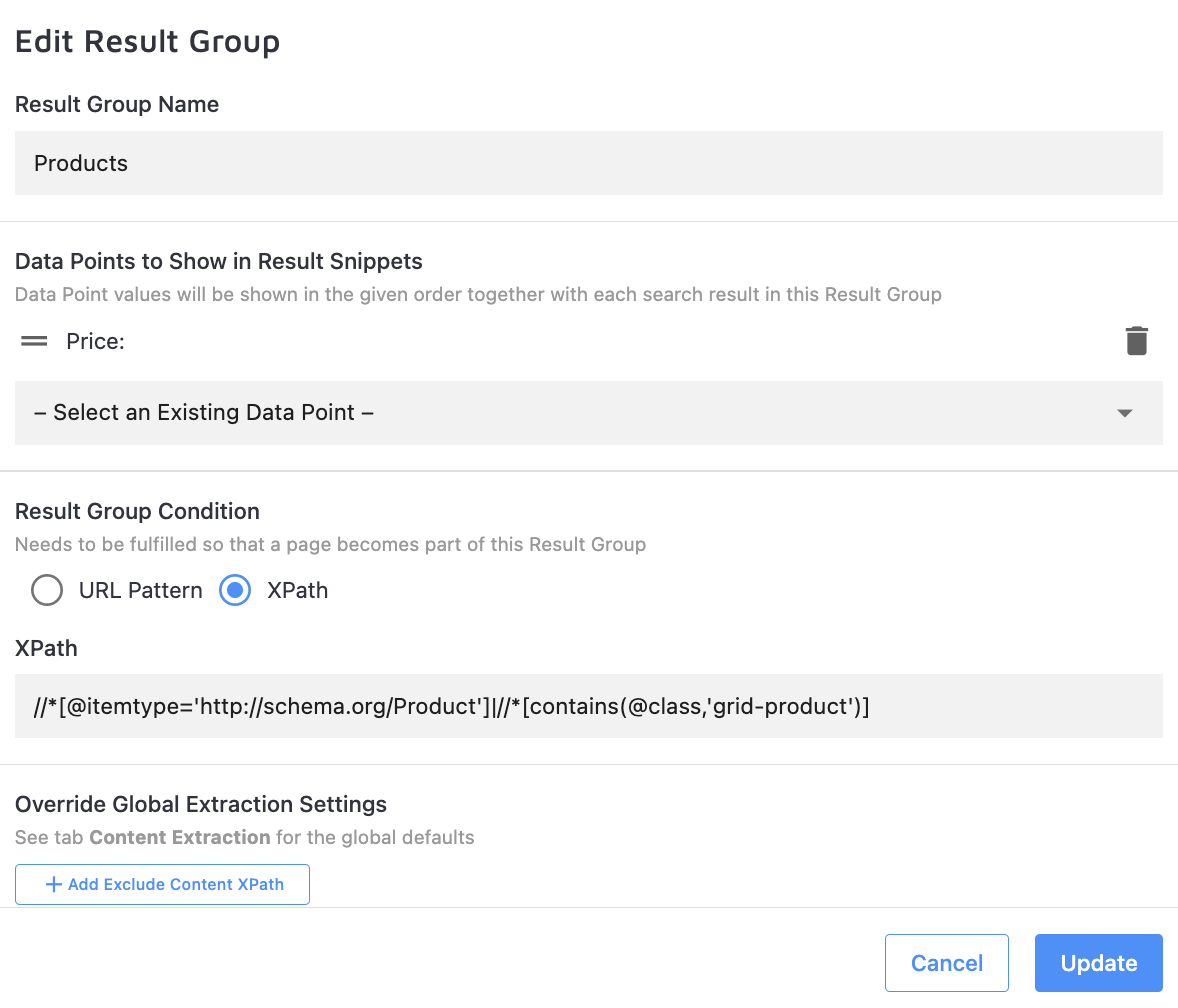
More information about search categorization is available in our article on Result Groups.
Default content extraction strategies were covered in the "Search Preview" section. For complex sites that need precise extraction of titles, images, or content across multiple patterns, use the "Content Extraction" tab:
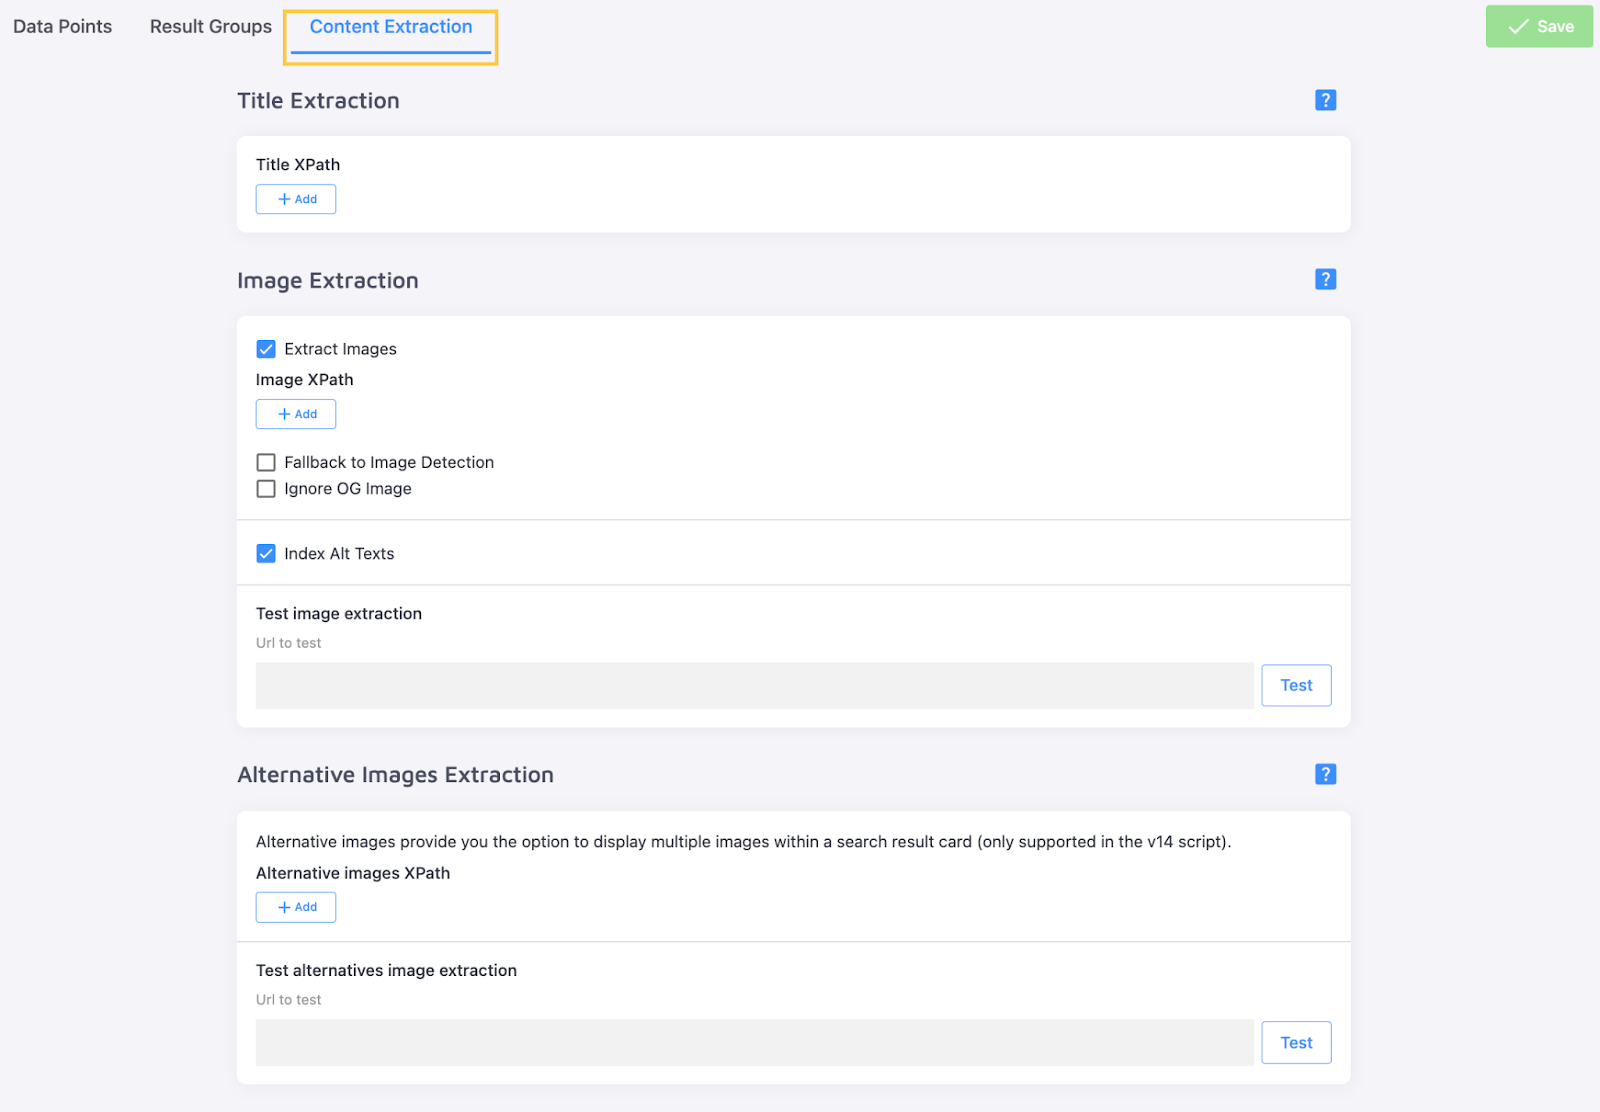
These settings let you choose which parts of a page are searchable — similar to blacklisting and whitelisting, but with XPaths. Headers, footers, navigation menus, and pop-ups are excluded automatically; you control the rest.
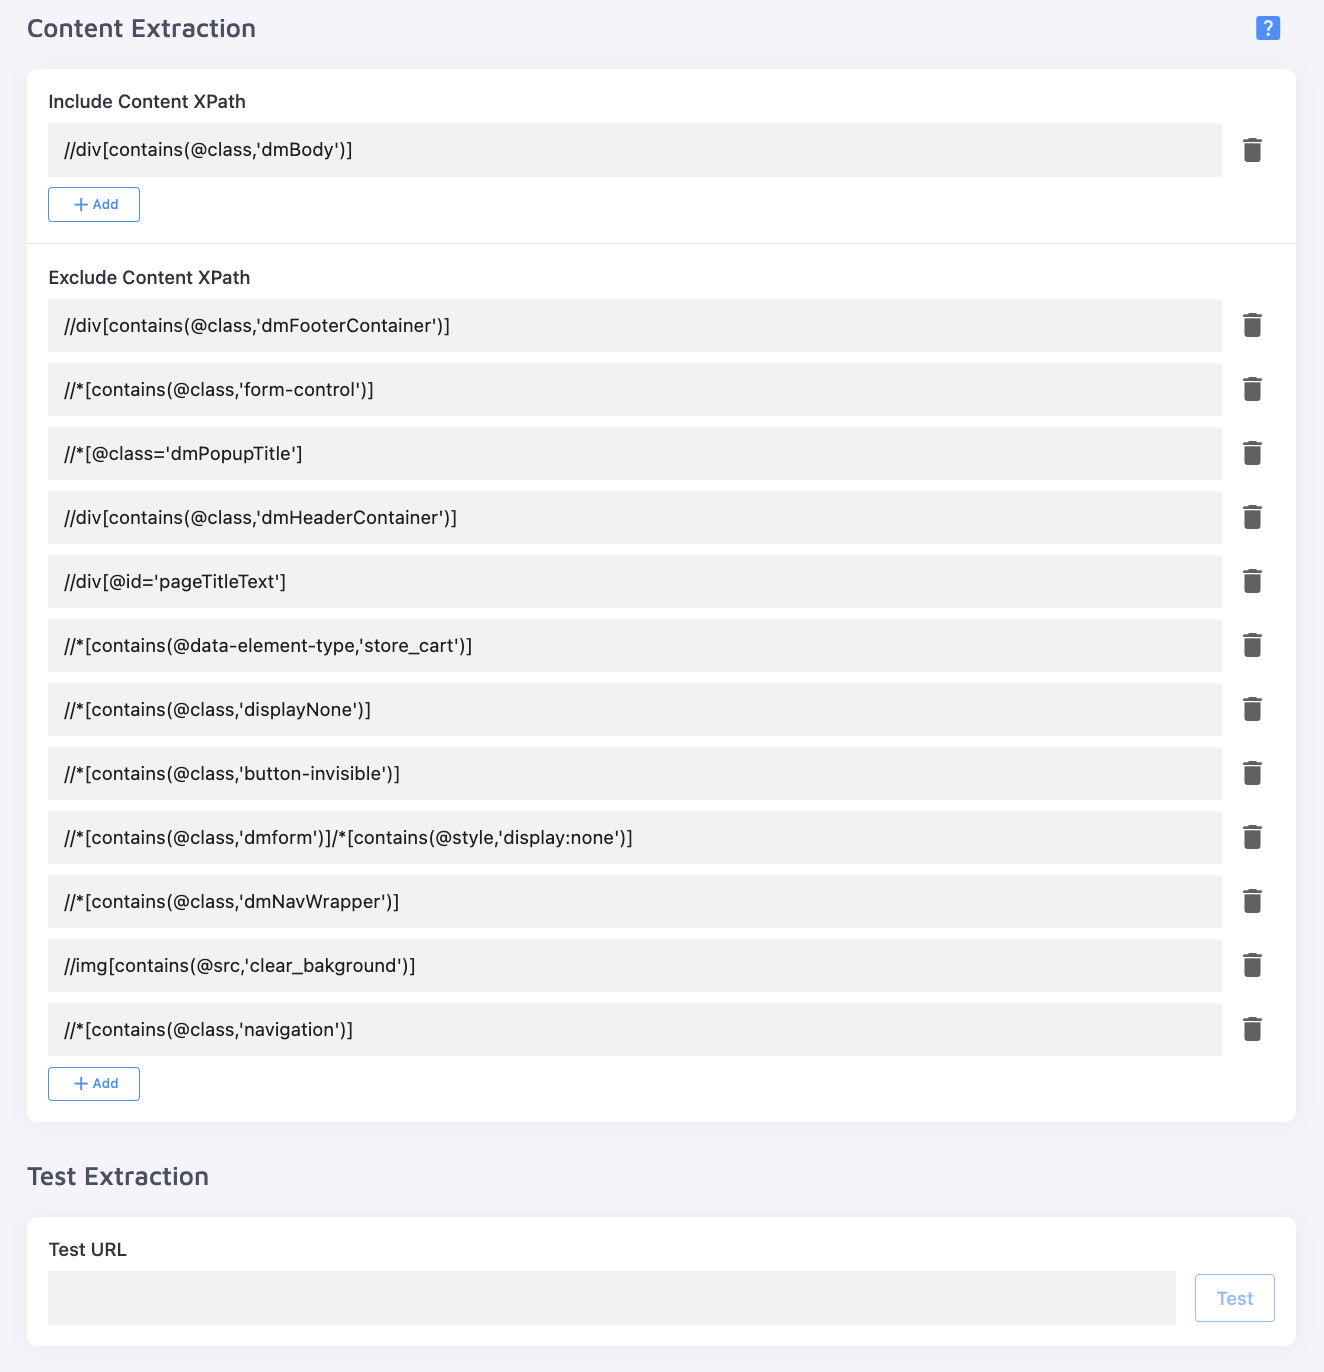
A detailed explanation of these settings' functionality is available in our article on Content Extraction.
Filters and Sorting
The "Filters and Sorting" section covers how users can refine and order results.
"Filters" segment your search based on specific Data Points — one or several in the same filter:
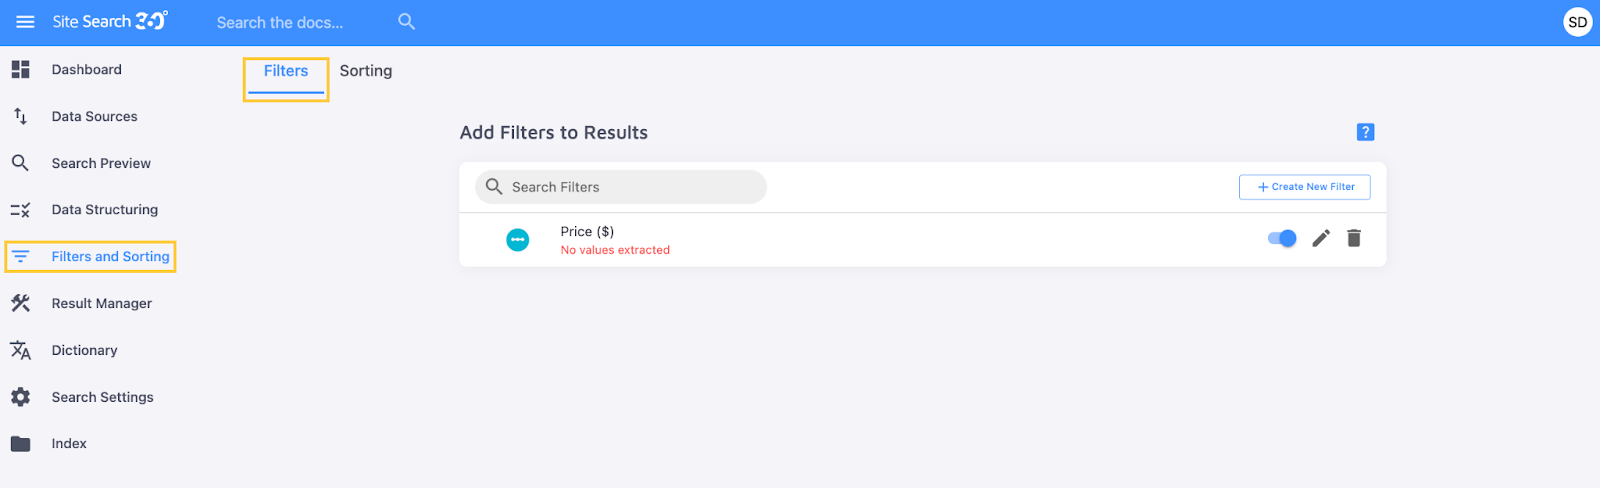
Here's a filter setup based on the "Price" Data Point:
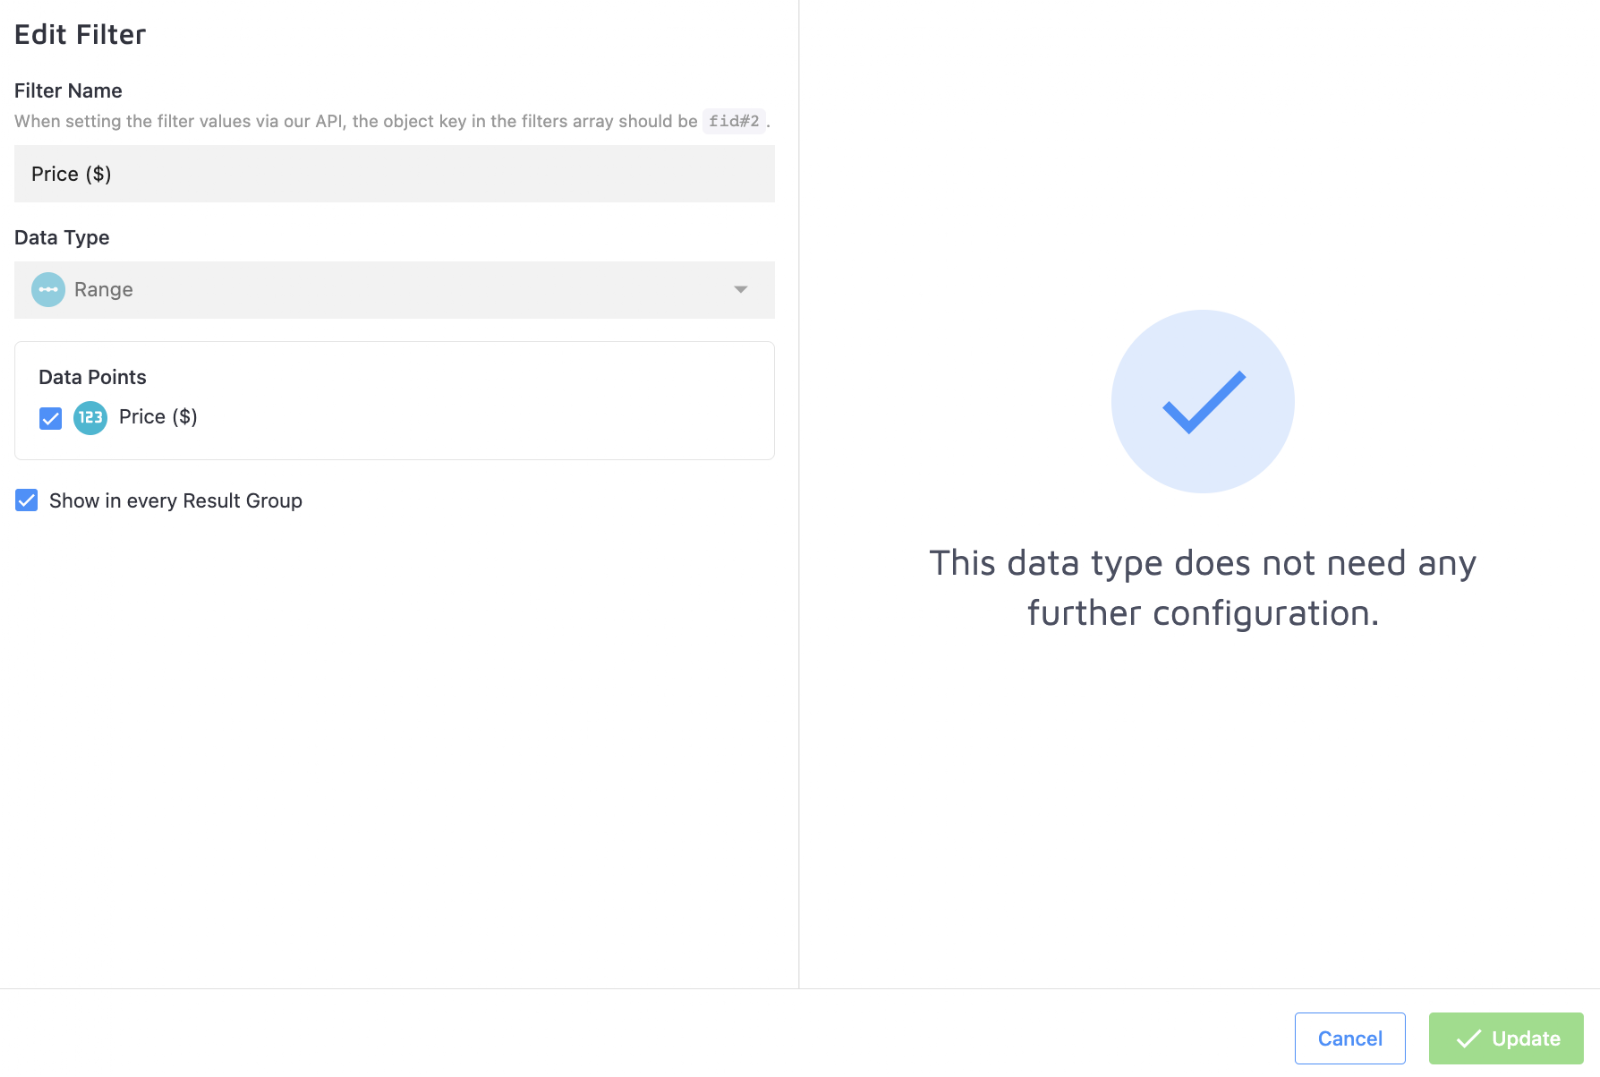
Learn more about filters in our dedicated article or see them in action in this demo.
"Sorting" options order search results based on the Data Points you create. For example, a "Price" sorting option can arrange results from highest to lowest (Descending) or lowest to highest (Ascending, shown below):
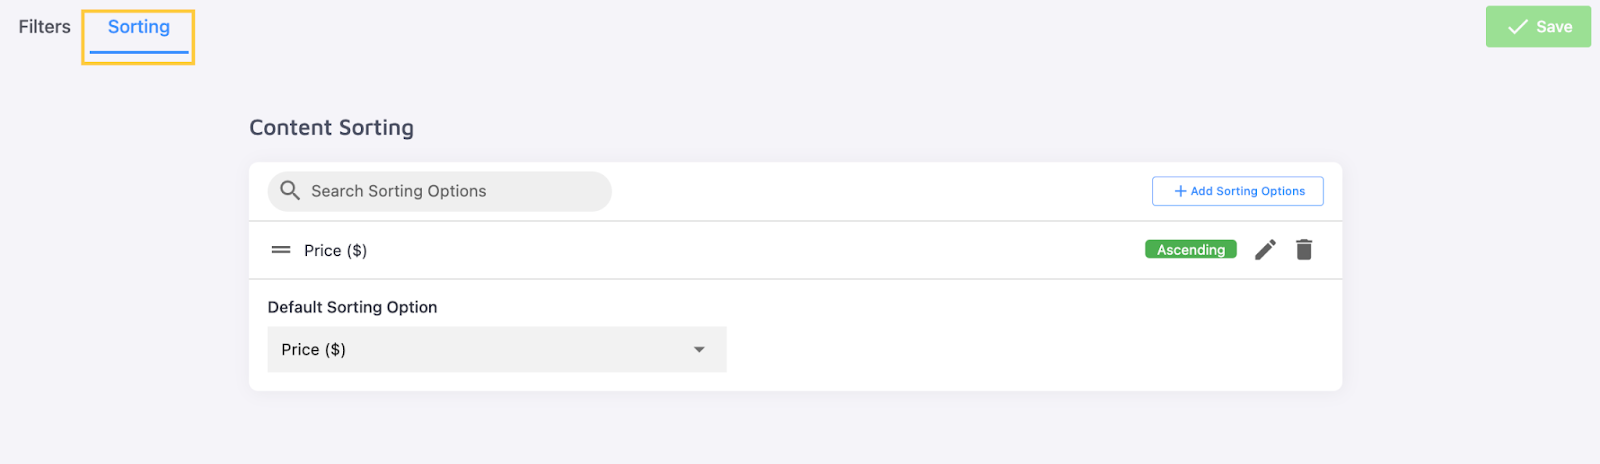
The feature is further explained in our Sorting Options article.
Result Manager
The "Result Manager" section gives you direct control over search results, beyond the look-and-feel settings covered in other sections.
"Result Mappings":
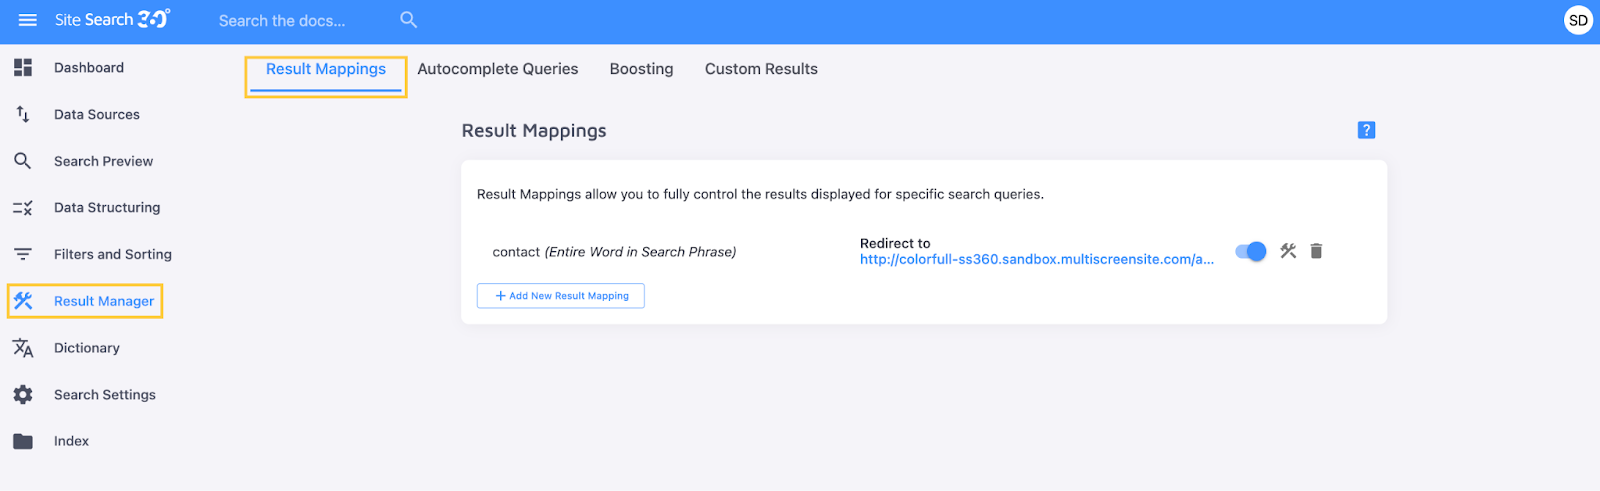
Result Mappings will allow you to:
- Customize a unique set of results for any query, automatically applying specific filters and filter values, and choose a timeframe during which default results are reordered
- Replace search results for one query with pages relevant to another
- Redirect a query to a specific page rather than show default search results
Here's an example: a query that would normally return one result instead redirects users directly to that result's page:
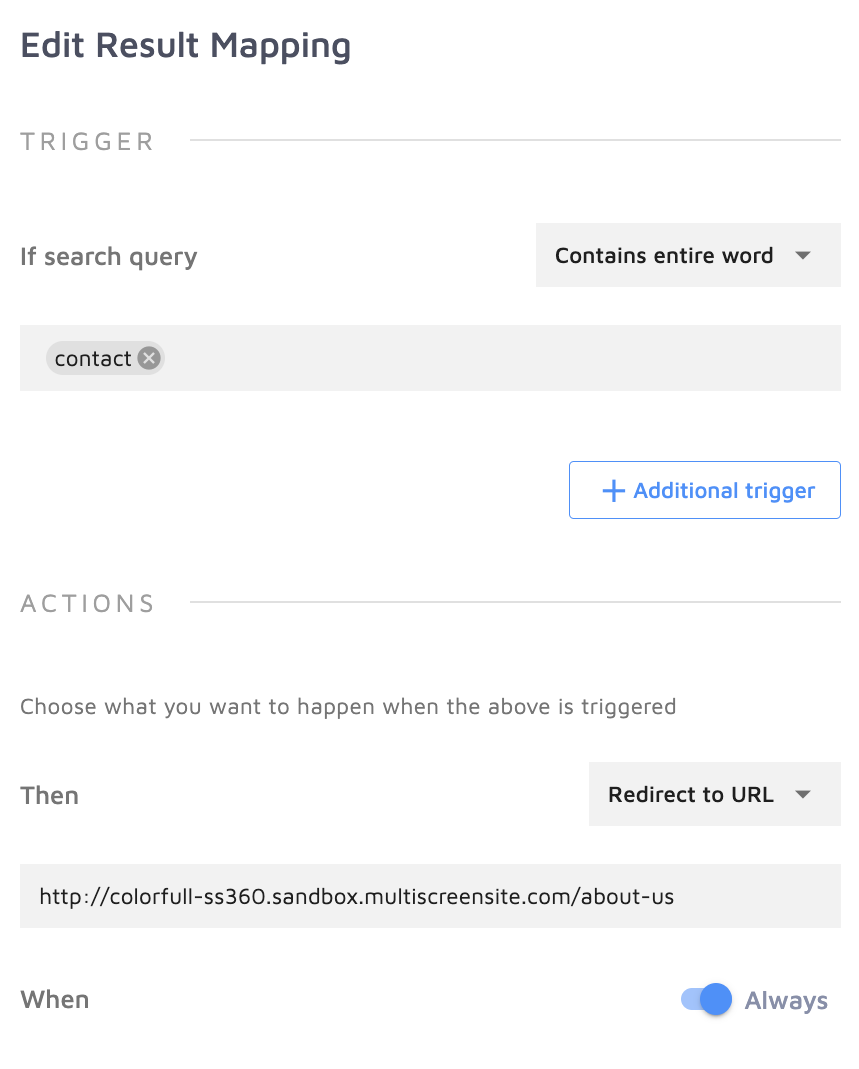
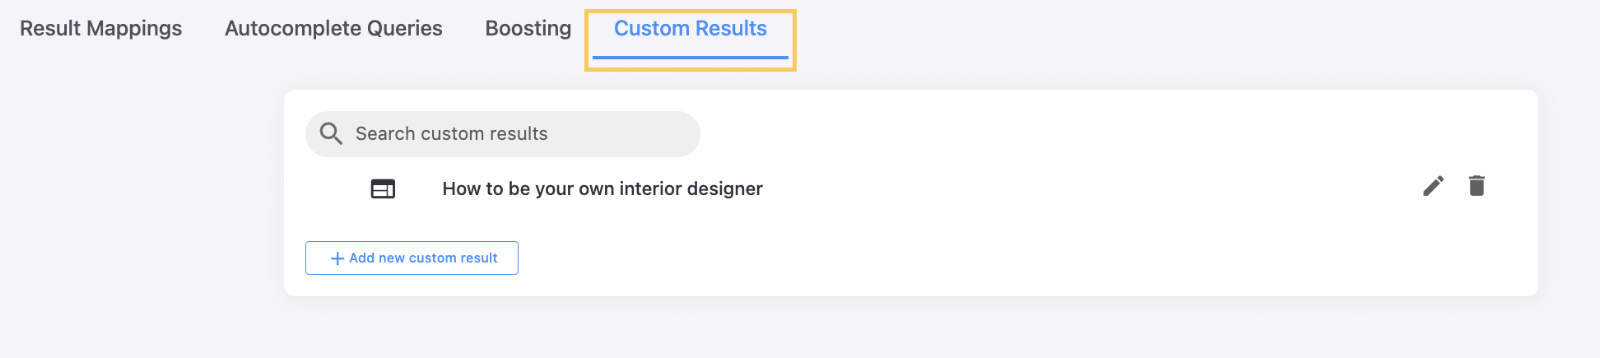
Result Mappings aren't limited to pages from your site — you can add pages from other domains or create entirely new ones. Regular pages and promotional banners created this way appear in the "Custom Results" tab:
This customization also extends to search suggestions, through "Autocomplete Queries":
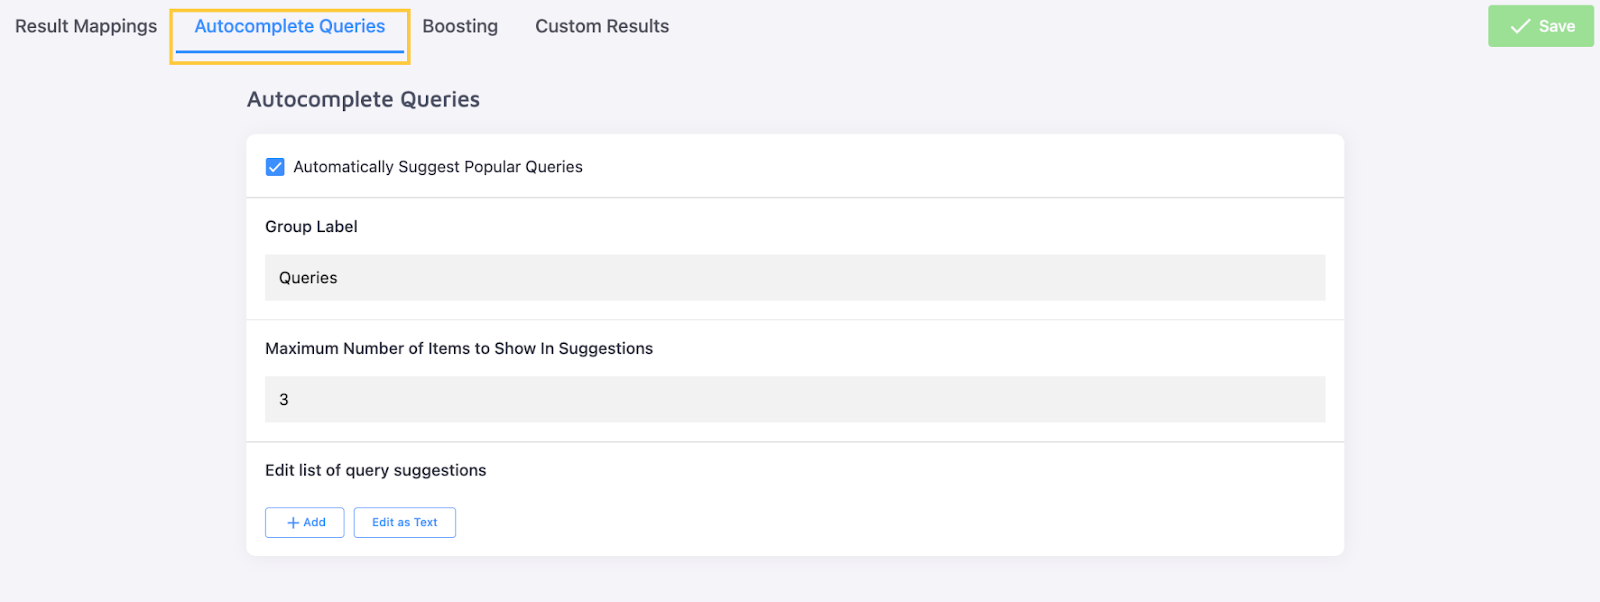
Show queries your users search for most often, automatically, or add custom queries that appear when they match the first few letters typed into the search box.
All three of these customization options are explored in our article on Result Mappings.
Finally, there's the "Boosting" tab:
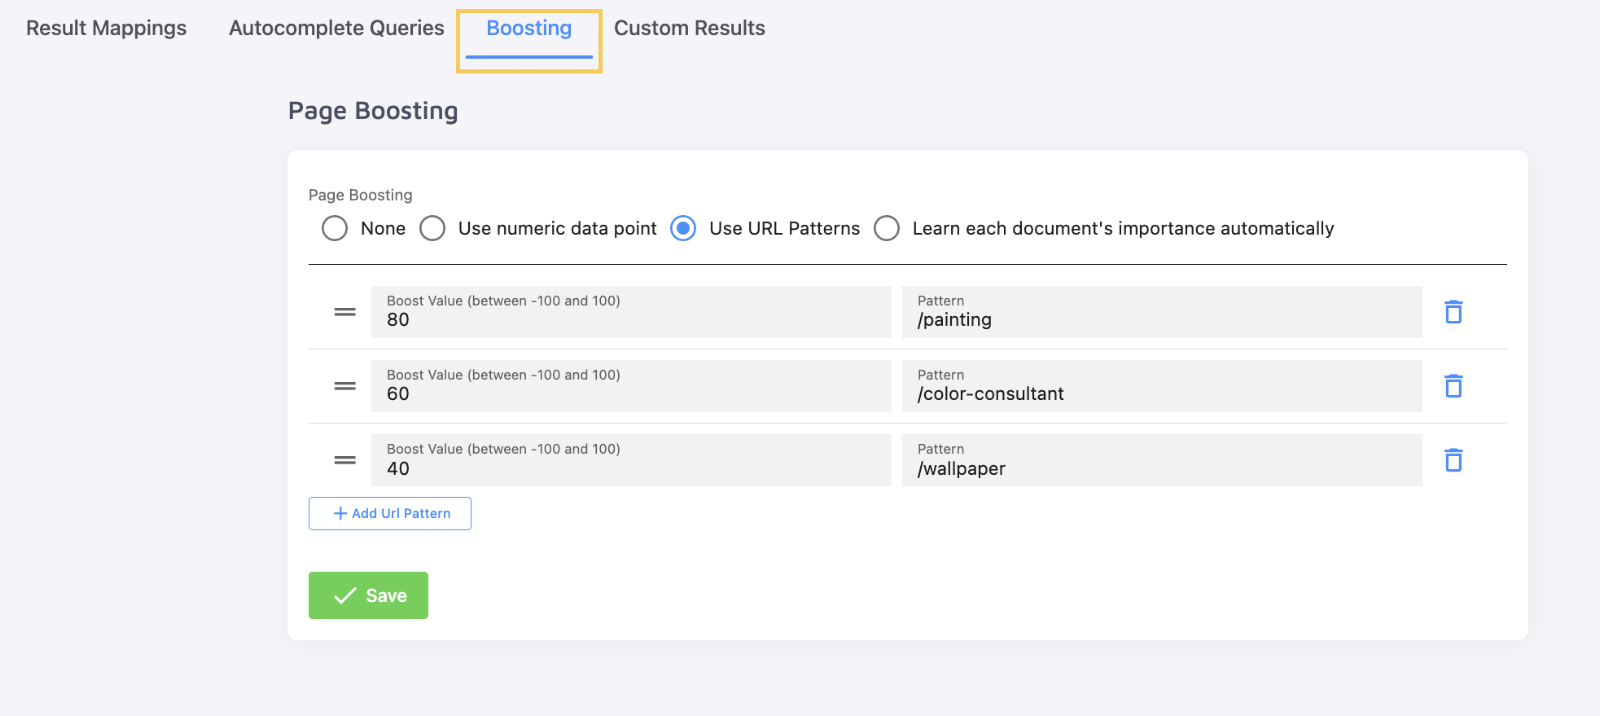
Boosting was already covered under "Preview Settings". Boosting in this tab applies to URL patterns that group pages, rather than individual page elements. Use "Preview Settings" to rank pages higher based on where a query match appears (title or snippet). Use the "Boosting" tab to rank all pages matching a URL pattern — for example, all /product/ pages above /blog/ entries.
Dictionary
"Dictionary" also customizes search results, though with less range than Result Mappings.
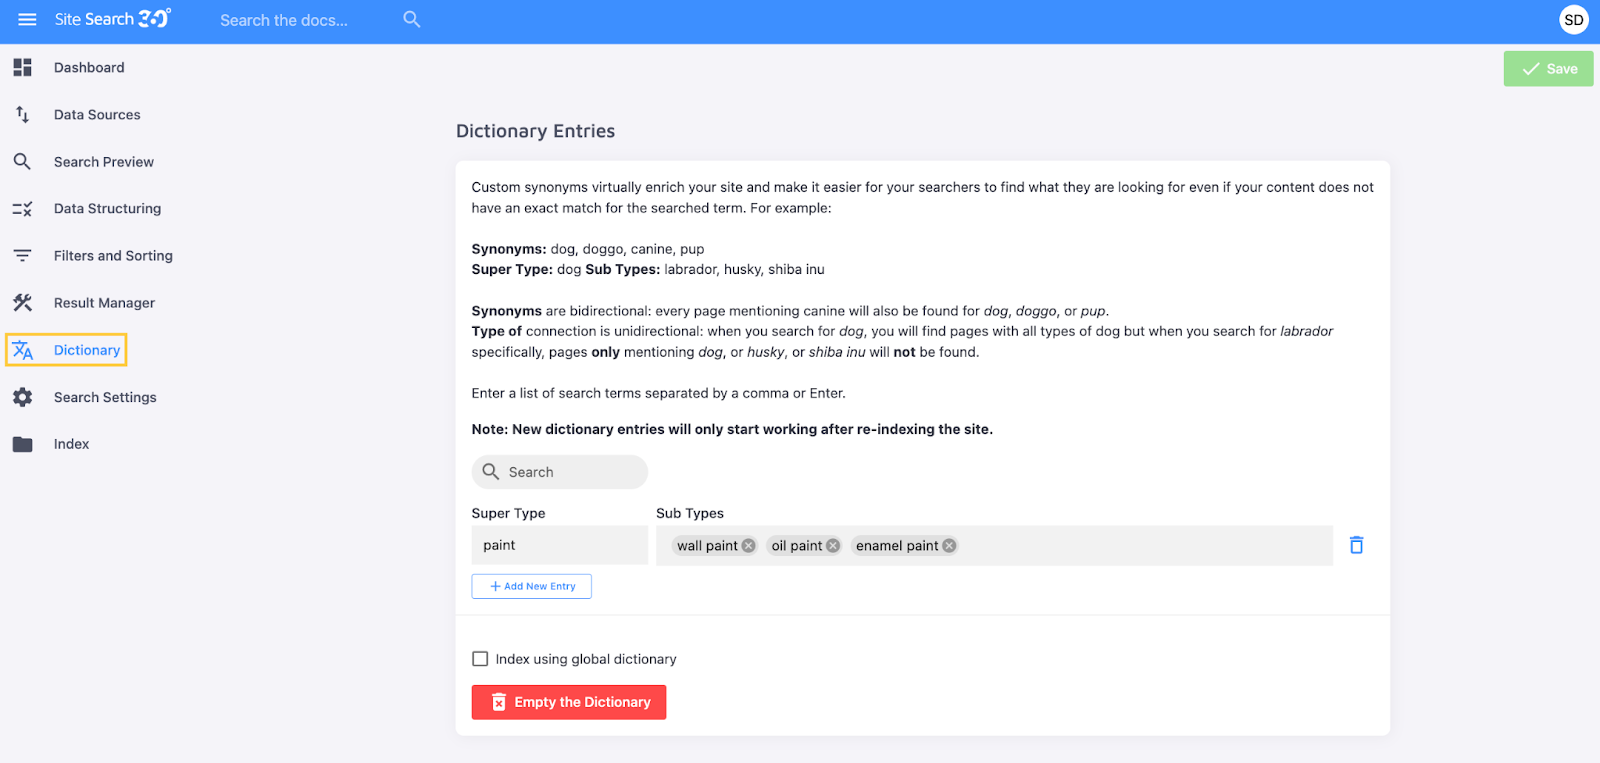
Make search results for one query appear for a different query, and vice versa, by setting the queries as synonyms. Or create a one-directional "type of" connection, so results for "sub type" queries appear when someone searches for the "super type" — but not the other way around.
To find search terms that could enrich your site for SEO, add a link to any page here and see what the system proposes:
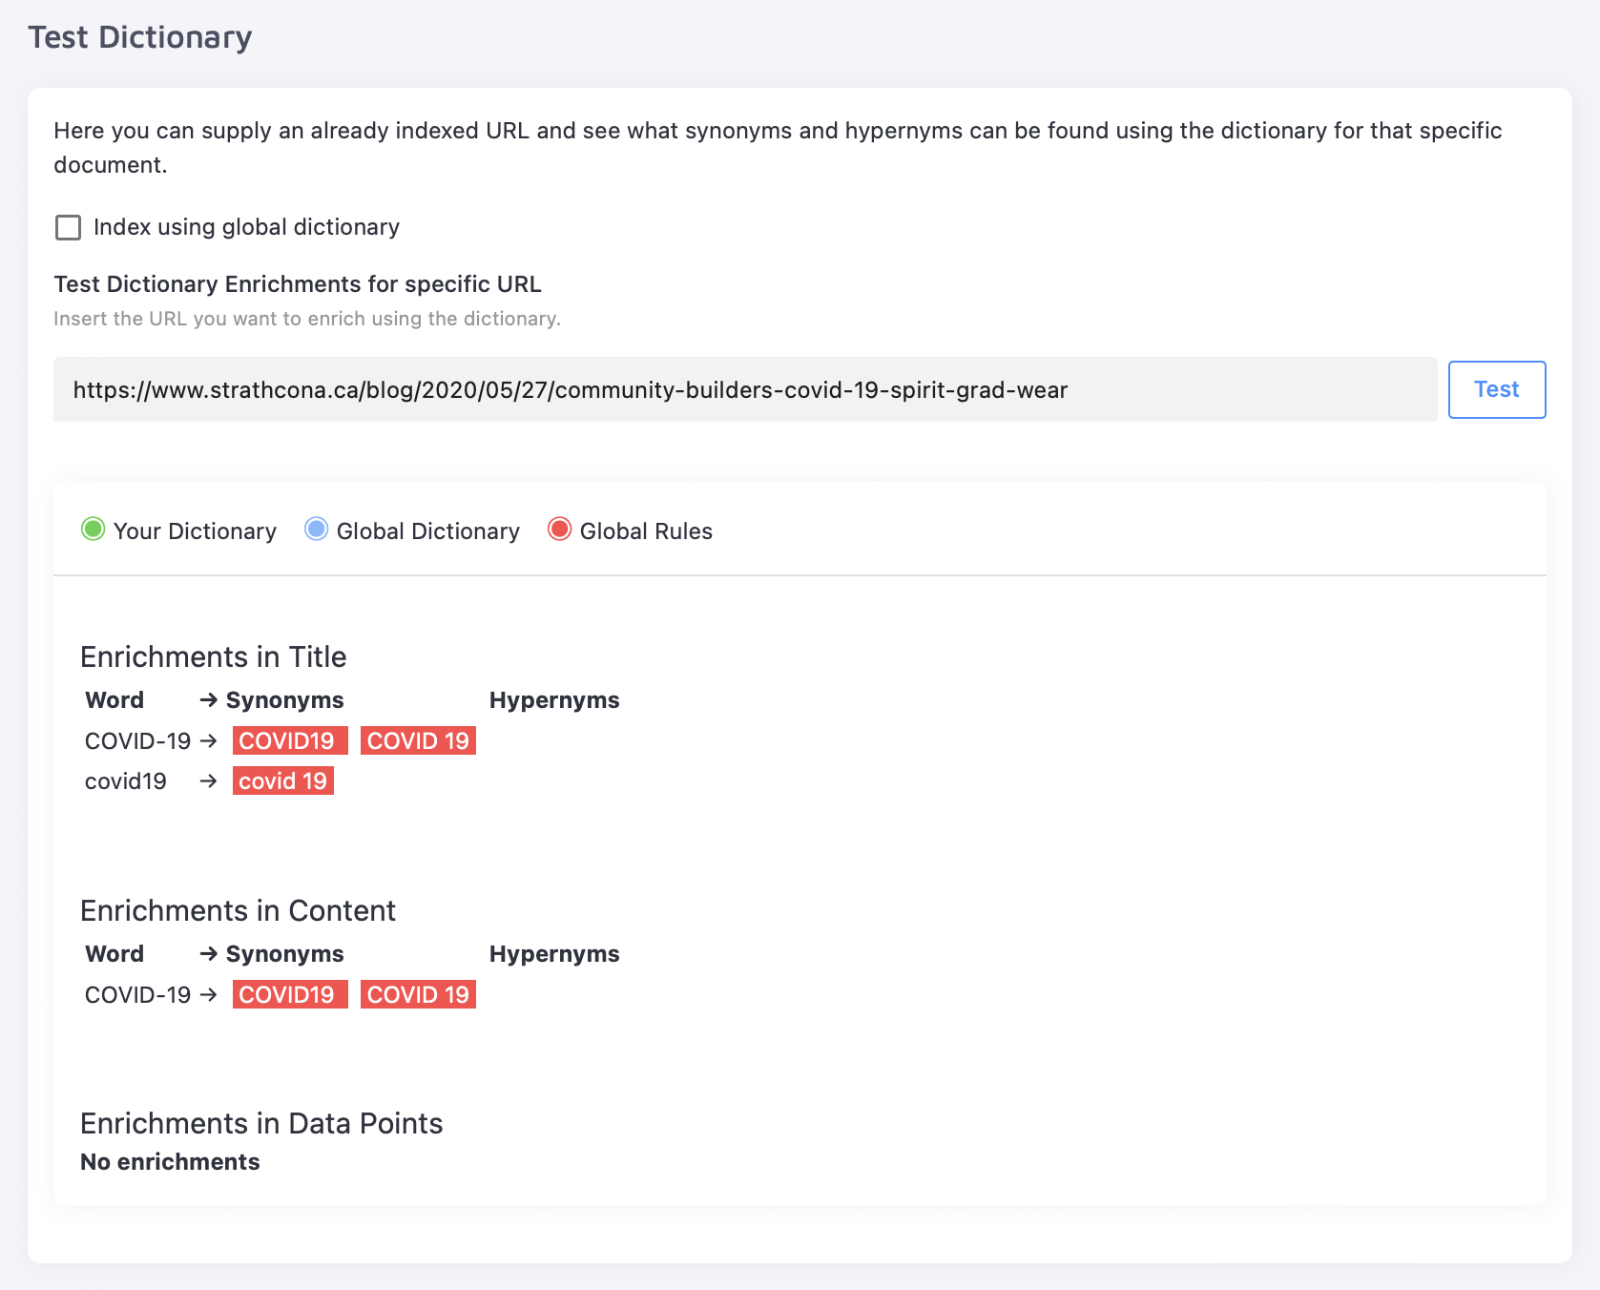
Learn more about what "Dictionary" has to offer in our dedicated article.
Search Settings
"Search Settings" controls the search's general behavior.
The "General" tab covers all the "Preview Settings" we've already discussed.
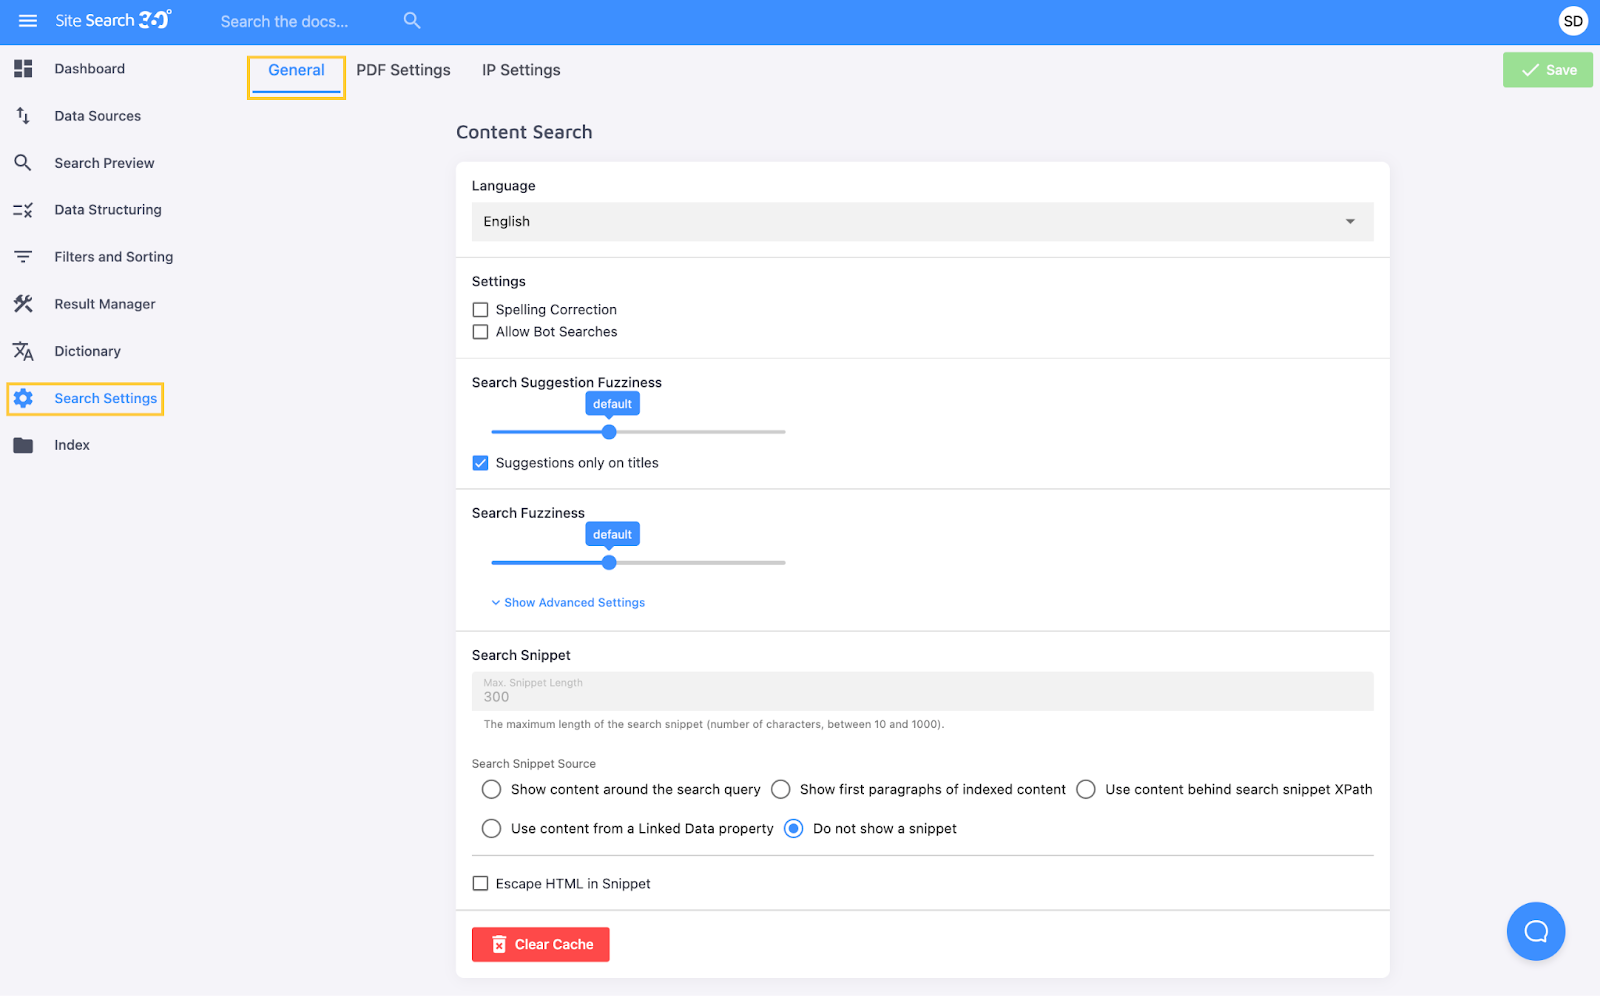
At the bottom of this tab, a button clears your project's cache:

"PDF Settings" correspond with how your PDFs' titles, content and thumbnails are extracted:
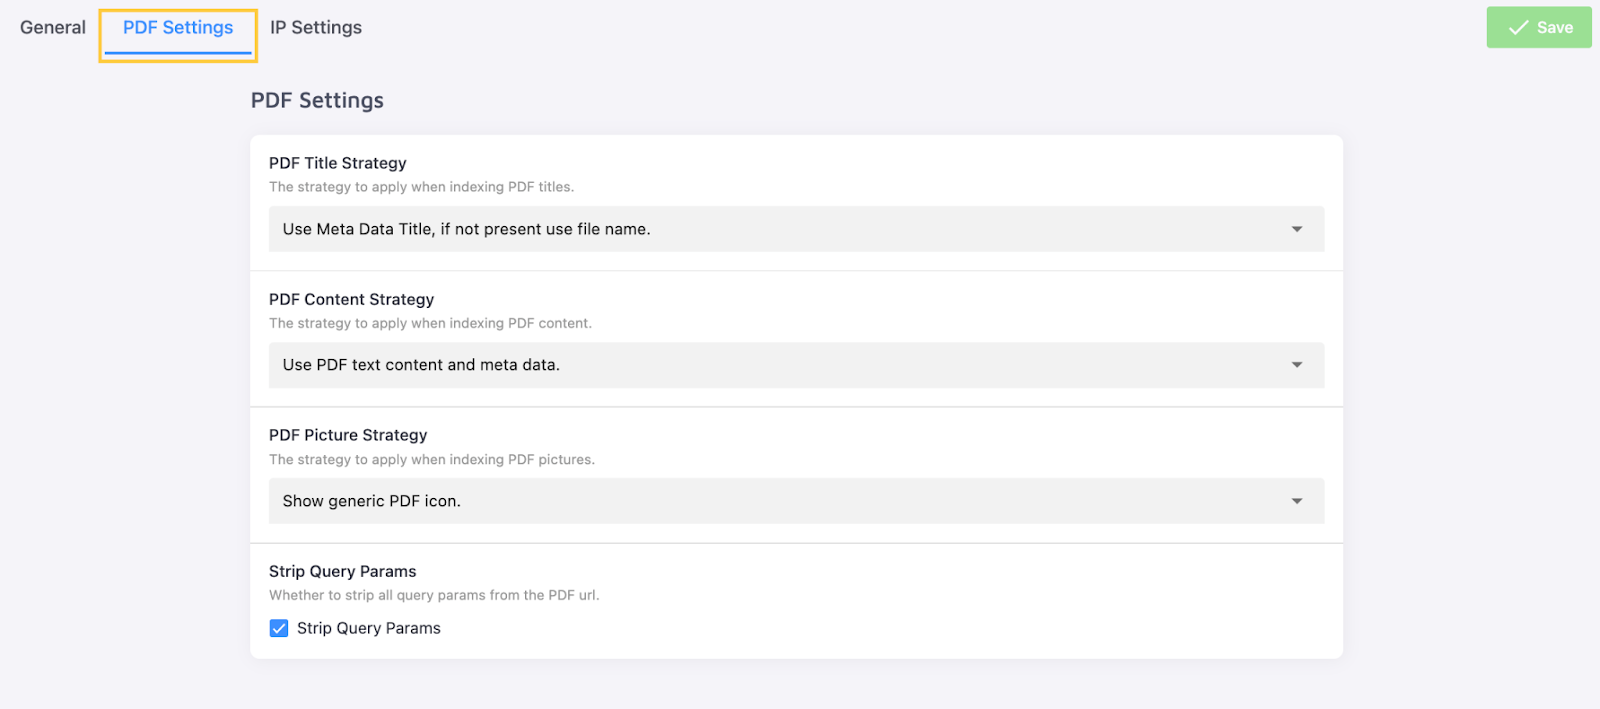
PDF Indexing is available only on the paid "Columbo" and "Holmes" plans, with a 15 MB size limit.
"IP Settings" is about the accessibility of your search:
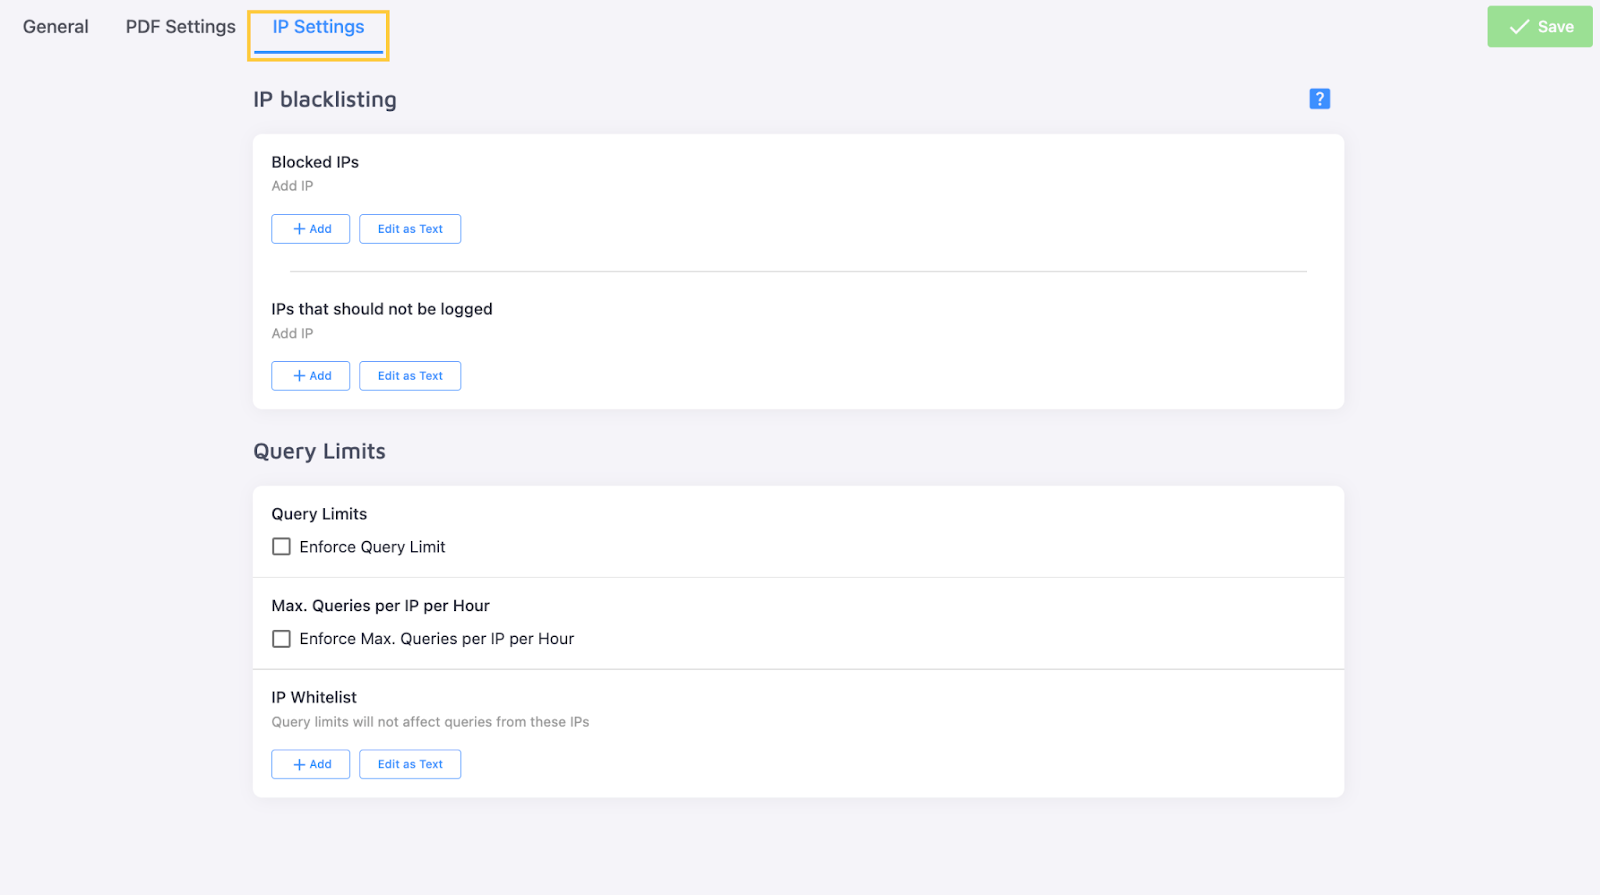
Prevent certain IPs from using the search, or exclude them from your search statistics. This tab also lets you enforce query limits so you're not charged for exceeding your plan.
Our Search Settings article explores all these tabs in great detail.
Index
The "Index" section lists all the pages the crawler has indexed from your "Data Sources":
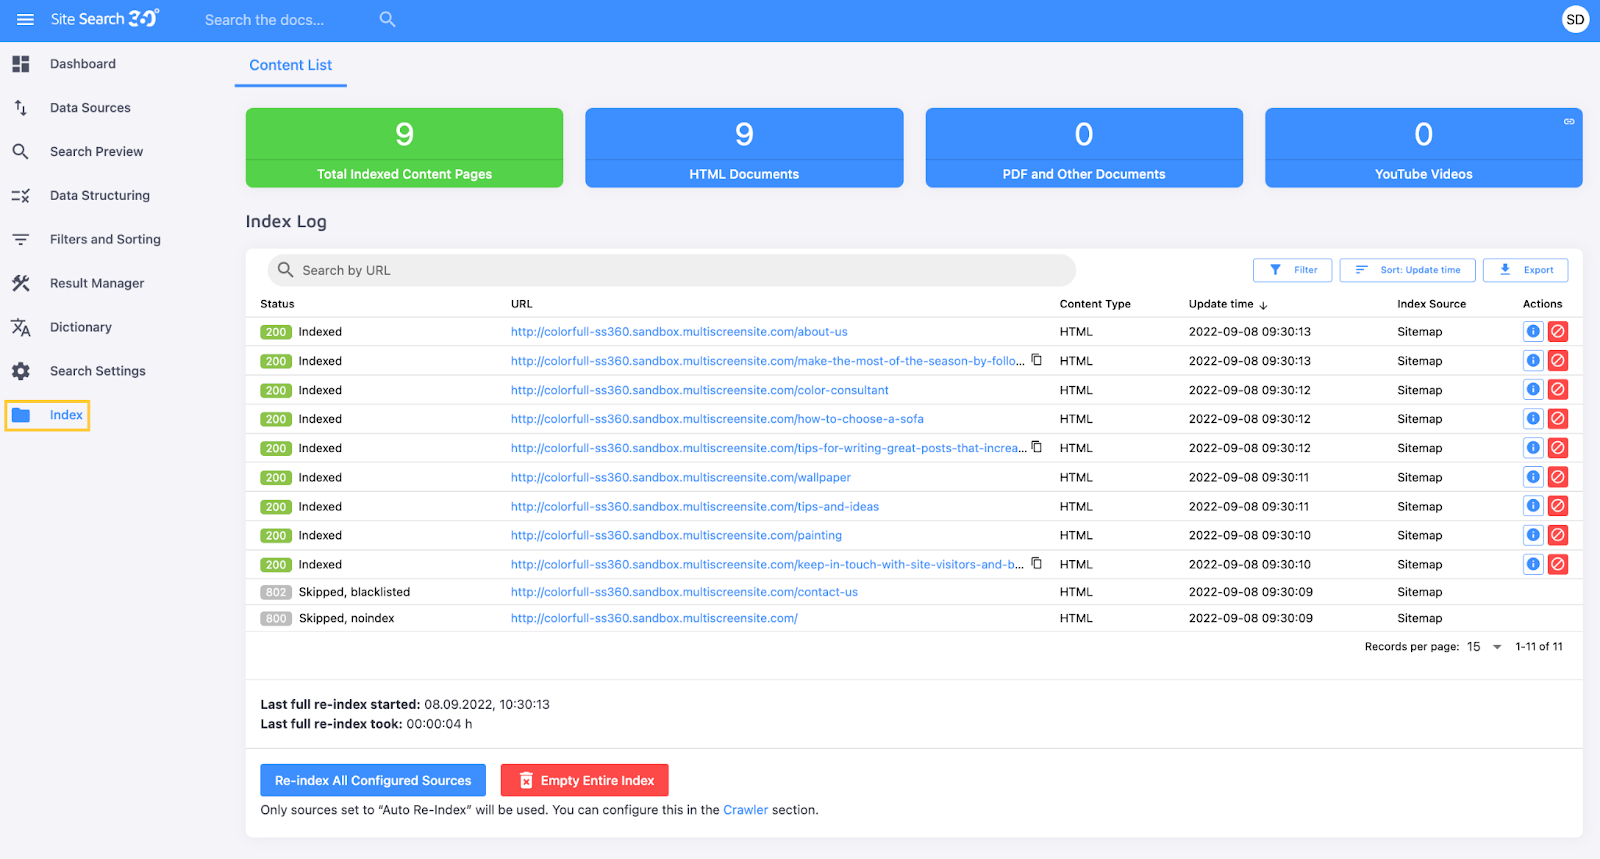
Filter pages:

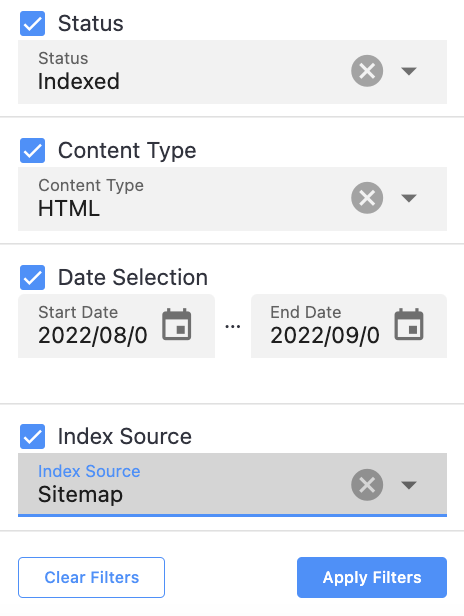
Sort them by when they were indexed or updated:

Export this data:

Each page has two buttons on the right:
- The "Show Details" button opens a window showing all content the crawler sees on the page and can make searchable, same as in "Search Preview":

- The "Remove" button deletes the page from the Index and your search results:

Below the table are two more buttons: one starts a full recrawl of your Data Sources, updating existing pages and adding new ones; the other clears the Index Log entirely:

This section is also where you can manually add new pages to your Index Log:

or remove them from it:
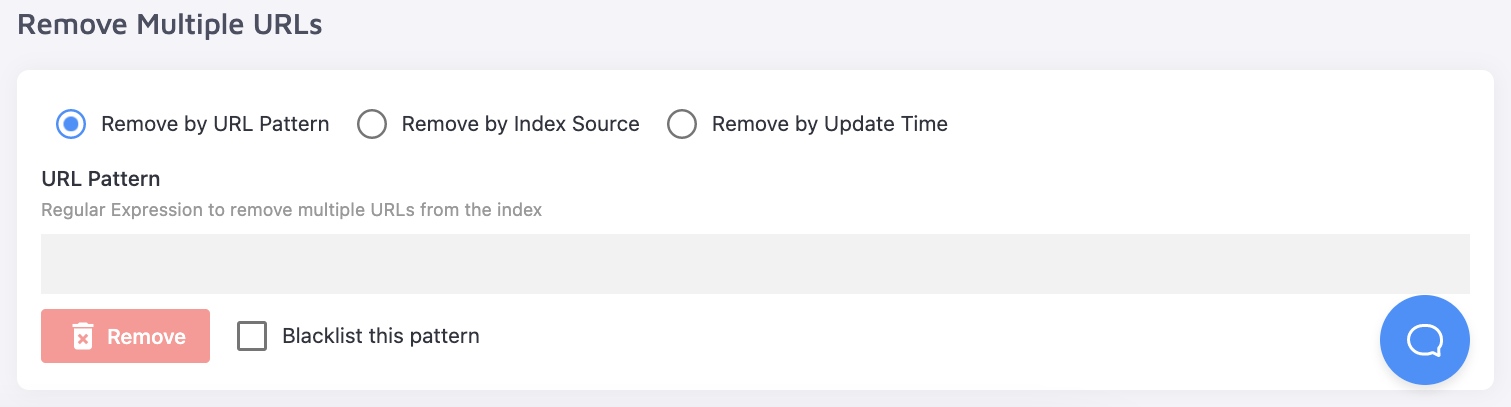
Manually added or removed pages revert after a full re-index, so use this feature for testing rather than as a permanent indexing method.
Once you've configured the search in the site editor and the Control Panel, press the Republish button again to apply the changes to the live site.
Republish the site each time you make configuration changes. This triggers a full re-index, after which the search's functionality updates accordingly.
Manual Integration
The Duda app has some limitations compared to Site Search 360 projects on non-Duda sites:
- There's no free trial for exploring the "Batman" plan's capabilities
- The Free plan is limited to 10 pages; "Columbo", in its turn, is limited to 200
- Search needs to be added and set up separately for desktop, tablet and mobile

- Results can only be shown in overlay - they can't be embedded or displayed fullscreen
- PDFs can only be indexed if they are listed in a separate sitemap
Despite these limitations, the Duda app offers advantages over manual integration:
- Paid plans cost less: manually integrated "Columbo" and "Holmes" are $9 and $49 per month, while the Duda versions are $5 and $30
- Manually integrated "Columbo" projects include Site Search 360 branding in search results and suggestions; the Duda "Columbo" plan removes all branding
- Updating a manually integrated search requires waiting for the next scheduled re-crawl or manually re-indexing; with Duda, republishing the site reflects configuration changes instantly
- With Duda, no coding is required to integrate or customize the search
- Content extraction happens automatically using Duda's default sitemaps, and the widget can create Result Groups for products and blog posts out of the box
To integrate the search manually instead:
- Create an account for your site on our registration page. If the registration page redirects you to the Duda App Store, email us — we'll add your project to the Site Search 360 database and transfer ownership to you on your first login.
- Configure your search's functionality in the Control Panel — these settings are almost identical for widget and manual integrations
- Set up the design of your search in the "Design & Publish" section of the Control Panel (explored in detail in our introductory article on the Search Designer)
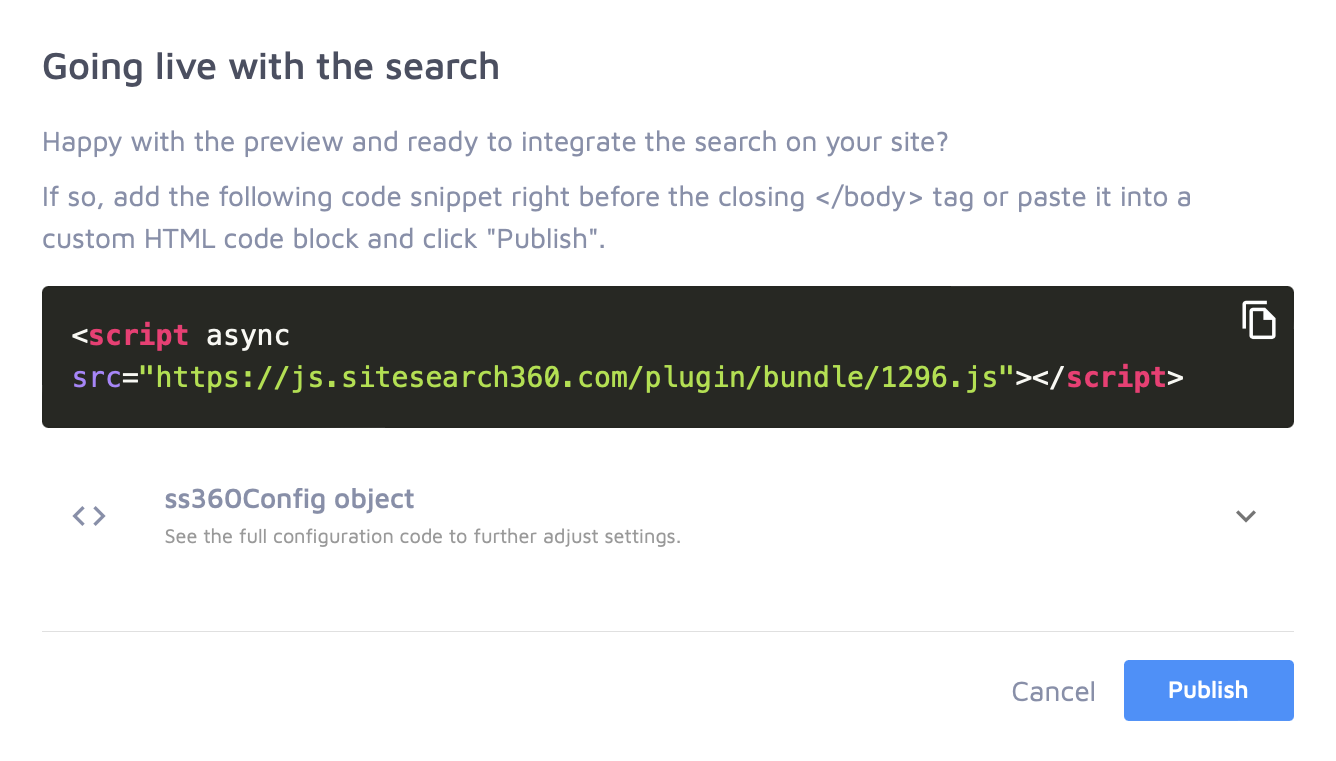
- Press "Publish" in the top right corner to get a bundled JavaScript integration code:
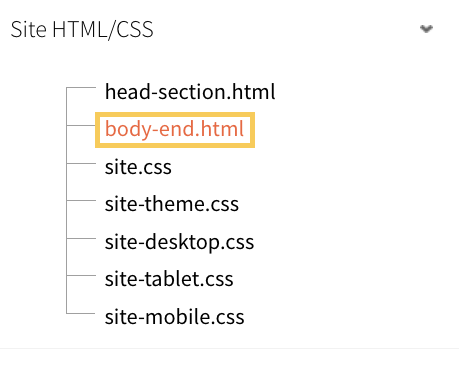
- Paste the integration code in the last line of body-end.html under "Site HTML/CSS" in Duda's Developer Mode:

- Save the changes to complete the manual integration
This process is less automated than the widget, but straightforward.
If you have questions about the app, contact our support team at any time.