Lightspeed Integration
Set up a sophisticated search for your Lightspeed shop without writing code. The Lightspeed plugin gets your search running in minutes. This article covers installation and a tour of the platform:
- Installation
- Lightspeed features overview
Installation
Follow these four steps to get the search up and running:
-
Install the plugin
Add the plugin to your Lightspeed site. Search for "Site Search 360" in Lightspeed's App Store (left side panel, under Apps -> App Store), or go directly to the plugin's page in the store.
Open the plugin and select Install App in the top right corner. This redirects you to your project's Control Panel:
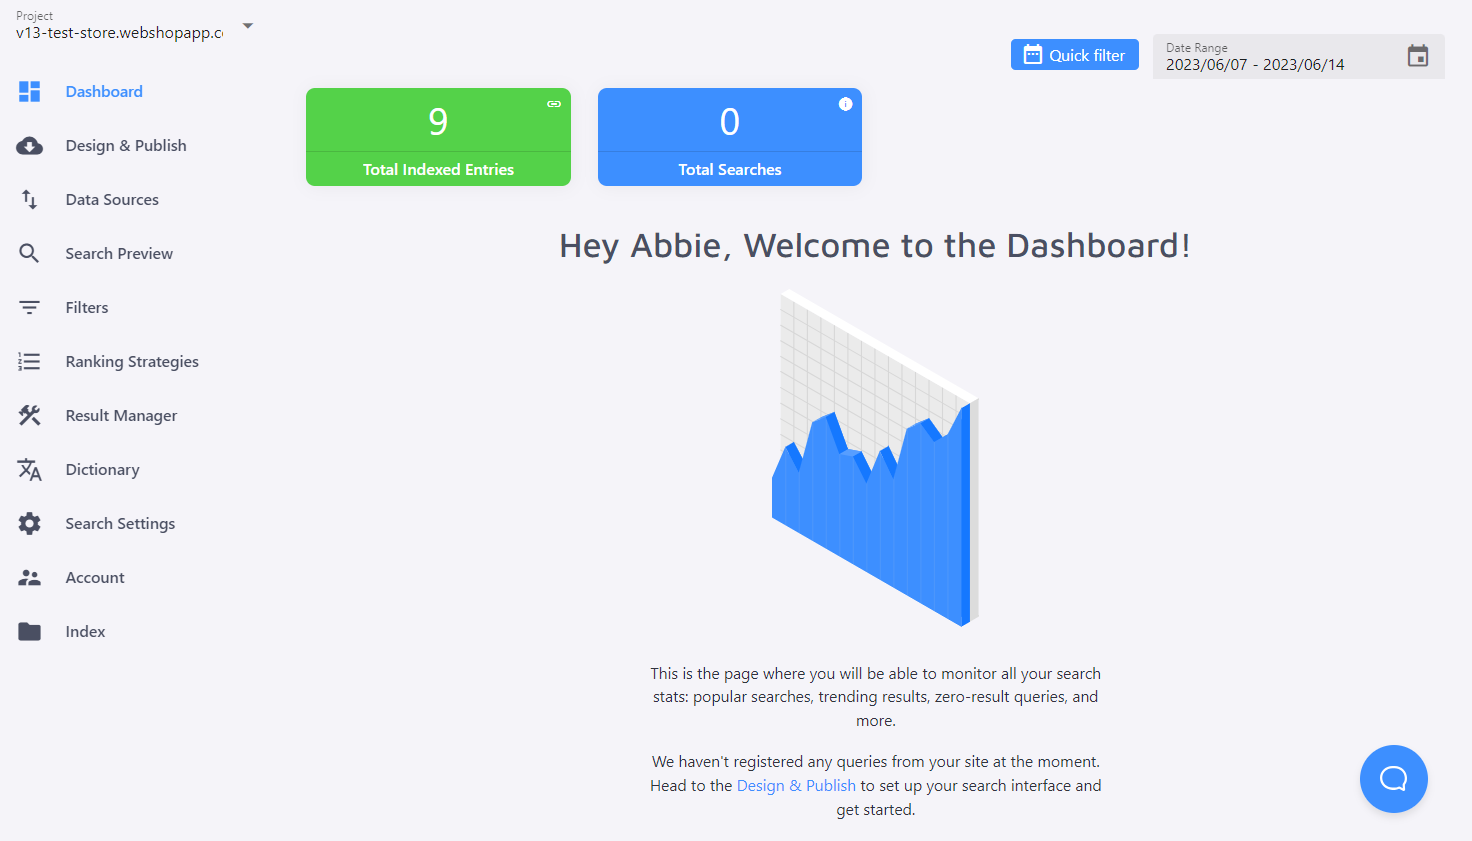
You're logged in automatically. The password is sent to the email address of your Lightspeed store owner — you can change it at any time under Account -> My Profile.
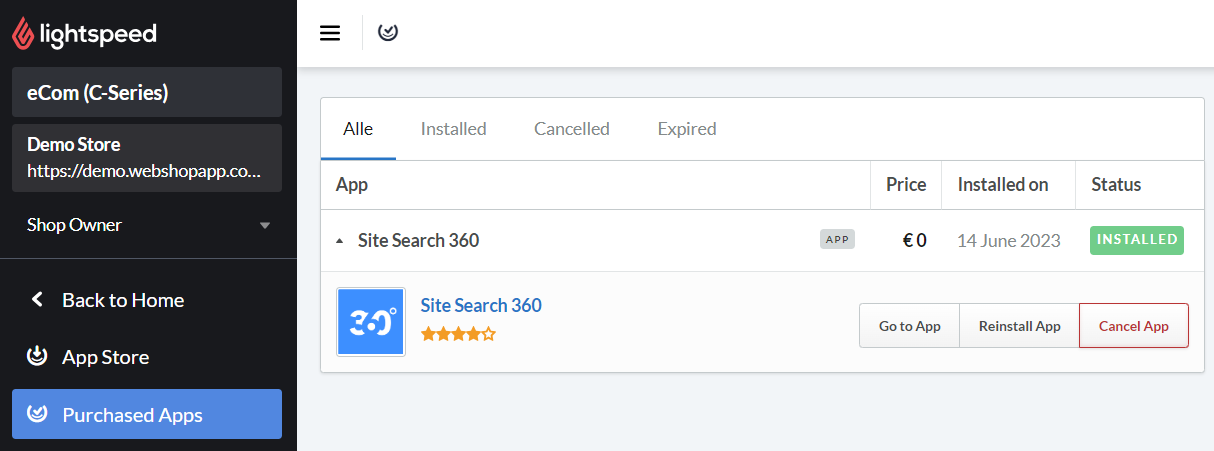
Once installed, open the Control Panel from the plugin's page in the App Store, or from the "Purchased Apps" section of the left side panel menu:

You land on your Dashboard. On first login, you only see how many pages have been indexed from your site. Once you start using the plugin, this is where you'll find search performance data — for example, which search terms come up most often and which return zero results. See Dashboard Analytics for more on the data we extract from search activity.
-
Connect Site Search 360 to a search bar
This, along with the look and feel of your search, is configured in the Search Designer.
Go to Design & Publish -> General and scroll to the "Search Bar" section, then choose "Use existing search bar" or "Add a search bar to website".
Most Lightspeed themes already have a search bar that we connect to automatically. If you're not getting results, or the button doesn't work once Site Search 360 is active, add CSS selectors to make sure Site Search 360 initializes correctly and links to all search bars if your site has more than one.
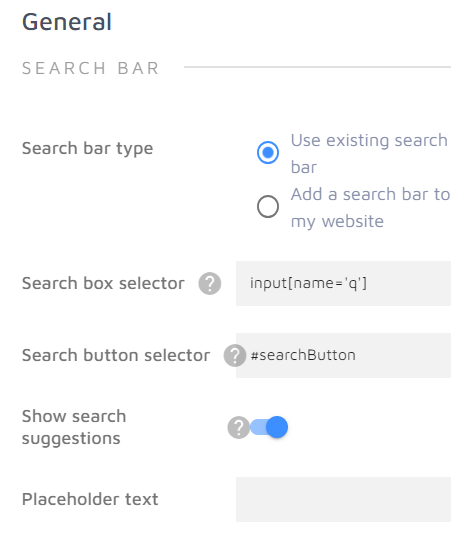
If you add a new search bar, provide CSS selectors pointing to where you want it to appear. If you want the search bar in the same place on every page, choose a selector that's present on all of them.
-
Configure the look and feel
Go through the settings in Design & Publish to configure how your search looks and behaves.
-
Activate the search on your site
Go to Design & Publish -> General:

This activates the search on your site, connecting it to your existing search bar or adding a new one. You can start using it right away.
To temporarily disable the live search, turn the "Activate" toggle OFF. You can re-enable it later without losing any of the configured settings.
You don't need to activate the search to test its settings. Use the Search Preview tab, where configuration changes are reflected immediately, or the preview window on the right side of Design & Publish to see what the search will look like on the live site without changing anything.
Lightspeed features overview
Design & Publish
This section covers your search's design and many of its settings.
See Lightspeed's Search Designer for details.
Data Sources
The Data Sources section shows every source our crawler uses to populate your search results.
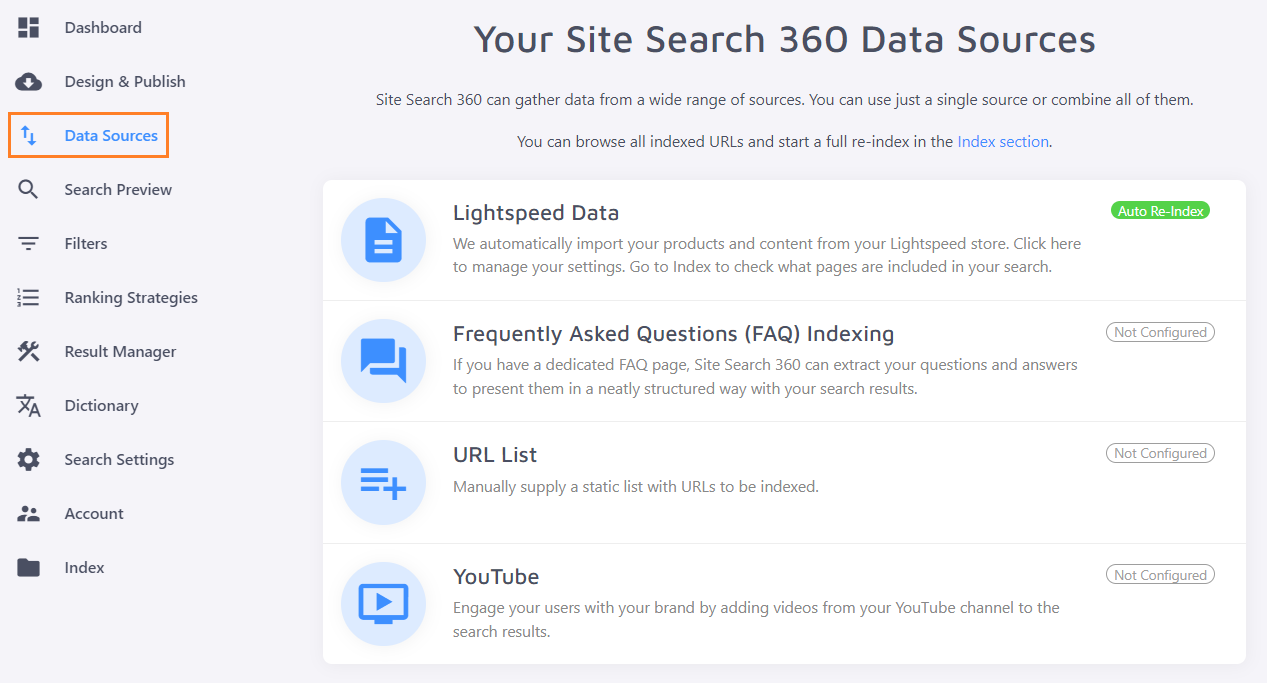
We automatically pull data from your Lightspeed store when you register. This can take up to 20 minutes to add all available pages, especially if you have thousands of products. The list of those pages is only accessible in Lightspeed's control panel under "Products".
The Lightspeed Data section controls how your Lightspeed-powered pages are presented:
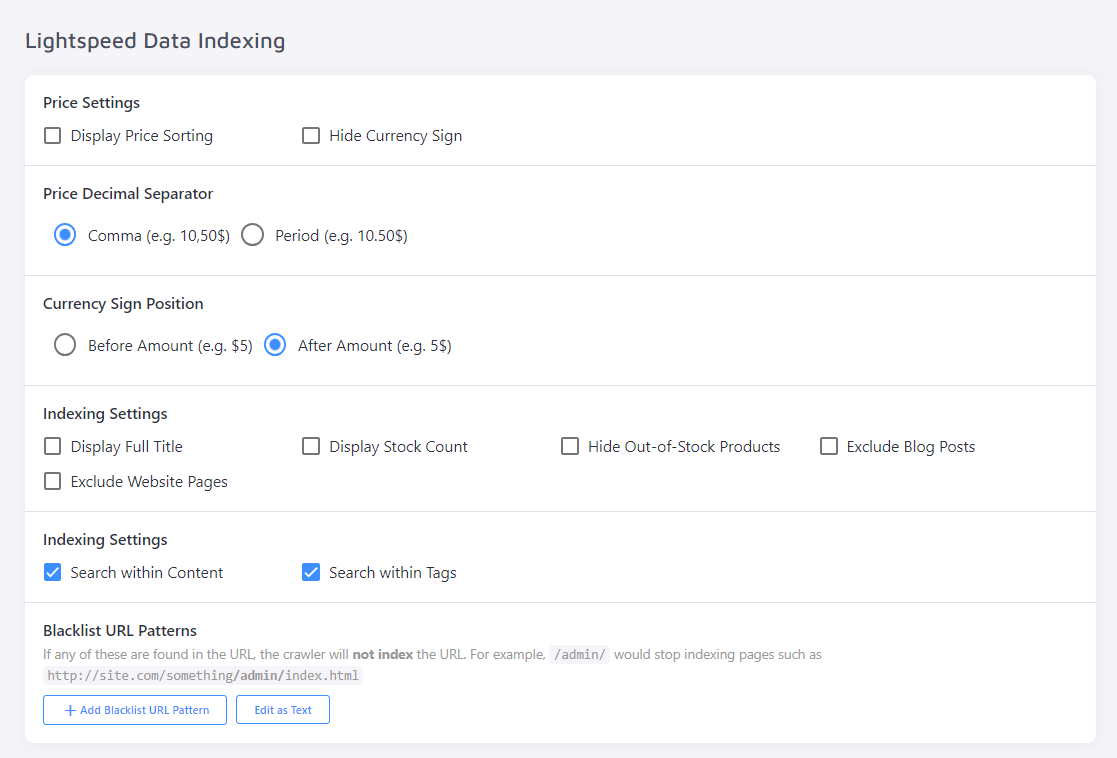
You're not limited to Lightspeed pages for your search results. You can also:
- Add a dedicated FAQ page
- Create a URL list containing pages not found in your Lightspeed store, for example pages hosted on a separate domain
- Index your YouTube channel — this is an add-on feature not included in plans by default
Search Preview
The Search Preview section shows what your search will look like without switching to the Search Designer. Use it to check that changes to your search configuration look the way you expect, and to test the search itself — for example, which results come back for a specific query, which Result Groups they belong to, or how your search snippets look.
Filters
Filters and their values are extracted directly from your Lightspeed store, along with other data, but you can still adjust them in your Site Search 360 Control Panel.
On the main Filters page, choose which filters appear in the search by moving the respective toggle to OFF:
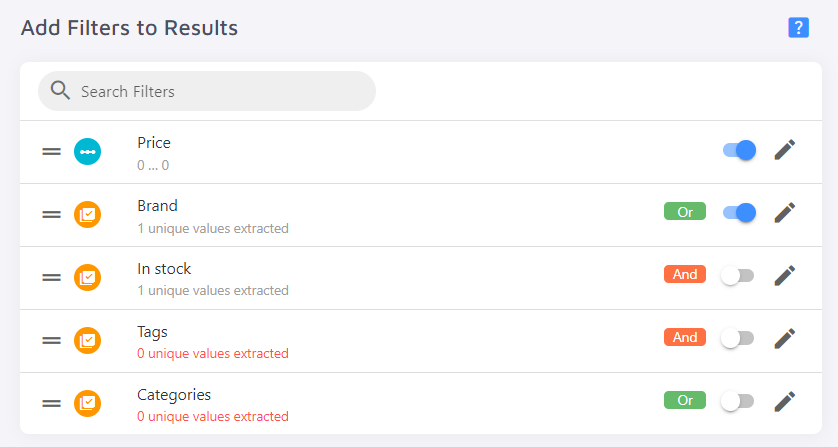
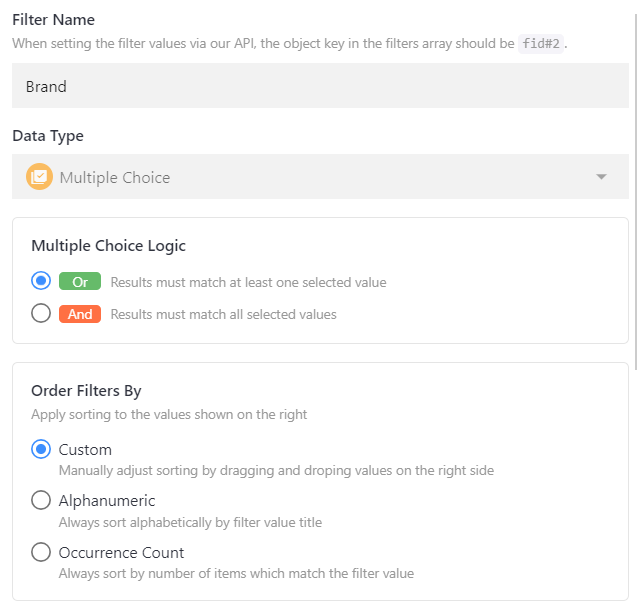
For each filter, you can also:
- Change its name, choice logic, and sorting order:
- Choose which data points are used as extraction criteria:

- Configure which values should and shouldn't be shown, move specific values to the top of the list, and limit value selection to any value of your choosing:

See how filters work on your site in the Filters demo.
Ranking Strategies
The Ranking Strategies section lets you rank some pages higher or lower than others. See Page Boosting for more detail.
Result manager
This tab has three sections:
- Result Mappings let you:
- Customize a unique set of results for a given query, and automatically apply specific filter values to them
- Rewrite the query
- Redirect a query to a specific page instead of showing default search results
- Autocomplete Queries let you create two setups:
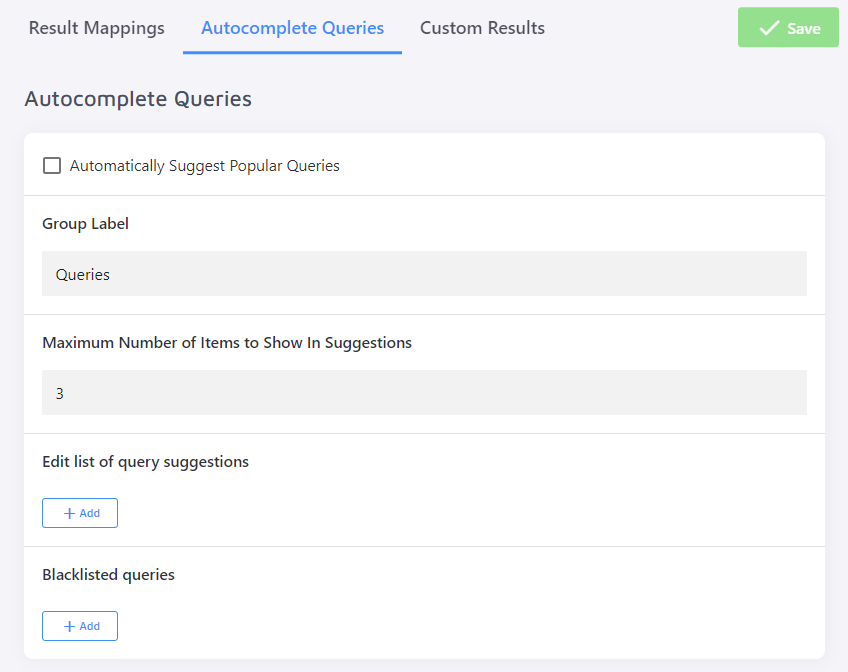
- Display the queries your users have searched for most often over the last 3 days
- Suggest queries of your choosing, displayed when they match the first few letters the user types (3 by default)
Unlike regular search suggestions, these queries appear as search terms rather than clickable pages.
- Custom Results let you go beyond pages our crawler has indexed from your Lightspeed database. Add pages from other domains to your customized search results, or configure custom entries such as regular pages or promotional banners.
See Result Manager for a full guide.
Dictionary
The Dictionary works like "Rewrite trigger to" in Result Mappings, except changes only take effect after you fully re-index the project.
Make search results for one query appear for another (and vice versa) by defining synonyms, or create a one-directional alternate spelling.
Synonyms are useful when your search fuzziness is set to "strict" — your search results still match queries exactly, but you can make exceptions for particular terms. They also let you automatically surface relevant pages for queries that are often misspelled or return zero results. Check Dashboard Analytics to find those queries for your project.
See the Dictionary article for more detail.
Search Settings
Search Settings has four sub-sections:
-
General — settings for how the search behaves when in use. Most are self-explanatory, but keep these in mind:
-
Search Fuzziness controls how closely extracted page info needs to match the query, from "extremely strict" (an exact match) to "get more results" (a partial match on at least a few characters). You can configure fuzziness separately for search results and search suggestions.
-
The search snippet is the description shown under each search result.
-
Search Field Boosts let you set the hierarchy between strategies such as title, content, and data point, under Advanced Settings:

Change and test these settings immediately under "Preview Settings" in the Search Preview tab — you don't need to fully re-index the project to see the changes reflected in the search.
-
-
PDF Settings — configure the extraction strategy for your PDFs' titles, content, and thumbnails:
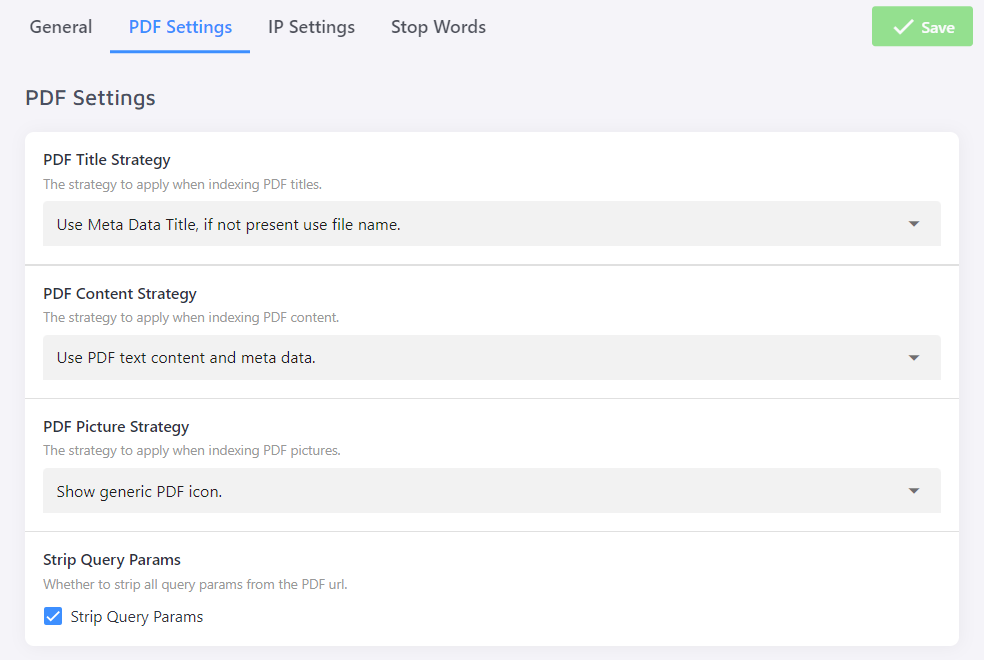
All plans come with a PDF size limit of 15 MB by default. If your site has larger files, contact us to set up a custom PDF indexing plan.
-
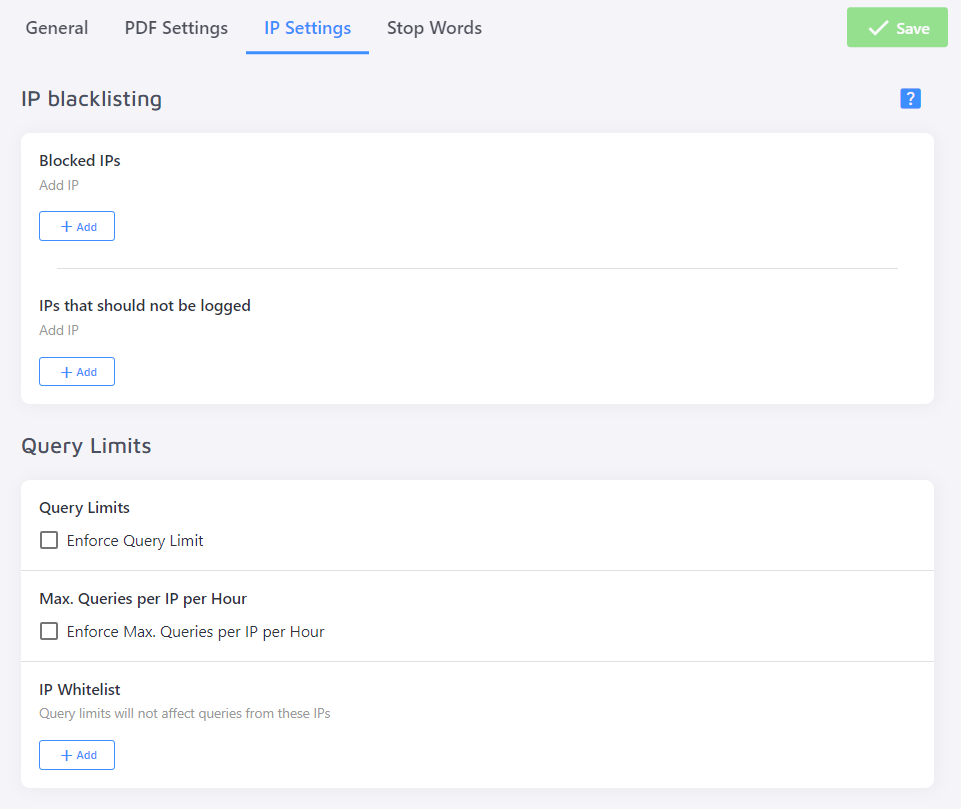
IP Settings — block certain IPs from using the search, exclude others from your search stats, and enforce query limits (per IP per hour, or overall) to avoid overage fees for queries past your search limit:
-
Stop Words — by default, we ignore stop words such as pronouns and articles in queries. Some sites need these preserved — for example, a book store wants users to search for a book titled "Tell Me How It Ends" without the pronouns being stripped from the query. Define a custom list of stop words to treat as meaningful terms.
See the Search Settings article for more detail.
Account
This tab covers account management:
-
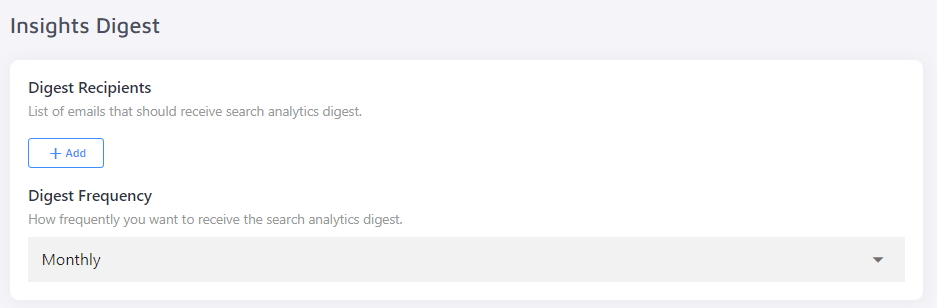
General — general account information, plus an option to subscribe to an insights digest for your projects at the bottom of the section:
-
Plan — upgrade your project to another plan, or configure a custom plan that fits your needs instead of one of the defaults.
-
Billing — for paid plans, find your full billing info and download past and current invoices.
-
Projects — if your store has multiple language versions, each has its own project page. View all versions of your site and basic stats for each, such as the number of pages indexed and search activity on that domain over the last day.
On a paid plan, you pay only for the search installed on the main site — other language versions are included in your subscription by default.
-
My Profile — an overview of your user profile.
Index
The Index Log shows all pages our crawler has indexed, whether pulled from your Lightspeed data or added through your FAQ, URL List, or YouTube channel.
To narrow down results, filter by indexing status, content type, data source, and update time:
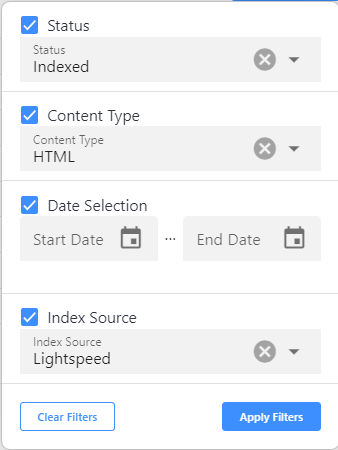
This section is also where you manually re-index your project to apply config changes, or purge the index of all pages:

Remove any page from the search results manually with the red "Remove" button next to it, or through "Remove Multiple URLs" in the Index tab. If the product is still in the Lightspeed database, it's added back to the index during the next update.
Questions about your search? Email us anytime.