Configuration Options
The ss360Config gives you numerous options to fine-tune your search. Here are some common questions and answers related to the ss360Config and how you can adjust it to achieve your search goals.
Search Suggestions vs. Search Results
Search suggestions (autocomplete, or search-as-you-type results) are generated differently from full search results which are rendered after you hit Enter or click the search button.
When you type, the engine cannot be sure whether you are done typing, so it searches within words. When you submit a query, it indicates you have finished typing.
For example, if you type hot, showing a suggestion for hotel makes sense — but once you press Enter, it becomes clear you want results for hot, not hotel.
Unlike search results, search suggestions are not counted against your monthly search volume.
To indicate that more results are available, you can display a View All Results call-to-action at the end of the suggestions dropdown using suggestions.viewAllLabel in your ss360Config.
You can also skip suggestions entirely and trigger instant search results after every keystroke:
{
    suggestions: {
        /* Submits a query whenever the search field value changes */
        triggersSearch: true,
        /* Minimum characters before results are triggered */
        minChars: 3
    }
}
Check the instant search demo to see this in action.
With triggersSearch: true, every keystroke fires a full search query. Unlike default suggestions, these count against your monthly search quota.
Google Sitelinks Searchbox
You can enable users to search your website directly from Google search results using Google's Sitelinks Searchbox.
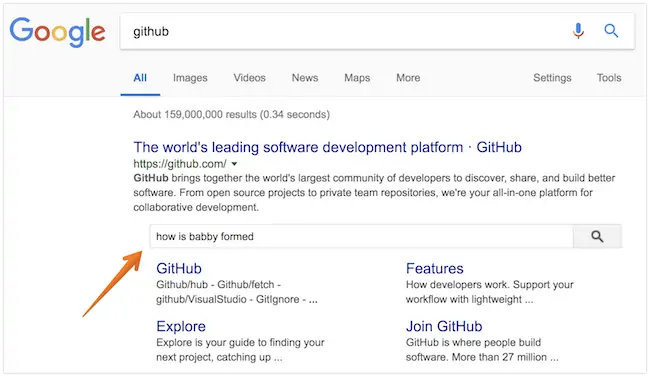
Add the following script to your home page. Next time Google crawls your site it will interpret the script and show the Sitelinks Searchbox:
<script type="application/ld+json">
{
   "@context": "http://schema.org",
   "@type": "WebSite",
   "url": "https://example.com/",
   "potentialAction": {
      "@type": "SearchAction",
      "target": {
         "@type": "EntryPoint",
         "urlTemplate": "https://example.com/search?ss360Query={search_term_string}"
      },
      "query-input": "required name=search_term_string"
   }
}
</script>
- Replace
https://example.com/with your website URL and update thetargetparameter to match your search URL pattern. - Make sure the query parameter name matches
results.searchQueryParamNamein yourss360Config— the default isss360Query.
To test, replace search_term_string with a test query and open the URL in a browser. For example: https://www.site.com/search/?ss360Query=pizza
OpenSearch
OpenSearch lets users install your site as a native search engine in their browser and search directly from the address bar.
![]()
Upload an opensearch.xml file with the following content to your server:
<OpenSearchDescription xmlns="http://a9.com/-/spec/opensearch/1.1/"
    xmlns:moz="http://www.mozilla.org/2006/browser/search/">
    <ShortName>SHORT_NAME</ShortName>
    <Description>DESCRIPTION</Description>
    <InputEncoding>UTF-8</InputEncoding>
    <Tags>TAGS</Tags>
    <Image height="16" width="16" type="image/x-icon">
        https://samplesite.com/favicon.ico
    </Image>
    <Url type="text/html" template="https://samplesite.com?ss360Query={searchTerms}&ref=opensearch"/>
    <moz:SearchForm>
        https://samplesite.com/
    </moz:SearchForm>
</OpenSearchDescription>
Replace the following placeholders:
- SHORT_NAME — your website name (16 characters or fewer)
- DESCRIPTION — a brief description of what users can search for
- TAGS — a few comma-separated keywords describing your site
https://samplesite.com/favicon.ico— link to your favicon or iconhttps://samplesite.com— your website URLss360Query— replace only if you've customisedresults.searchQueryParamNamein yourss360Config(default isss360Query)
Then reference the file in the <head> of your page:
<link rel="search" type="application/opensearchdescription+xml" href="/opensearch.xml" title="TITLE">
Cookies and Local Storage
To disable non-essential cookies (e.g. for consent management), set allowCookies: false in your ss360Config.
Alternatively, you can disable all cookies at once using the toggle found in Design & Publish → General → Tracking.
Cookies (can be disabled):
ss360CGResults— last active content group set viadata-ss360-include/data-ss360-exclude; stored for 1 hourssi--lastInteraction— last search interaction timestamp; stored for 10 minutesssi--sessionId— session ID used to cluster search statistics; stored for 1 yearss360-open-tab— search query and content group to reopen tab on page reload; stored for 1 hourss360-cg--c— active content group for back-button history navigation; stored for 1 hourss360-offset--c— offset of selected result for back-button history navigation; stored for 1 hourss360-query--c— last query for back-button history navigation; stored for 1 hourss360LastQuery— last query; stored for 24 hours
Local storage (cookies as fallback):
uniboxsearchhistory— list of recent queries used to display search historyss360lastquery_result— cached search result object used to speed up reload within a short period
Multiple Search Boxes
Single configuration
All search boxes share one ss360Config and one embed snippet. This works well when the boxes have the same look and behaviour and you only need to differentiate what content they return. See Scoping Search Results for how to control scope per input.
Separate configurations
Design & Publish supports multiple independent configurations. Each has its own settings, its own look, and its own embed snippet — meaning you can power two completely different search bars from the same account. Use the configuration menu in the top-left corner of Design & Publish to create and switch between configurations.
See Configurations for a full walkthrough and the Multiple Search Boxes page for a live demo.
Multiple site IDs in code
If you need to reference two completely separate SS360 projects on the same page, or prefer to manage configuration in code rather than through the UI, use the standard JS integration.
Using ss360Configs
window.ss360Config = {
    siteId: 'mysite',
    searchBox: {
        selector: '#searchBox1'
    }
};
window.ss360Configs = {
    SS360_SECONDSEARCH: {
        siteId: 'mysite2',
        searchBox: {
            selector: '#searchBox2'
        }
    }
};
Using ss360Config as an array
window.ss360Config = [{
    siteId: 'mysite',
    searchBox: {
        selector: '#searchBox1'
    }
}, {
    siteId: 'mysite2',
    searchBox: {
        selector: '#searchBox2'
    }
}];
If you're using the React component, use the alias prop instead — it maps to the same concept as the key in ss360Configs:
<SiteSearch360 siteId=".." alias="SS360mysite1" />
<SiteSearch360 siteId=".." alias="SS360mysite2" />
Scoping Search Results
Scoping controls what content each search box returns.
Using data-ss360-include and data-ss360-exclude
Add data-ss360-include or data-ss360-exclude directly to each search input element in your HTML. This is the only approach that supports true include logic — no UI equivalent exists.
data-ss360-include="[]"— no restriction, all content groups are includeddata-ss360-include="['Products','Reviews']"— returns only the listed groupsdata-ss360-exclude="['Menu Items']"— returns everything except the listed groups
Not sure which element to add it to? Look for the element matching the selector value in your ss360Config — that is your search box element.
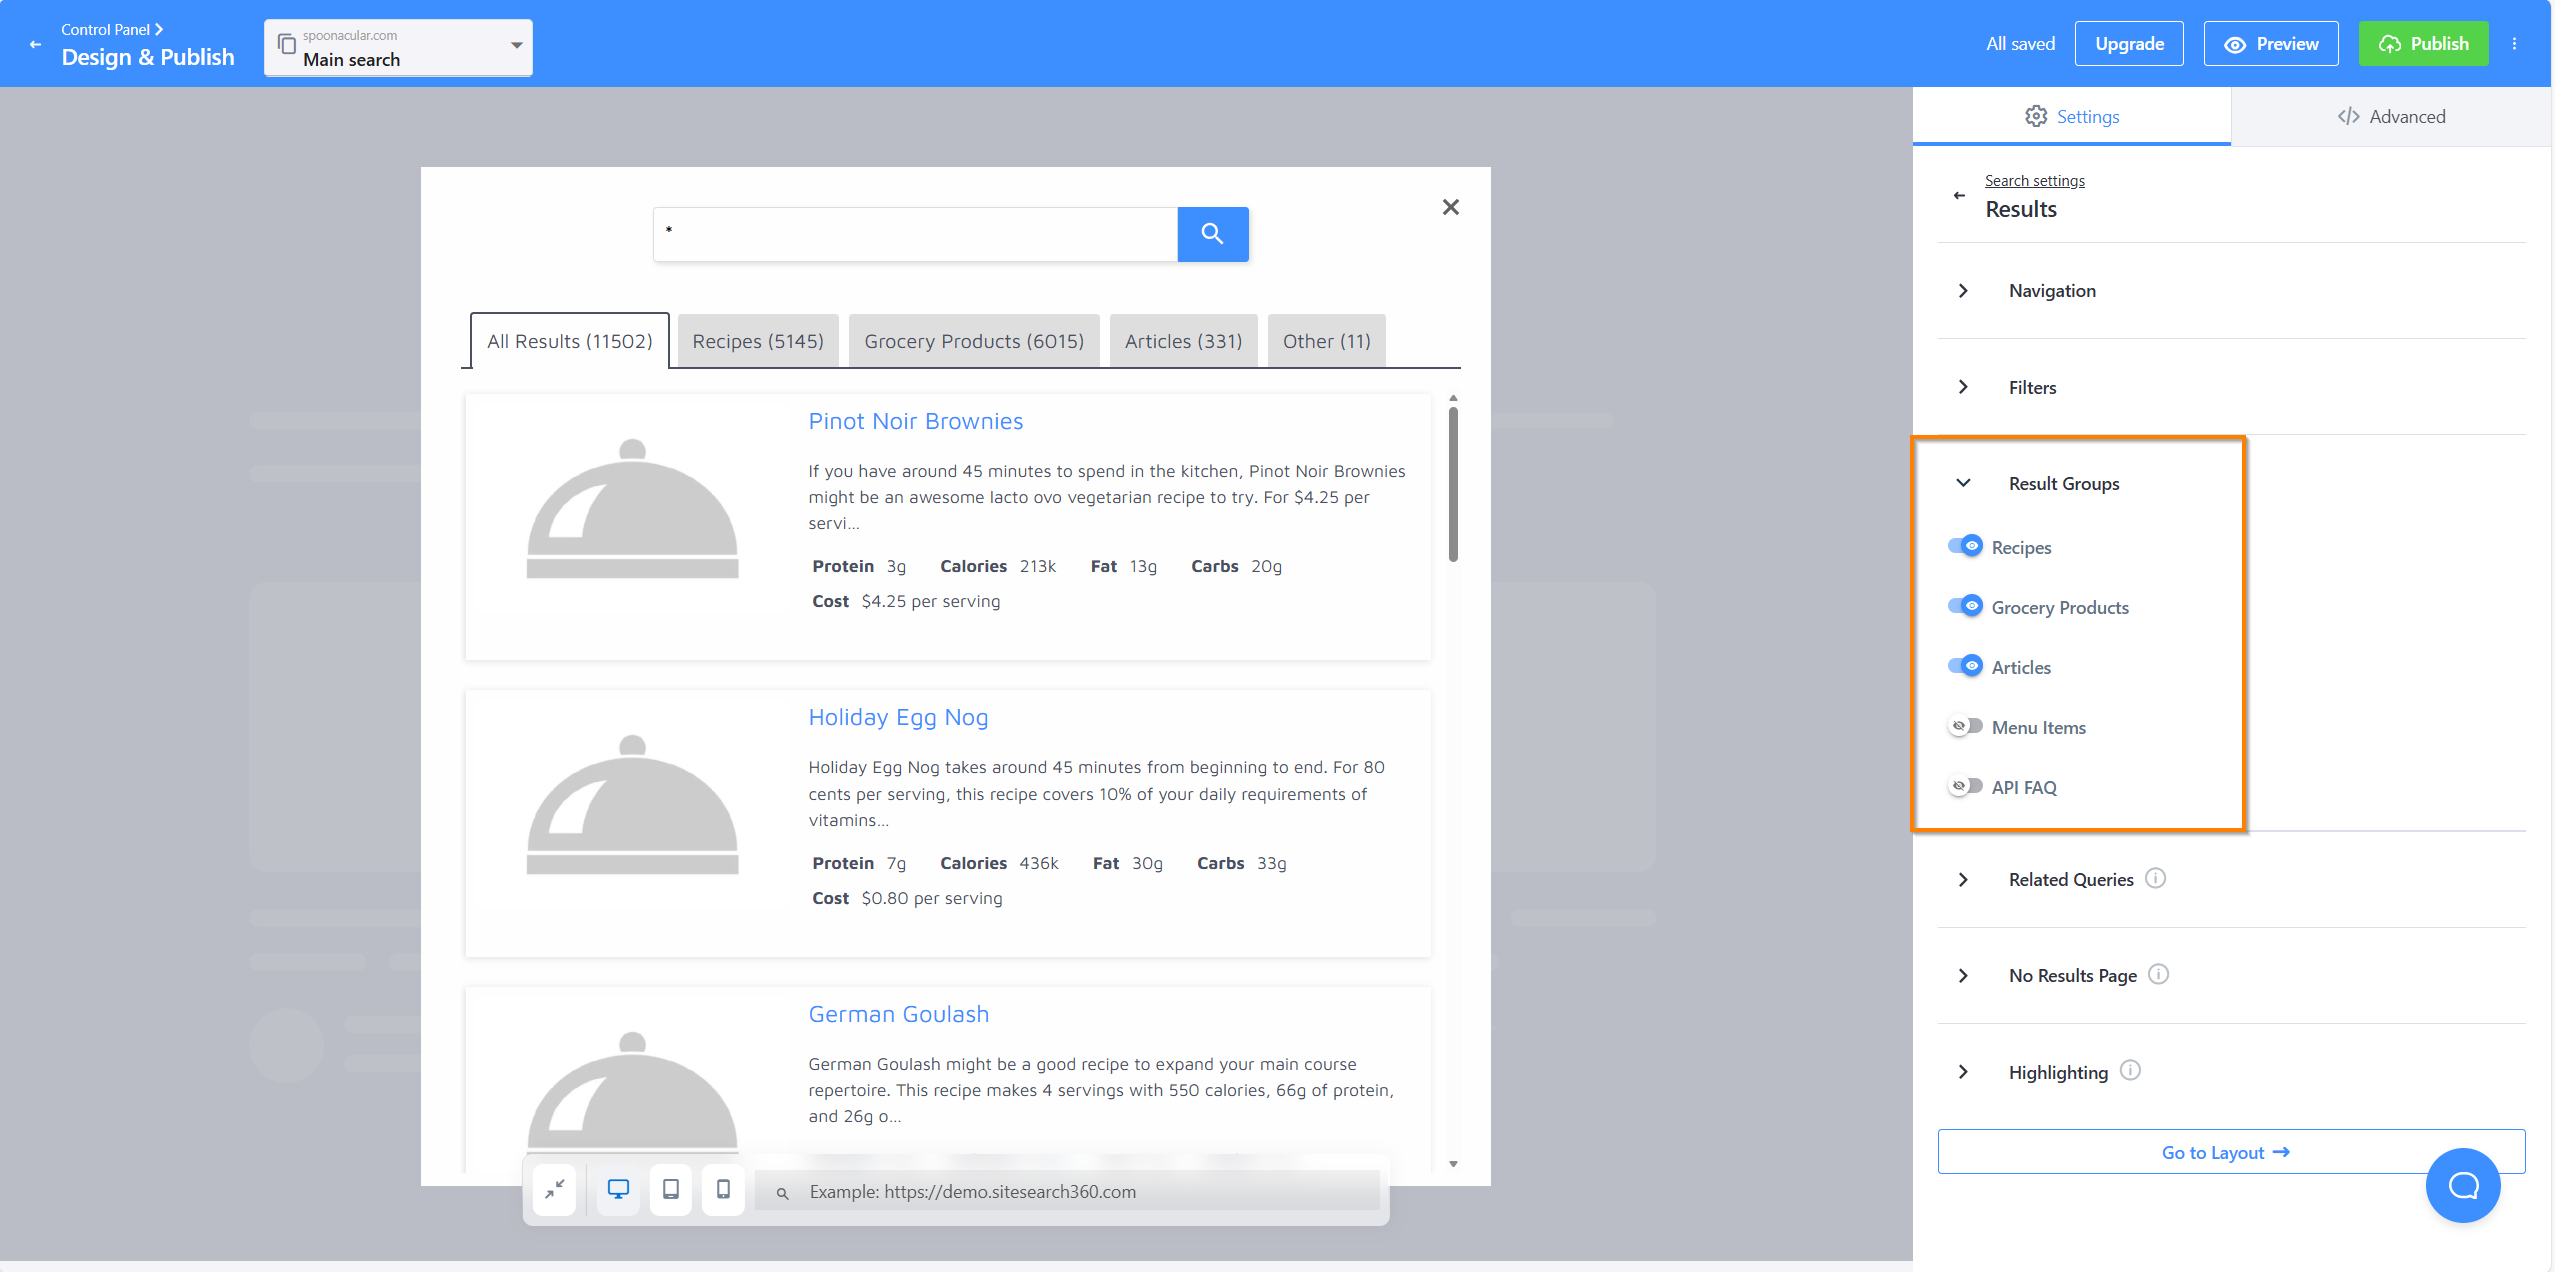
Using Result Groups in Design & Publish
Result Groups let you categorise your indexed content into named groups — for example, Recipes, Articles, or Menu Items. See the Result Groups documentation to learn how to create and manage them.
Scoping via Result Groups is exclusion-based — results include everything except the groups you explicitly disable. There is no native include-only toggle.
To exclude a Result Group, open Design & Publish, navigate to Results and select Result Groups. There you can toggle off the groups you want to suppress.
Which Approach to Use
| Goal | Recommended approach |
|---|---|
| Limit a search box to specific groups | data-ss360-include on the input element |
| Exclude one or a few groups from a broad search | Result Groups via Design & Publish |
| Two search boxes with completely different settings | Separate Configurations in Design & Publish |
| Two search boxes with different scopes, same setup | data-ss360-include per input element |
| Two separate SS360 projects on the same page | Multiple site IDs in code |
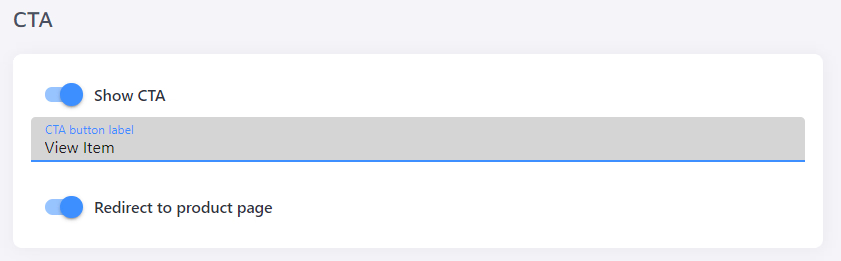
CTA Buttons in Search Results
Call-to-action buttons encourage users to take further action and can increase click-through rate. Use the results.cta parameter to add one:
var ss360Config = {
    results: {
        cta: {
            text: "View Product",
            link: "#RESULT_URL#",
            icon: "/images/some-icon.png"
        }
    }
}
You can also configure different CTA elements per Result Group. See the advanced parameter list.
If you use the Lightspeed plugin, you can configure CTA behaviour directly in the Plugin Config section without manual code changes.
Overriding Default CSS
Site Search 360 includes its own stylesheet by default. To disable it, set style.defaultCss to false in your ss360Config.
Tracking with Google Analytics or Google Tag Manager
Configure the tracking object in your ss360Config to enable external tracking:
var ss360Config = {
   tracking: {
      providers: ['GA'],
      searchCallback: function(query) {
         return true;
      }
   }
};
Supported providers: 'GA' (Google Analytics), 'GTM' (Google Tag Manager).
This adds a ?ss360Query={query} parameter to search result pages. To view search terms in Google Analytics, configure the URL query parameter as described in Google's documentation.
Google Tag Manager Integration
- In Google Tag Manager, create a new tag and select Custom HTML as the tag type.
- Add the code snippet below, replacing
mysiteid.comwith your site ID (found under Account > General) and configuring yourss360Configparameters. - Set the trigger to All pages, save, and publish.
Using the bundled script (recommended):
<script async src="https://js.sitesearch360.com/plugin/bundle/0000.js"></script>
Replace 0000 with the code generated from the Design & Publish section of your project.
Using the legacy script:
window.ss360Config = {
   siteId: 'mysiteid.com',
   searchBox: {/*...*/}
};

var e=document.createElement("script");
e.src="https://cdn.sitesearch360.com/v15/sitesearch360-v15.min.js";
document.getElementsByTagName("body")[0].appendChild(e);
v13 Configuration Options
The options in this section apply to v13 of the Site Search 360 script. If you are on v14 or later, use the Search Designer to manage most of these settings without touching your code. We highly recommend upgrading to the latest version.
Overlay vs. Embedded Results
Site Search 360 can display results in an overlay (default) or embedded into your page. To embed results, configure results.embedConfig:
var ss360Config = {
   results: {
      embedConfig: {
         contentBlock: 'CSS-SELECTOR',
         url: '/search'
      }
   }
}
contentBlock is a CSS selector pointing to the DOM element where results should be injected. For example, for <div id="main"></div>:
results: {embedConfig: {contentBlock: '#main'}}
Embedded Results on a Separate Page
To open embedded results on a dedicated search page instead of the current page:
results: {embedConfig: {contentBlock: 'CSS-SELECTOR', url:'/search'}}
Replace /search with the relative path to your search result page.
Pagination and Infinite Scroll
Site Search 360 uses a "See more" button by default. To configure it:
var ss360Config = {
  moreResultsButton: 'See more',
  moreResultsPagingSize: 12
}
moreResultsPagingSize controls how many results are shown per page (max: 24). The total results fetched is controlled by results.num (default: 999999).
For infinite scroll, set results.infiniteScroll to true. This replaces the "Show more" button and requires either no Result Groups or a tabbed navigation layout.
If you need traditional pagination, use the API with offset and limit parameters.
Data Points in Search Suggestions
suggestions.dataPoints is a v13-only parameter and has no effect in v14 or later. Use Design & Publish to configure data points in search suggestions instead.
To show additional information (such as category or price) alongside each suggestion:
- Create the relevant data points.
- Reference them in
suggestions.dataPoints:
suggestions: {
    dataPoints: {
        Category: {
            html: '#Category#',
            position: 1
        },
        Price: {
            html: '#Price#',
            position: 2
        }
    }
}
See how to show data points in search suggestions for more examples.
Colors and Styling
The easiest way to style Site Search 360 is via Design & Publish. For v13, modify accentColor and themeColor in your ss360Config:
var ss360Config = {
    style: {
      accentColor: "#3d8fff",
      themeColor: "#4a4f62"
   }
}
- accentColor — applied to clickable elements: buttons, result titles, hover effects
- themeColor — applied to non-interactive elements

For more specific changes, use style.additionalCss to inject inline CSS.