Going Live
Once your indexed content is in good shape (see Setting Up Your Search), you're ready to put search on your site. This guide covers connecting your search bar and publishing your code snippet — the last step before your search goes live.
Open Design & Publish
Go to Design & Publish and select Start now.

You'll see search customization options. Customizing the look and feel of your search will make it feel at home on your site. The guide to the Search Designer covers all the available options.
Connect to a Search Bar
The search needs to be connected to a trigger (e.g., a search icon) or a search input field on your site. Choose one of the two options below depending on whether you already have a search bar on your site.
Use an Existing Search Bar
Load your website in the bottom bar and we'll try to detect your search bar automatically:
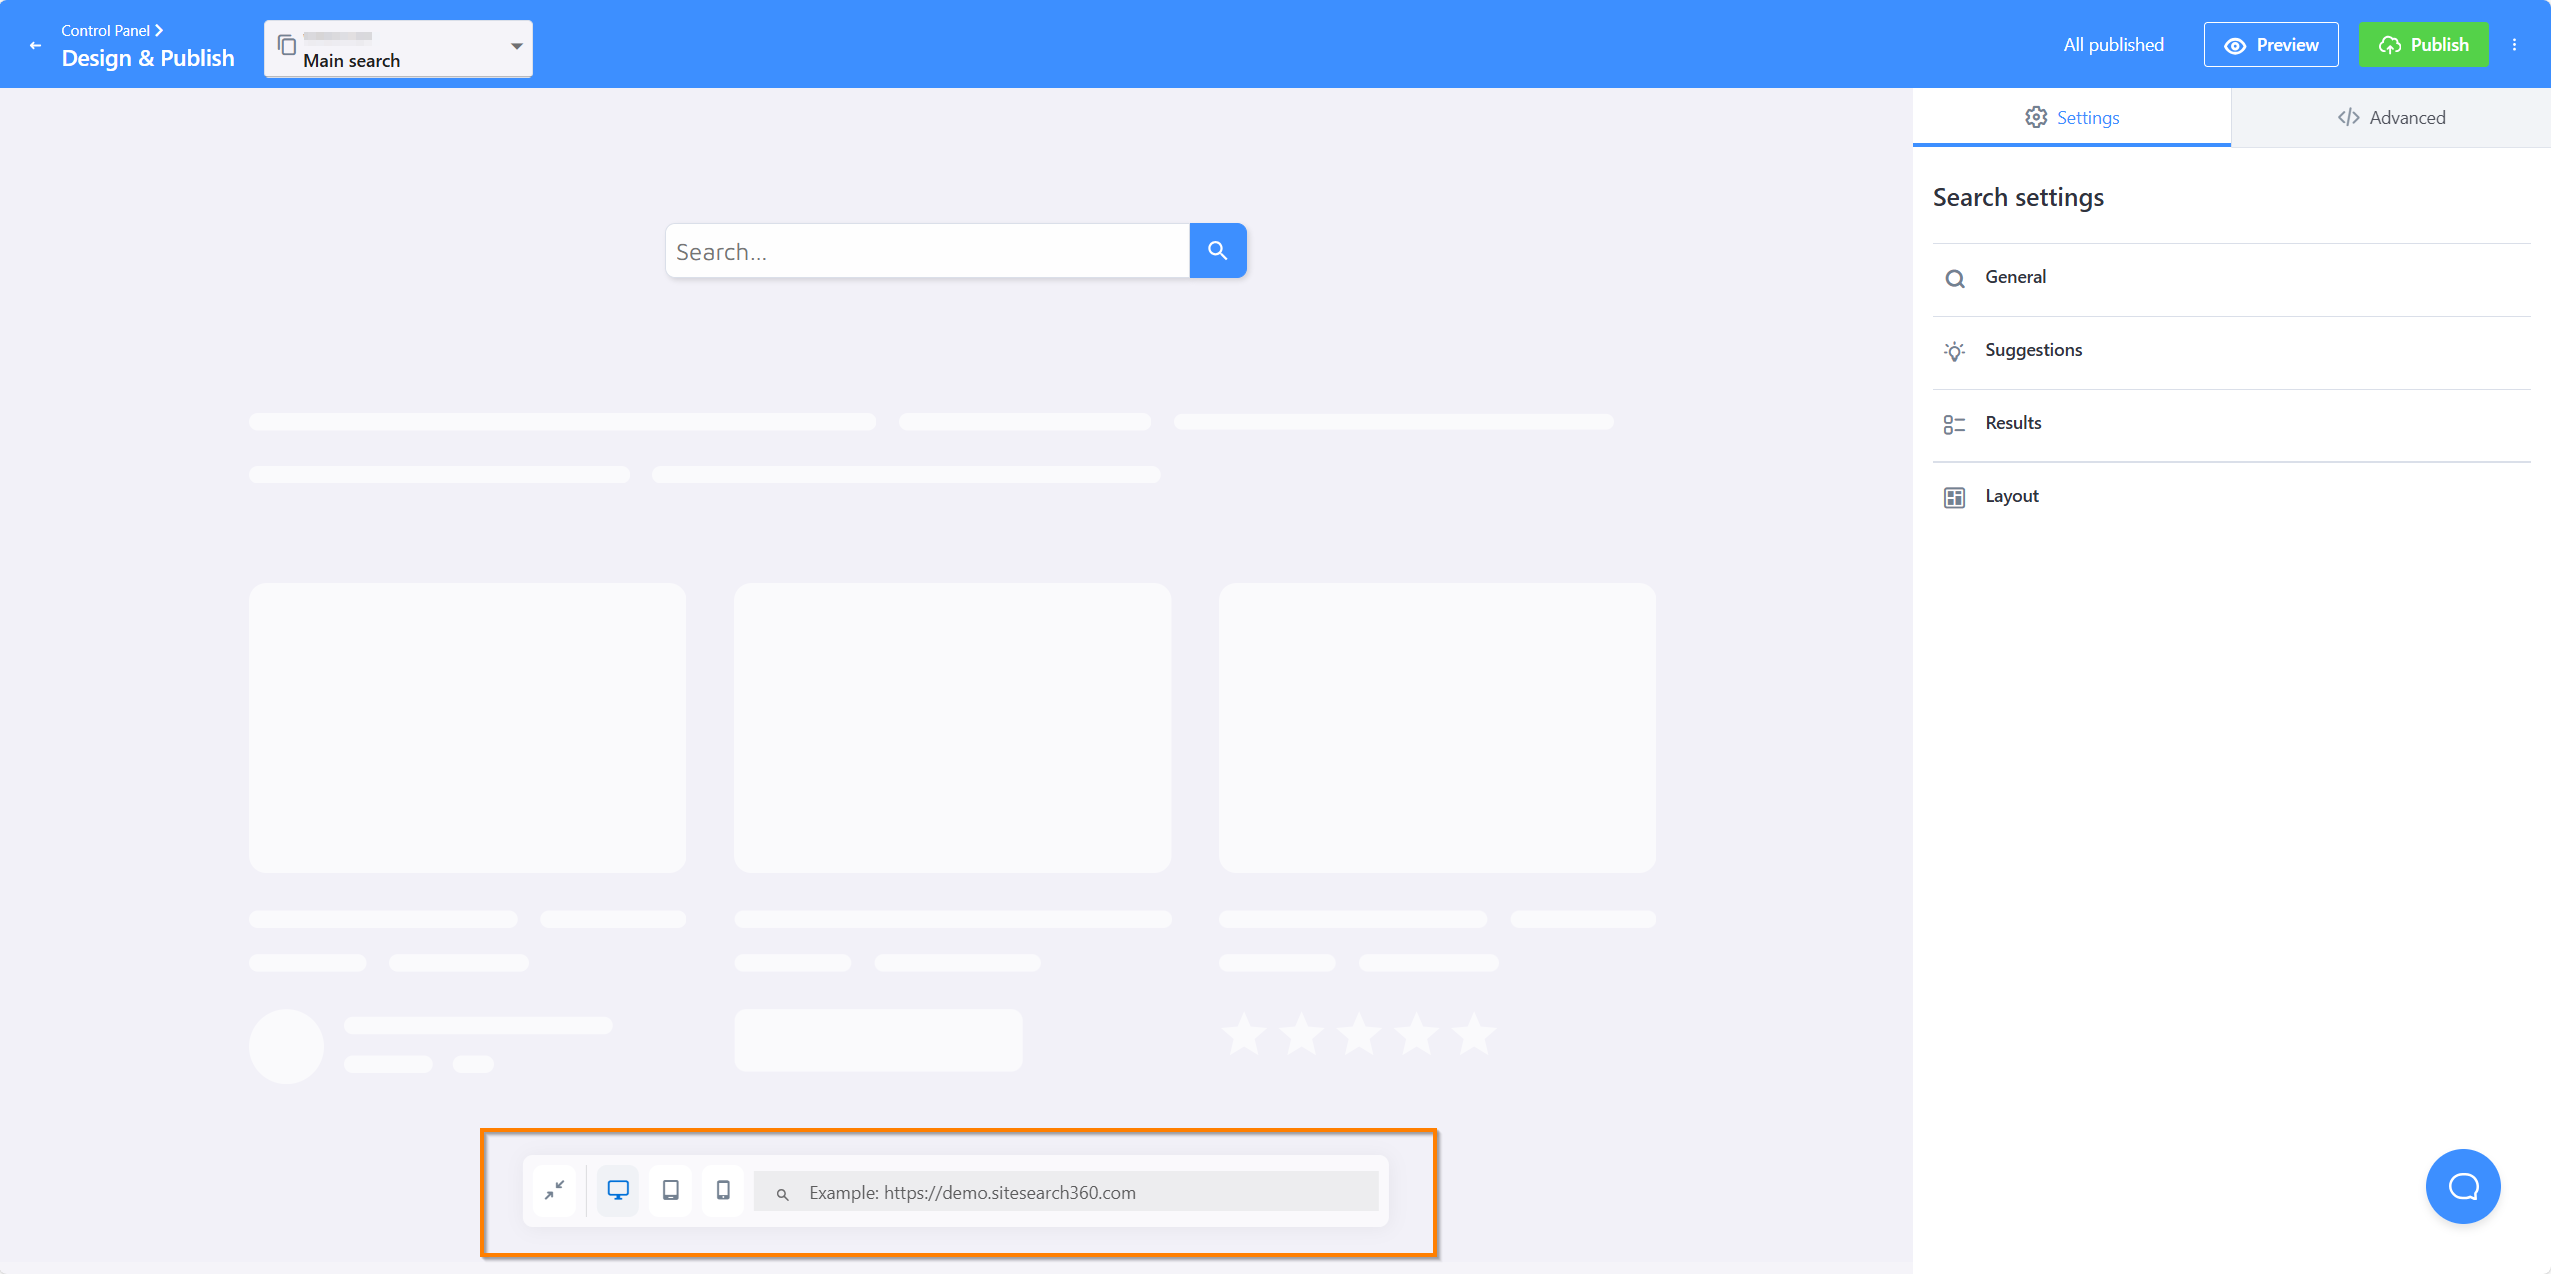
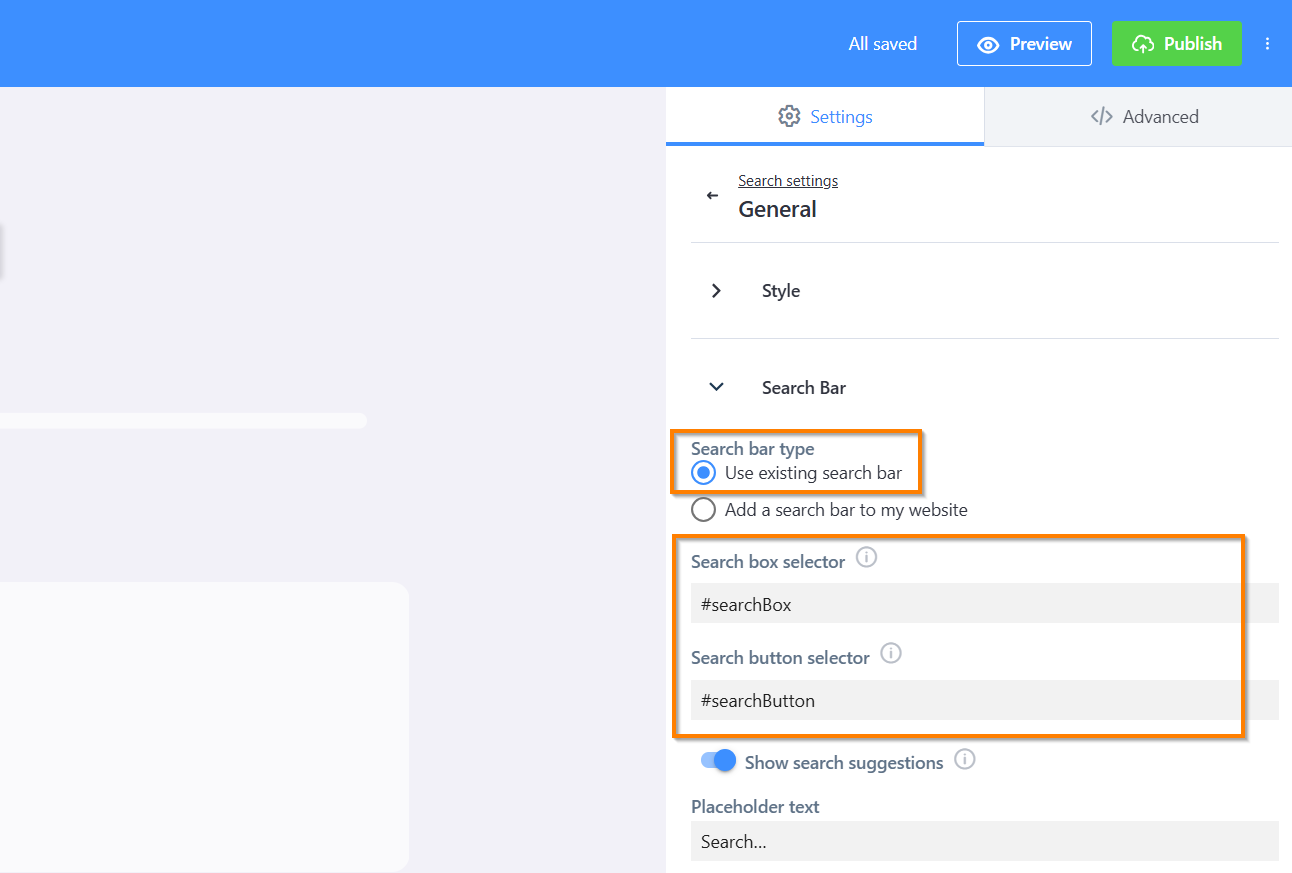
If it isn't detected automatically, set it up manually. Go to Search Bar in General Settings and enable Use existing search bar. You'll then need to provide two CSS selectors — one for the search input and one for the search button. If your site has several search boxes that should be connected to Site Search 360, you can provide multiple selectors here as well.
A CSS selector is a short string that identifies a specific element on your page — the same way a browser's dev tools do. The easiest way to find one is to right-click your search bar in your browser, choose Inspect, then right-click the highlighted element in the panel and select Copy → Copy selector. Paste that value into Search box selector. Repeat for the search button.
Add a New Search Bar
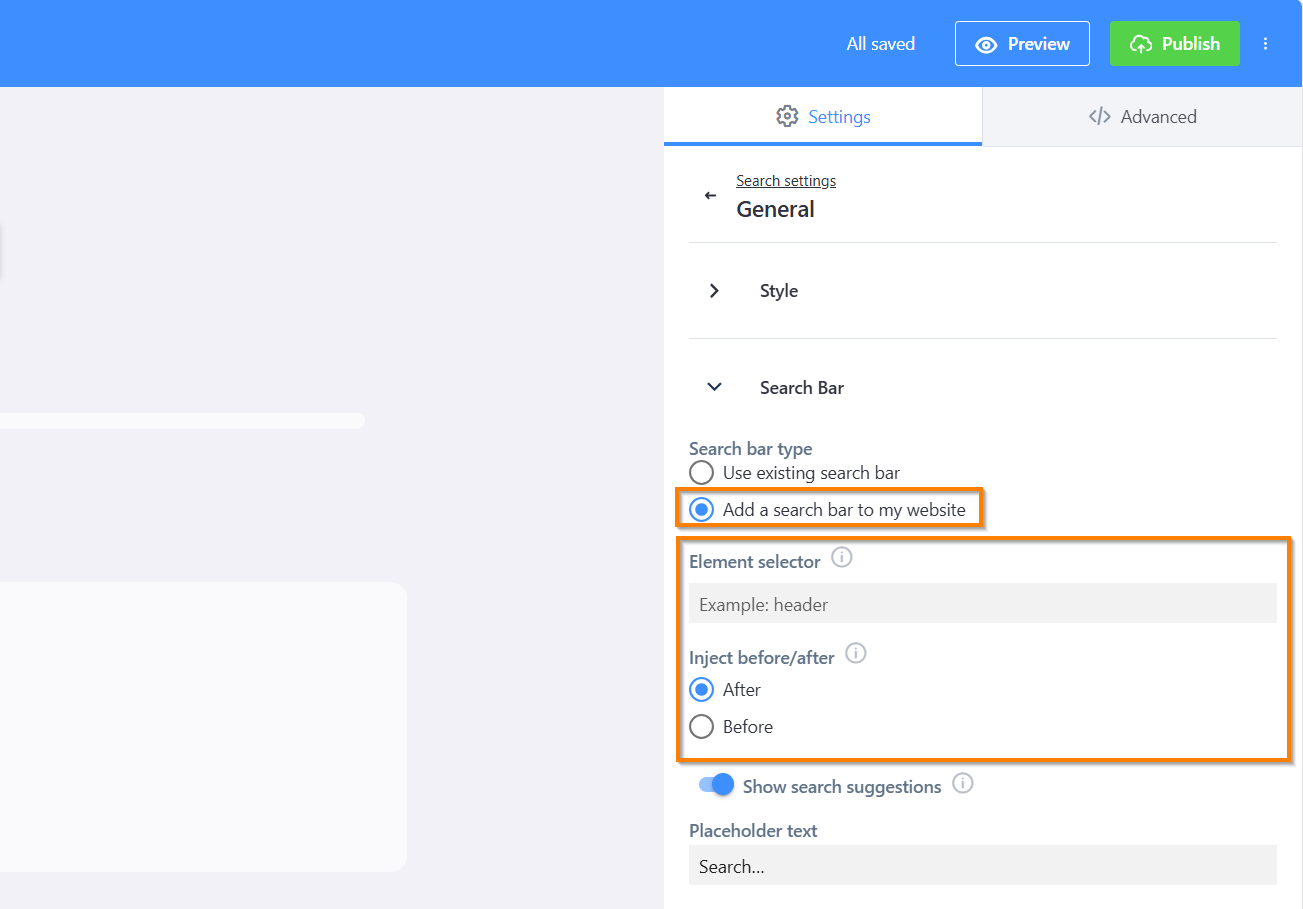
Select "Add a search bar to my website" and specify whether it should appear before or after an existing element on your page — for example, in your site header.
If you're working directly in your site's HTML and prefer to declare the search bar in markup, add the following snippet wherever you want the search box to appear. This skips the auto-detect step entirely:
<section role="search" data-ss360="true">
   <input type="search" id="searchBox" placeholder="Search…">
   <button id="searchButton"></button>
</section>
The data-ss360="true" attribute tells the plugin to bind to this element instead of injecting a new one.
Publish Your Code Snippet
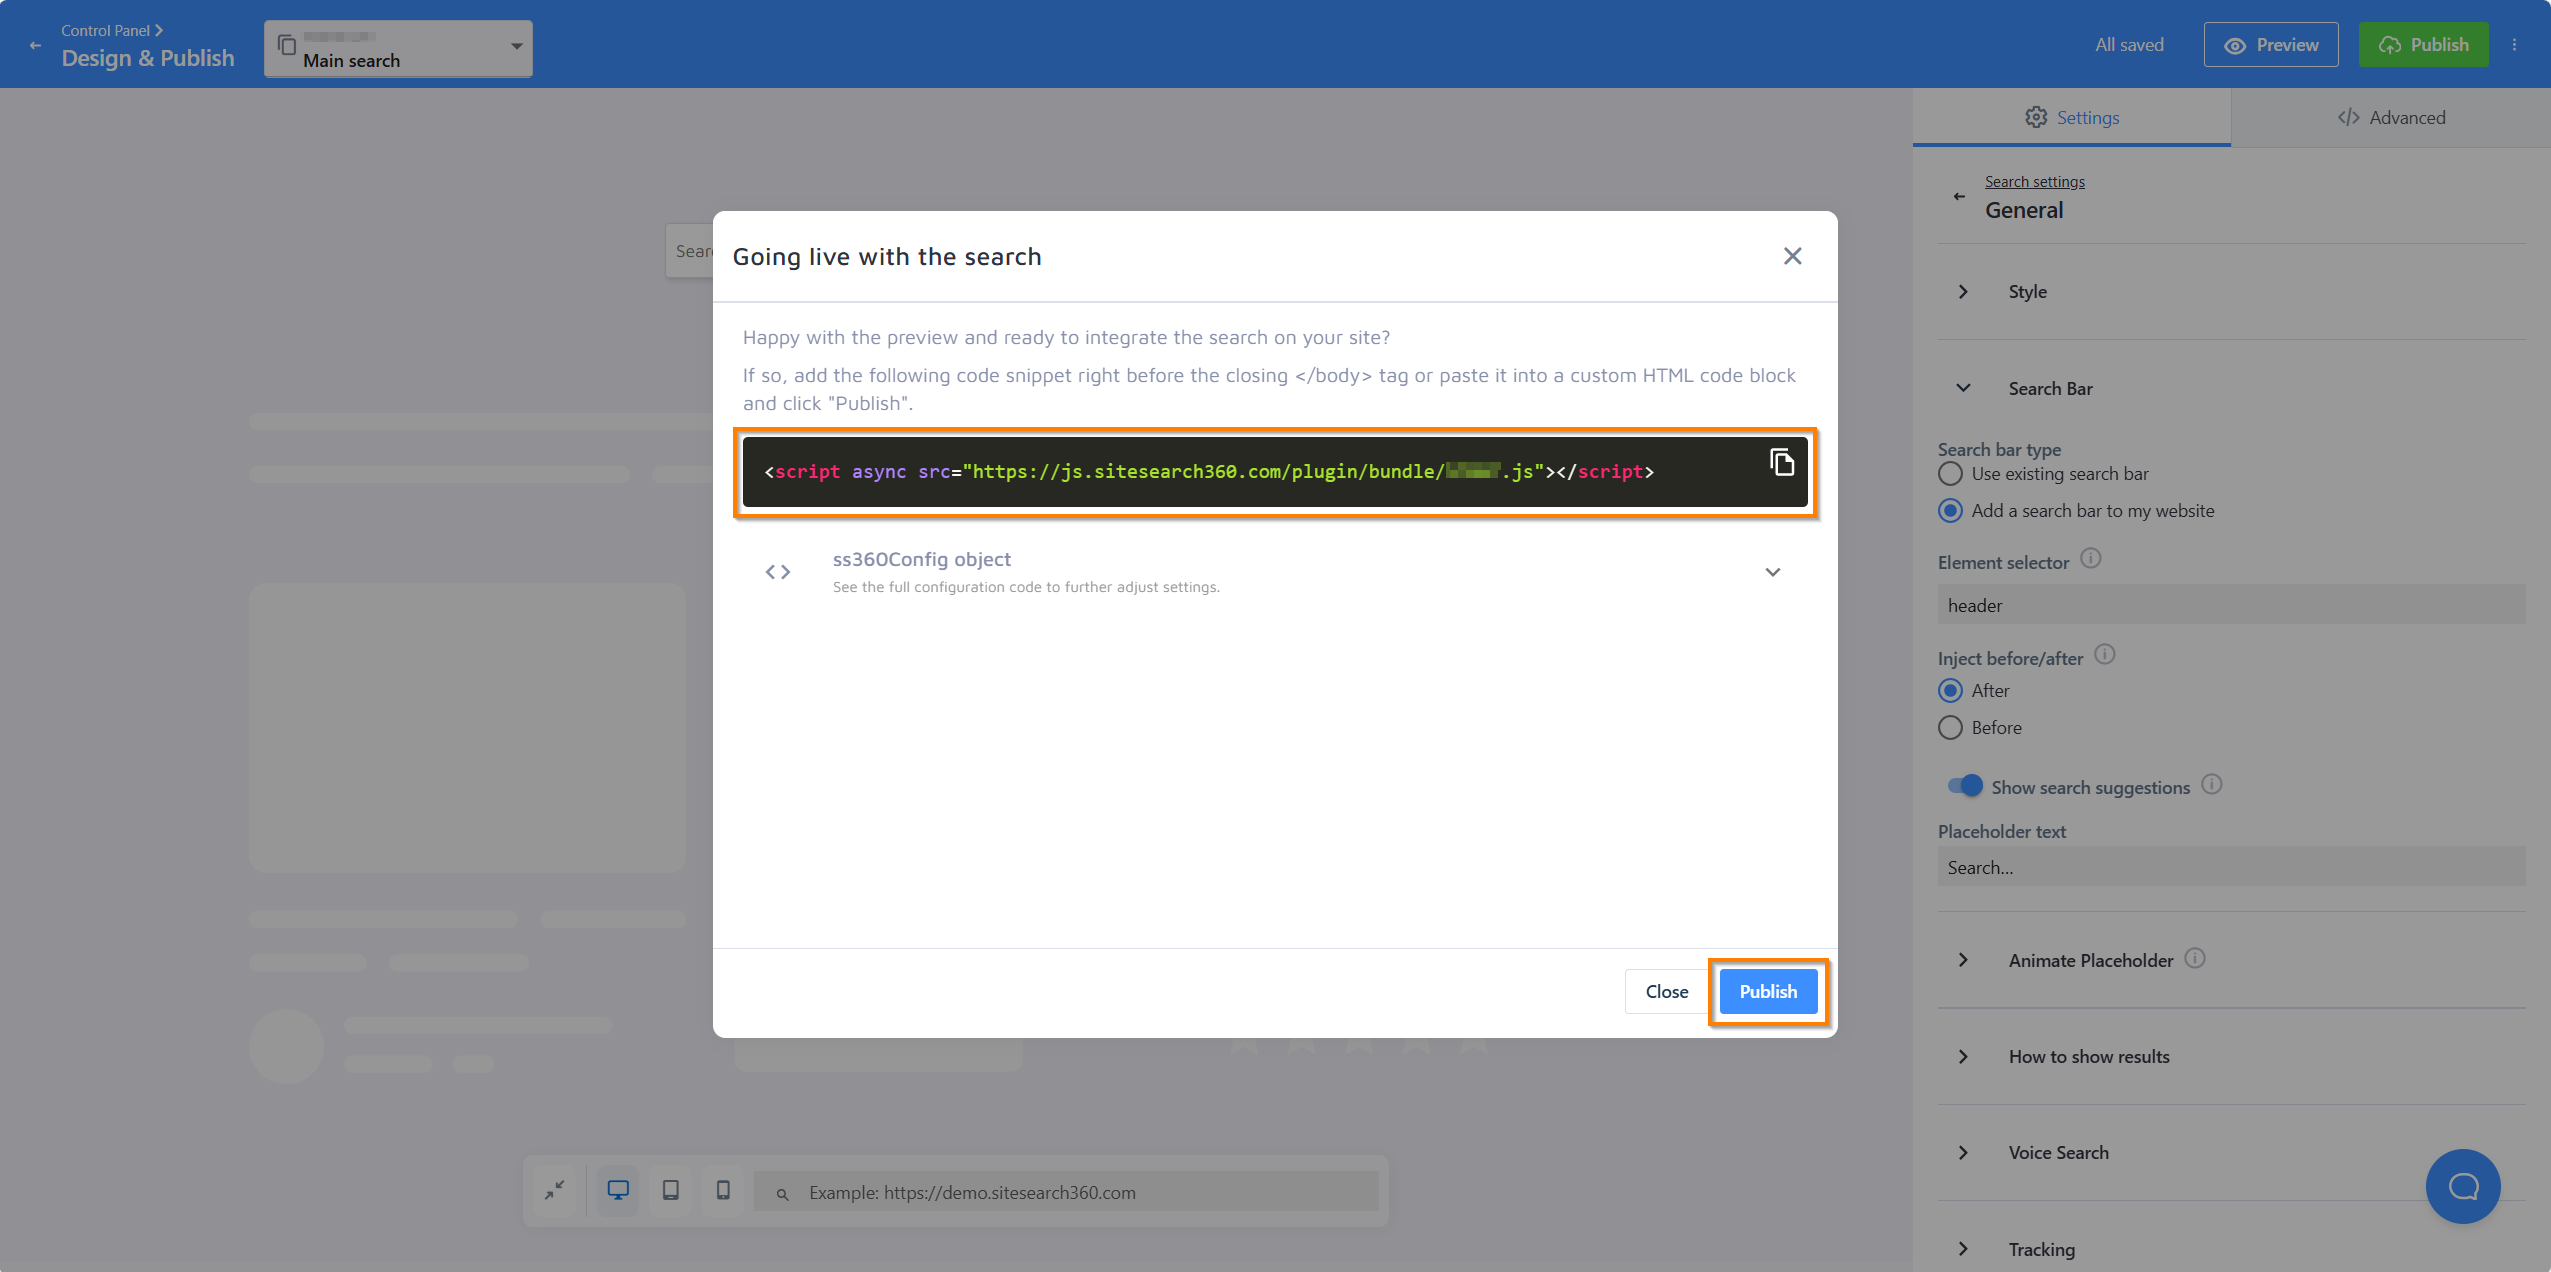
Once your search bar is connected, press Publish in the top-right corner. A panel will open with your personalized code snippet — and an SS360 config if your setup requires one. The snippet will look something like this:
<script async src="https://js.sitesearch360.com/plugin/bundle/0000.js"></script>
Copy the snippet and place it before the closing </body> tag in your site template. If you're using a site platform where you can't access your site's or template's source code, add a code block element instead.
The last four digits in the snippet are unique to your project. Use your own code — do not copy the example above directly to your site.
Editing the full configuration script instead
Instead of the lightweight script bundle, you can copy and paste the full configuration script from the same panel and update it manually with all subsequent changes. This gives you direct access to your ss360Config object, but means you're responsible for keeping it in sync — with the script bundle, all you need to do after future changes is press Publish again.
Once the script is in place, come back to that panel and press Publish to make your search live. This second Publish is the step that actually activates it — the search bar won't appear on your site until you've completed it.
After that, you're all set. Your search bar should appear on your site within a few minutes.
Next time you return to the Search Designer to adjust settings, click Publish and wait a few minutes for your changes to go live. No need to touch the code again.
This documentation page refers to our latest search script (v14). If you're using the v13 script or older, see our upgrade instructions.
You may be able to skip the manual installation entirely by using one of our plugins or extensions.
However you choose to install your search, we hope you and your visitors enjoy the experience. Reach out with any questions or feedback.